
Overview
![]() The content of this article is aimed at Suppliers using Tradesimple.
The content of this article is aimed at Suppliers using Tradesimple.
Once an order has been received in Trade Simple, there is the option to create a Confirmation document. This ensures that the customer can be kept up to date with any changes made to their order (product/quantity changes, substitutions, delivery date, etc).
This article describes the process of using Order Confirmations in Tradesimple.
Confirming an Order
Accessing the Confirmation Entry Screen
- Log in to Tradesimple
- Select Orders Placed in the Last 30 Days to access a snapshot of recent orders, seen in Fig.1
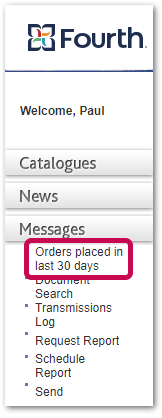
Fig.1 –Orders placed in last 30 days
- Identify the order to be confirmed and select View Thread
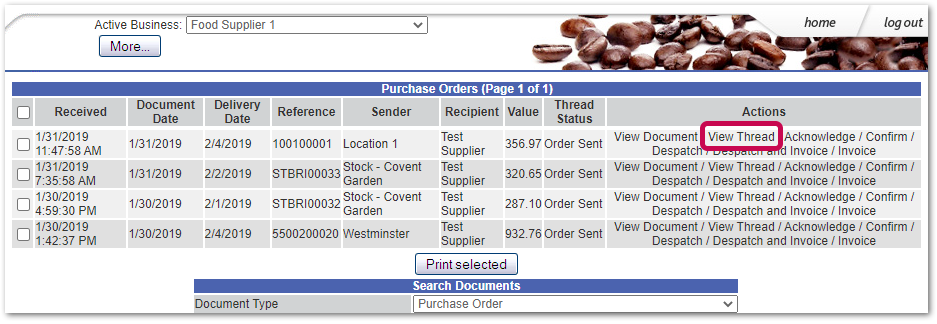 Fig.2 – Orders Placed within the Last 30 Days
- From within the thread, select Confirm against the order to open the Confirmation Entry screen
Creating the Confirmation Header
Certain data fields are mandatory and these are highlighted with bold text.
If the system being used doesn’t provide these items, some data will need to be added in order to process the document.
- POConf Ref – enter the sales order nummber (obtained from processing the original PO into the system), or the original PO reference
- Conf Delivery Date – populate this field if the requested delivery date needs to be changed
- This information may not feed back to the customer’s ordering platform, so it is advised to let them know directly
- Conf Slot Start - can be left blank
- Conf Slot End - can be left blank
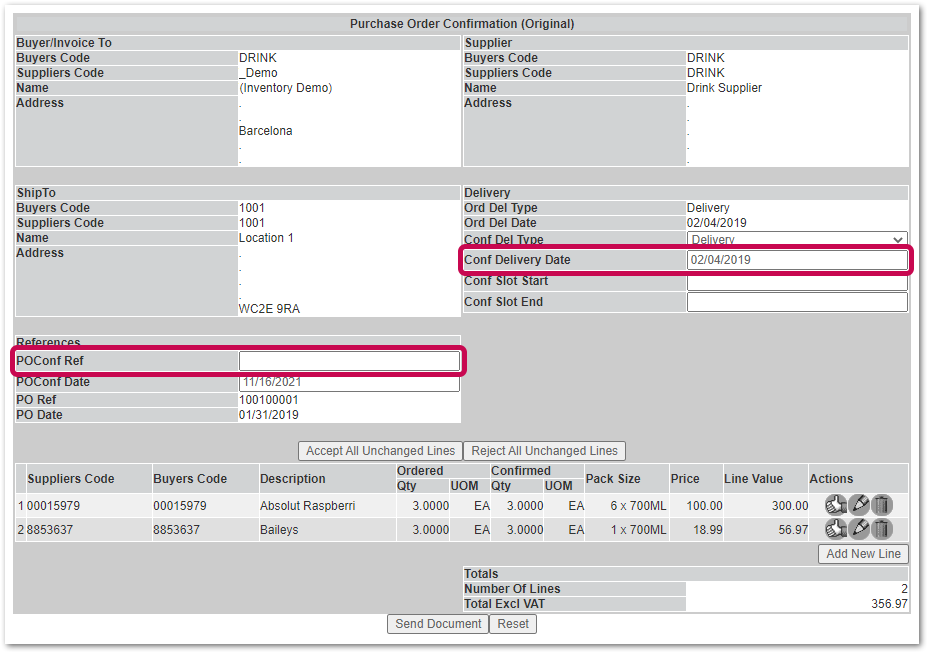 Fig.3 – Purchase Order Confirmation
Confirming Individual Lines
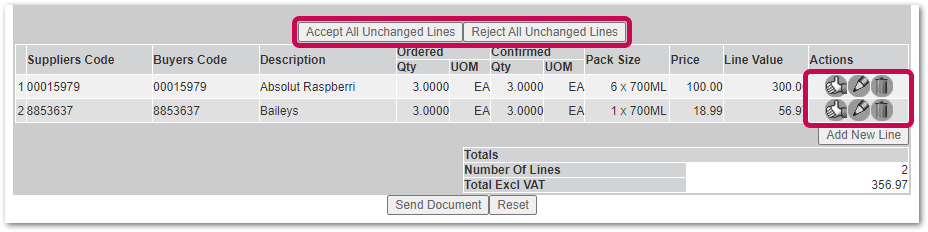
Against each line on the order, there are three response options: Accept, Change and Reject
- To accept a line in full – shipped exactly as ordered - select the Thumbs Up icon
- To make a change to Quantity or Price, select the Pencil icon
- A Reason for Change can be entered, but this may not feed back to the customer’s ordering platform
- Unless specifically requested there is no need to add a change code
- To reject a line in full – not shipping the item - select the Trash icon
- A Reason for Rejection can be added, but this may not feed back to the customer’s ordering platform
- Unless specifically requested there is no need to add a change code
- To Accept or Reject All Lines select the appropriate button
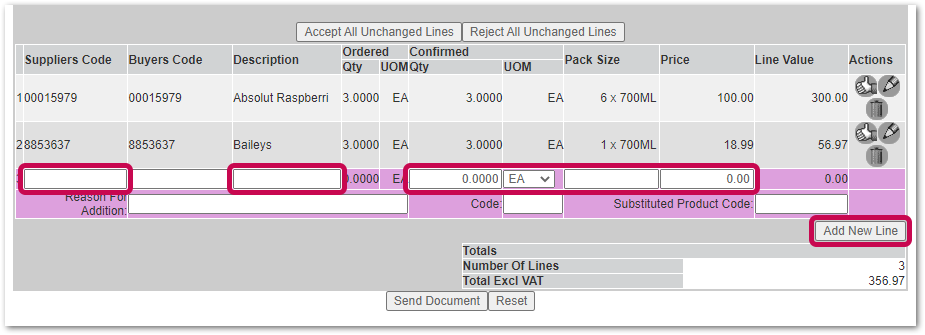
Adding New Lines
If products that were not in the original order are going to be delivered, they can be added as required to the order confirmation.
- Select Add New Line
- Populate the fields within the purple highlighted area (see Fig.4) to enter new product details. Certain items are mandatory:
- Suppliers Code – The code for the product
- Description
- Confirmed Quantity – Quantity of new product to be shipped
- UoM – The Unit of Measure for the product
- Pack Size
- Price
- If the product being added is replacing another product that has been rejected, the product code of the original code needs to be added in the field Substituted Product Code
Certain other items are optional:
- A Reason for Substitution can be added but this may not feed back to the customer’s ordering platform
- Unless specifically requested, there is no need to add a change code
Once the confirmation is complete:
- Select Send Document to transmit the information back to the customer
Comments
Please sign in to leave a comment.