Introduction
This document outlines the process of placing items into a purchase basket; checking that basket out and the approval workflow in place within Marketplace.Placing an Order
Adding Items to The Basket

Fig 1 – Product
- Once items have been brought back through a search (see Searching and filtering in Marketplace) these items can then be placed into the basket.
- The ‘Gallery’ and ‘List’ views both show the product purchasing unit against each item, as shown in Fig 1, in this example a case of 54 is being purchased.
- The purchase pack size cannot be adjusted, but the number of packs required can be entered into the quantity box, which in Fig 1 shows a ‘1’.

Fig 2 – Update Ordered Quantity
- To add something into the purchase basked select the ‘add to basket’ button to the right of the required order quantity.
- Shows the same item with a purchase quantity of ‘10’ required.
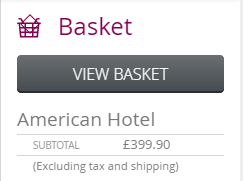
Fig 3 – Basket Summary
- The basket summary on the right hand side of the screen will be updated to reflect your addition.
- When items have been added, the basket it can either be checked-out, or further shopping can be completed with a multiple vendor basket checked out in one go.
Completing an Order
Selecting the ‘view basket’ button will navigate to the shopping basket page, which is shown in Figure 4. On this page the purchase can be finalised and various parameters entered, for example delivery date or a delivery note to the vendor.Delivery Date

Fig 4 – Delivery Date Dropdown List
- The first thing to do is to select a delivery date from the dropdown list.
- Delivery date: The vendor will upload their initial set up, their valid delivery days and any lead times that apply to their purchases. For the user only the valid delivery days for that vendor will be listed against their purchase basket. If the vendor delivers on any day all days will be shown
- Delivery cut off time: Likewise the delivery cut-off time is set by the vendor and displayed to the user as above in the ‘delivery date’ field
Delivery Note to The Supplier
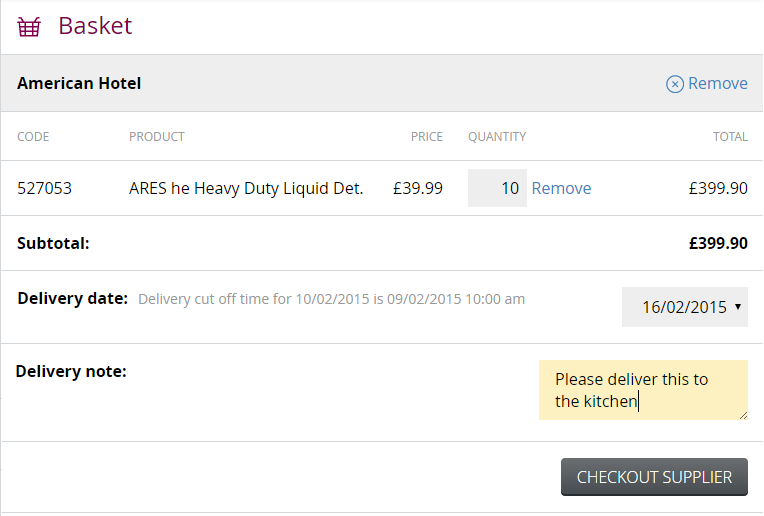
Fig 5 – Delivery Note
- A delivery note can be added to the purchase to be exposed to the vendor – this may be a simple delivery instruction of a note to the effect that the order is urgent for example.
- Notes can be added by selecting the ‘+ Add’ in the ‘Delivery note’ field as shown in Fig 5.
- When the purchase is complete and any additional information has been added the user can complete the order by selecting the ‘Checkout Supplier’ button shown in the images above.
An Order Exceeds The Allowed Value

Fig 6 – Approval Required Warning Message
- Should the order value exceed the spend limit of the operator the button will change to ‘Send For Approval’ as shown in Fig 6 and the order will be passed to the approver.
Confirmation Screen
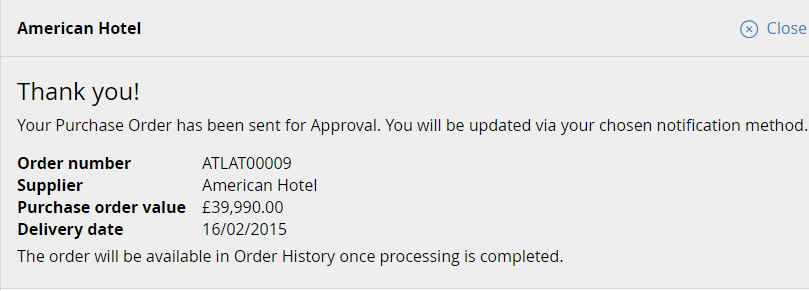
Fig 7 – Order Confirmation
- When the order has either been sent for approval, or passed to the vendor a confirmation screen will be shown as in Fig 7.
Order Approval
Users with the authority to approve orders for other operators will see these orders on the Dashboard news feed with the status of ‘pending’ as below.
Fig 8 – Dashboard with Pending Orders
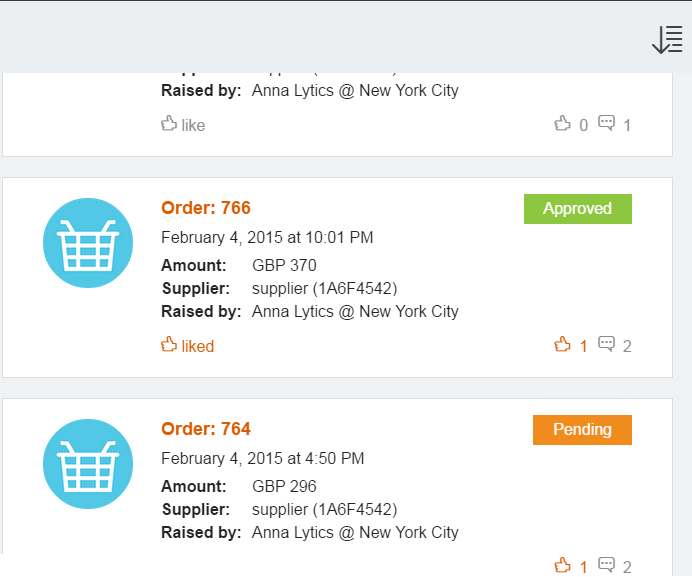
Fig 9 – Approved & Pending Orders
- By selecting an order that has this status the approver can then either approve or reject the purchase. There is also the ability to leverage the collaboration functionality to post a comment on the order.
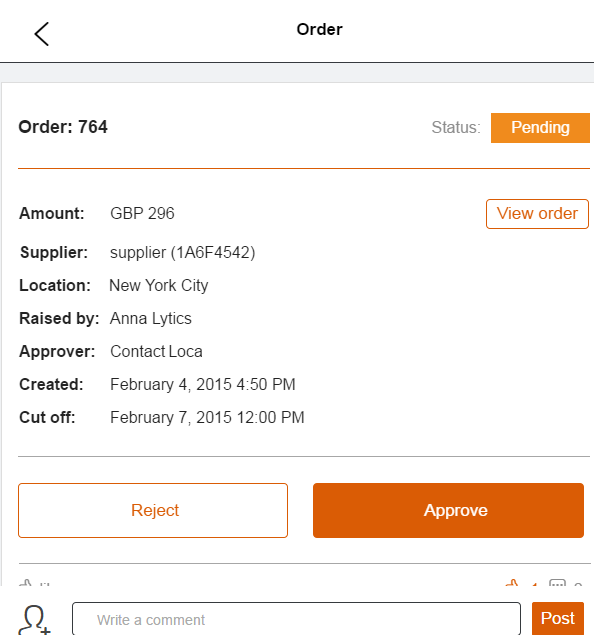
Fig 10 – Order to Be Approved, Rejected or Comments Added
- When the approver actions the order, one way or the other, or places a post upon the order a notification email and/or a push notification.
- If using the app will be send to the user including the information about the status update and the comment.
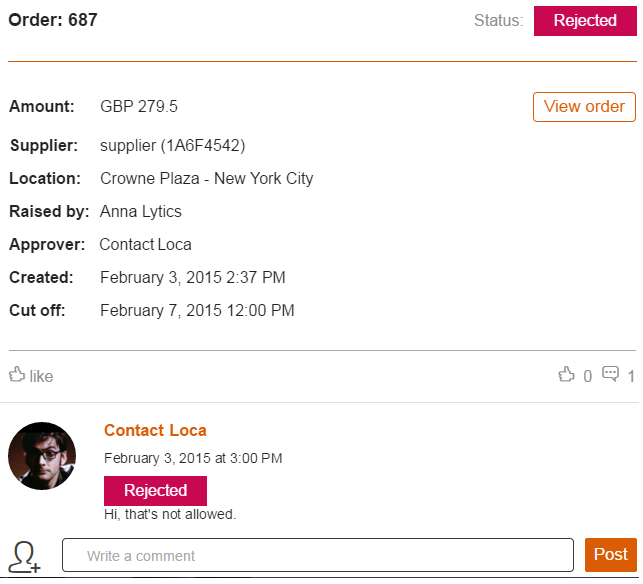
Fig 11 – Rejected Order with a Comment

Comments
Please sign in to leave a comment.