
Overview
There are four ways to create a Purchase Requisition:
- New in Requisition Center
- From a Template in Requisition Center
- From a Reorder Report in Requisition Center
- Uploaded from the Adaco Mobile software.
This article will describe the process of creating a new Purchase Requisition in Requisition Center.
- Go to Requisition > Requisition Center or click the Requisition Center button
- In the New Requisition drop-down, click Purchase Requisition, as per Fig.1
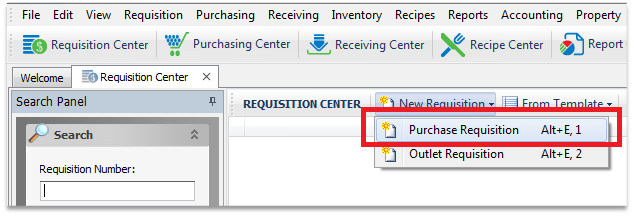
Fig.1 - New Purchase Requisition button
-
When the new purchase requisition screen is displayed, enter the necessary information as per Fig.2

Fig.2 - New Purchase Requisition fields
Table.1 below describes the fields from the Requisition panel of the Purchase Requisition details screen in Fig.2.
Table.1 - Purchase Requisition details screen
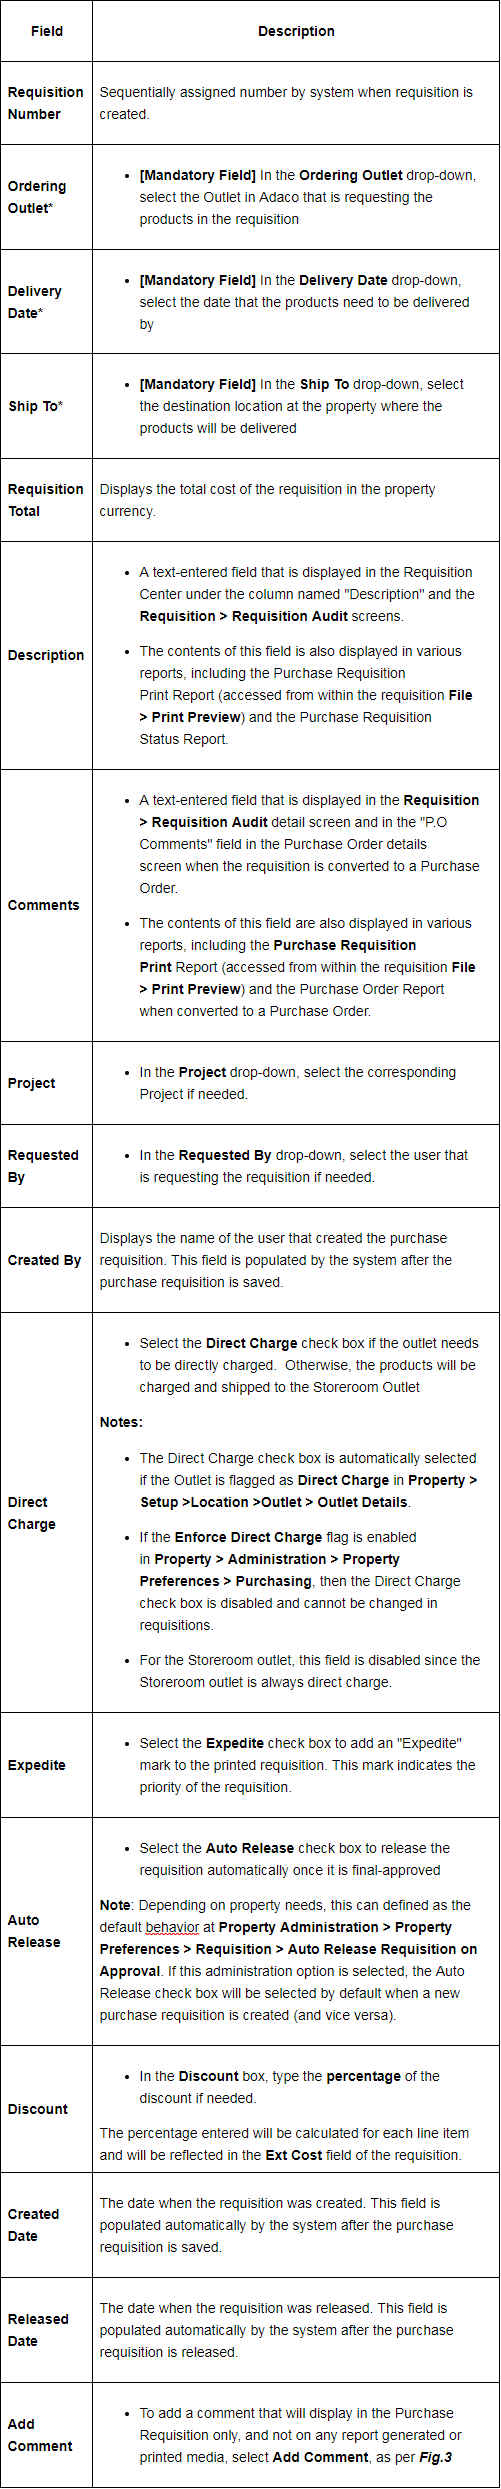
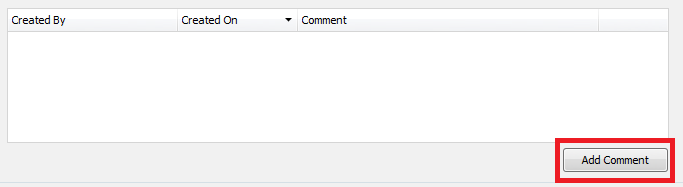
Fig.3 - Adding a Comment
Once all required fields and optional fields are entered, products can then be added to the requisition.
There are three buttons that can be used to add products to the requisition - See Table.2
Table.2 - Buttons that can be used to add products to the requisition
|
Button |
Description/Function |
|---|---|
|
|
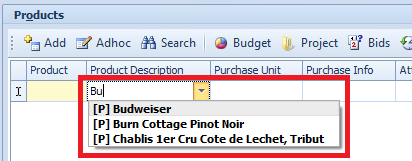
Select Add to manually add a product to the requisition by either:
Fig.4 - Adding a product |
|
|
When the Allow Adhoc Items check box is enabled in Property > Administration > Property Preferences > Requisition, users can add a adhoc item to a purchase requisition.
Fig.5 - Entering Adhoc product information |
|
|
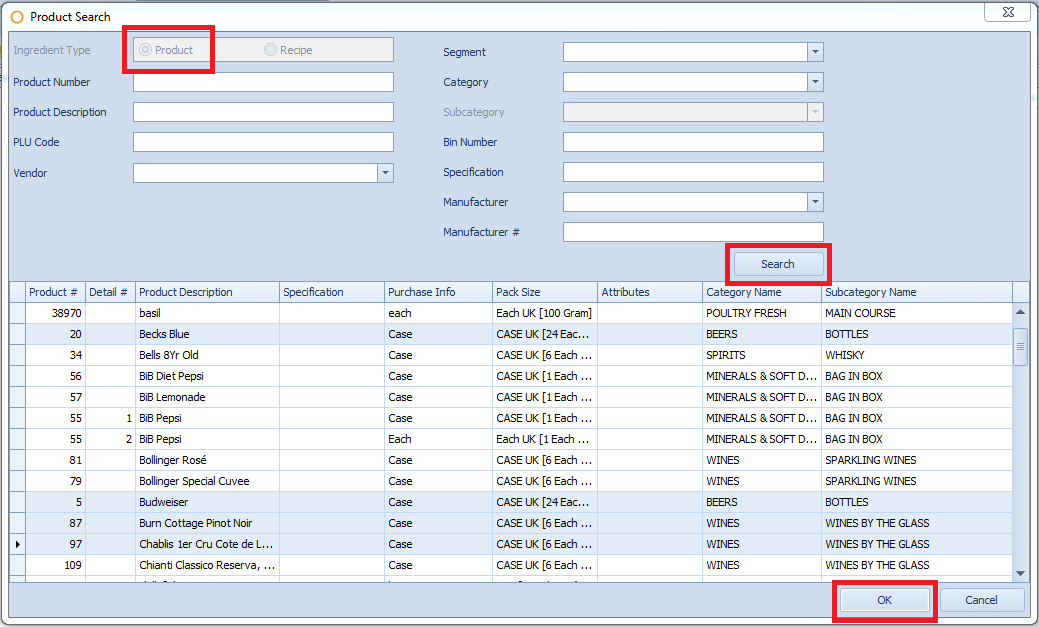
Note: Multiple products can be selected as in any Windows screen, via the CTRL and ALT keys, as per Fig.6.
Fig.6 - Product Search screen |


Notes on Adhoc items
- An Adhoc item is used when a product does not currently exist at the property, and will not be needed again, such as a service or specialized product
- Adhoc items cannot have categories or sub categories assigned to them, which will limit some reporting capability
- Adhoc products can be added to any purchase requisition regardless of whether the requisition originated from a template or not.
- Adhoc items are automatically flagged as Requires Approval and need to be final approved before being processed to a Purchase Order
Please note: If the Product line is coloured Blue, it means that the product flagged as a Contracted Product, as per Fig.9. This flag is enabled in the product details screen (Property > Products).
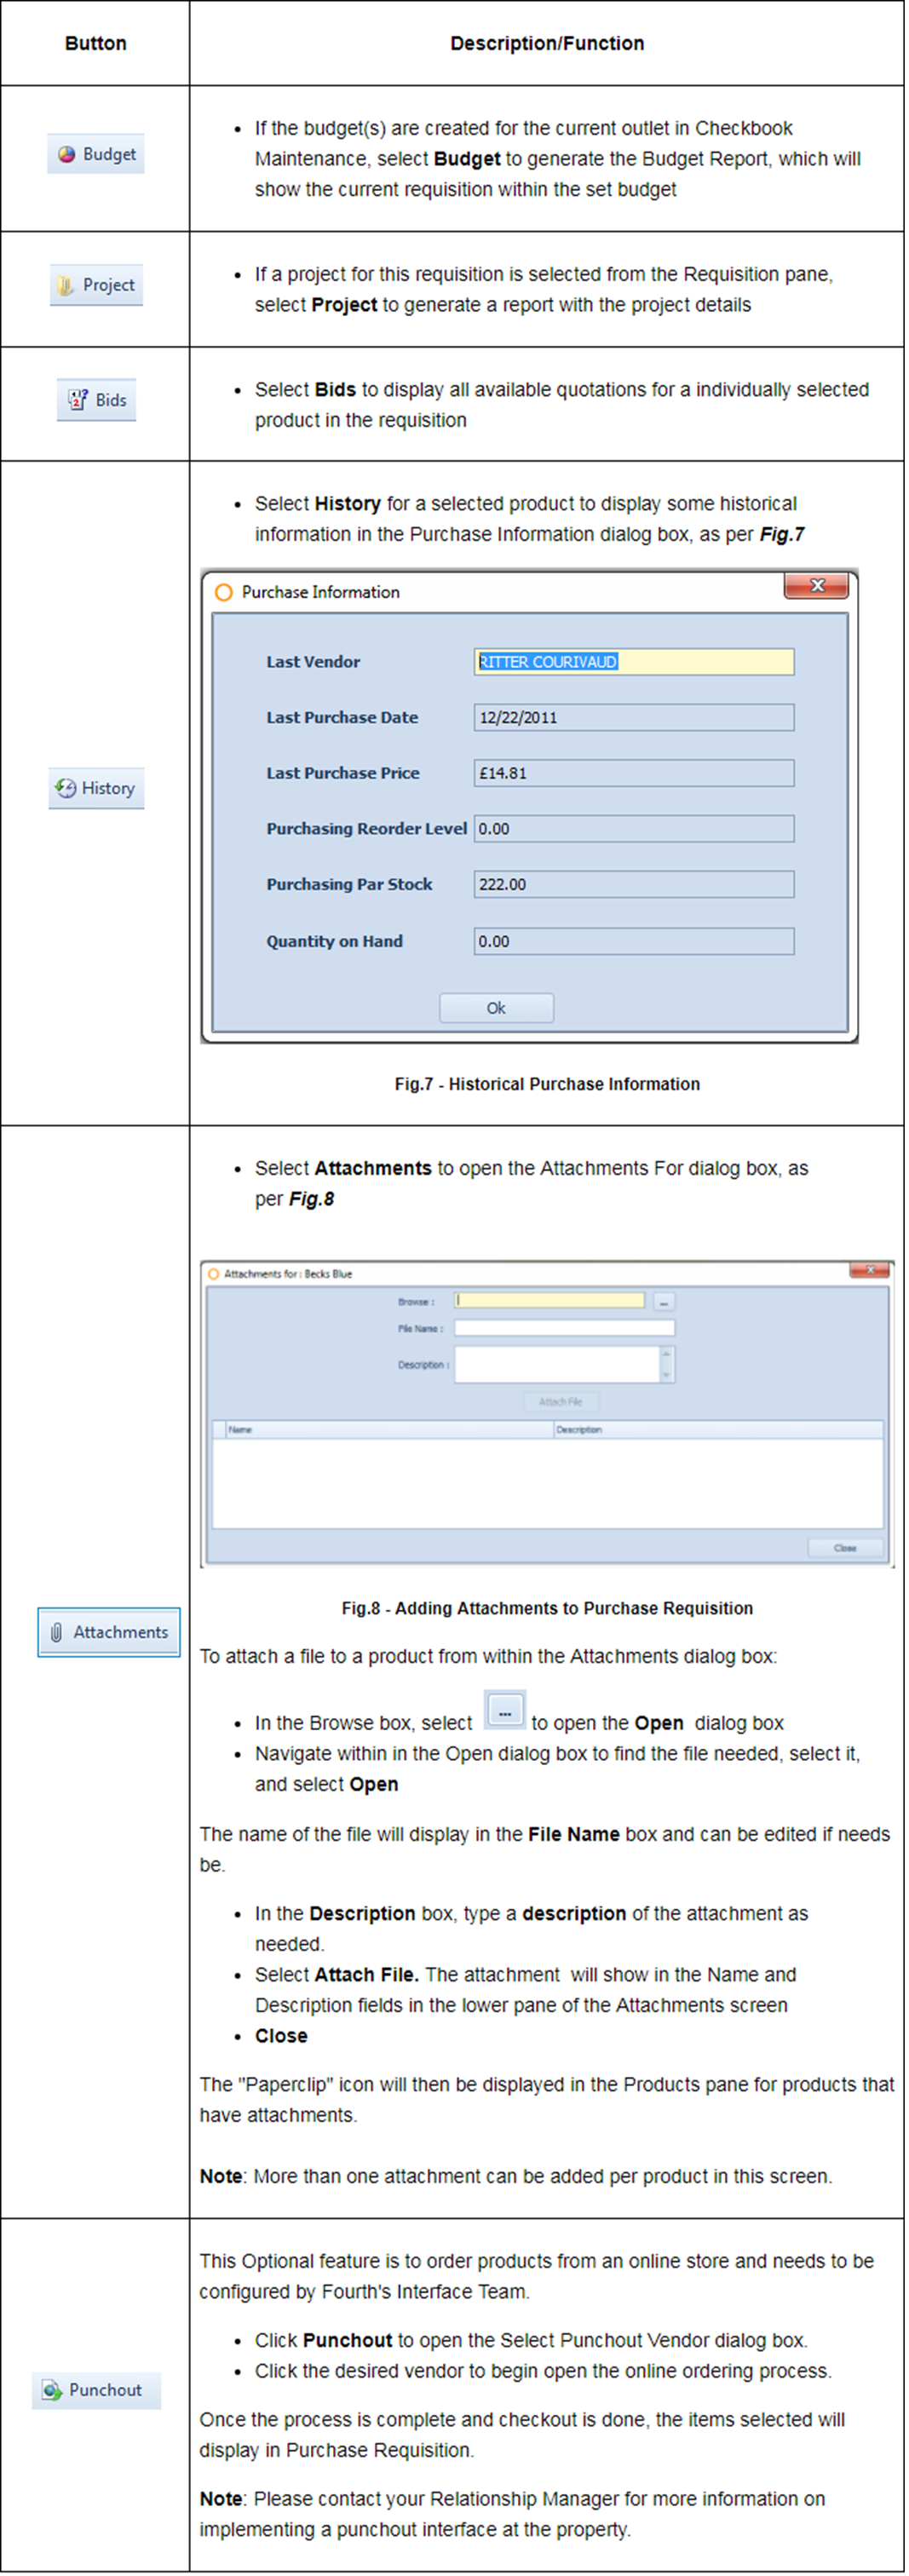
Table.3 below shows the additional buttons in the 'Products' pane.
Table.3 - 'Products' pane screen buttons
For further information on Budget functionality, refer to the article Adaco: Budget Review Report.
Once Products have been added to the requisition, additional information may be required. Please see Table.4.
Table.4 - Product grid


Fig.9 - Products' pane fields
Additional information regarding products is located at the bottom of the screen.
- Select a Product in the Products grid
Information for that particular product will display, as per Fig.10.

Fig.10 - Additional product information
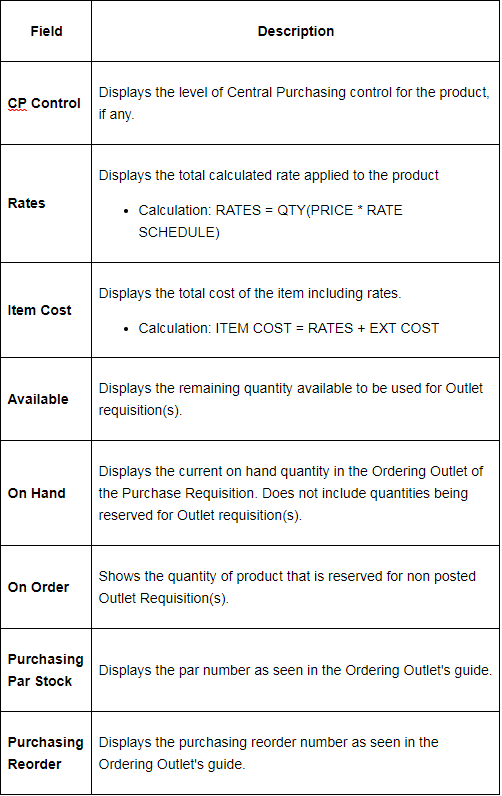
Table.5 - Additional Product information explained
- Once all needed information has been added to the requisition select Save
- To delete the requisition from the system select Delete
Please note: Deleted requisitions cannot be retrieved, are not audited, and are deleted entirely from the system.
- To close the requisition tab select Close
Table.6 explains the buttons from the Requisition toolbar
Table.6 - Buttons from the Requisitions toolbar
| Button | Description/Function |
 |
Note: Additional information on how to create routing lists and approval groups can be found in this article. |
 |
Note: This button is shown users that belong to a user group with the correct access rights. |
 |
Once the requisition is released, it is ready for processing at Purchasing > Create Pos from Requisition. If the property does its purchasing through a Central Purchasing property, the Release list will display either the option to click Central Purchasing or Property. This allows a requisition to be released to either the Property or to Central Purchasing.
If some of the products in the requisition are flagged as CP control "full", the requisition can only be released to Central Purchasing.
Note: If there are products in the requisition that require approval, the requisition can only be released after it is final approved. |
 |
Note: A request for quotation can only be sent to vendors where the corresponding interface is set up at Property > Vendors > Vendor Details > "Vendor Interface" tab. |
Comments
Please sign in to leave a comment.