
Overview
Transfers can be a helpful process to ensure stock can be shared between stores in the event of an unexpected shortage. Accurate inventory management and sales forecasts will assist in reducing the amount of restaurant transfers.
![]() Best practices for requesting and approving transfers are as follows:
Best practices for requesting and approving transfers are as follows:
-
Focusing on accurate inventory management will reduce the need for transfers
- The requesting manager must still call the sending store to request first
- The requesting manager creates the transfer in Fourth
- The receiving manager approves the transfer in Fourth as soon as the stock departs
![]() The goal is to reduce the need for transfers by helping manage the inventory more accurately.
The goal is to reduce the need for transfers by helping manage the inventory more accurately.
Approving a Transfer
- From the Work Flow, select the Check Open Transfers task (Fig.1), or from the Menu tab, navigate to the Transfer tab, select Open Transfers (Fig.2)
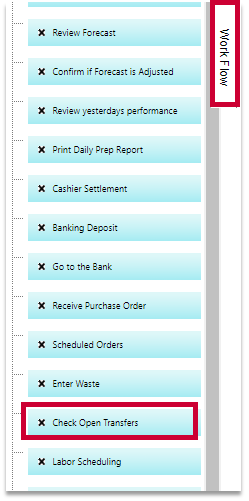

Fig.1 - Workflow navigation Fig.2 - Menu navigation
- Alternatively, log into the mobile site directly on a mobile device and select Inventory Transfer from the Menu
- Select Open Transfers
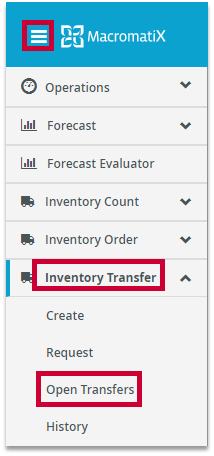
Fig.3 - Mobile navigation
- If there are any transfers requests that require approval, they will appear here. Select the View button to review the transfer request details

Fig.4 - Transfers to approve
- Then select each item to display the Item Details panel on the right
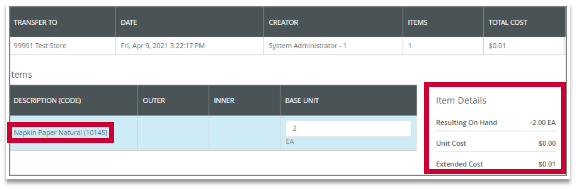
Fig.5 - Item details
- Select the ACTIONS button and choose one of the following options:
- Approve - Select this option to confirm the stock to be sent from the store
![]() The inventory levels will decrease immediately once approved. Ensure that the stock has been transferred or will be as soon as possible.
The inventory levels will decrease immediately once approved. Ensure that the stock has been transferred or will be as soon as possible.
-
- Deny - Select this option to deny the transfer being sent from the store. A pop up will appear asking you to enter a reason and confirm
![]() If the transfer is denied the inventory levels will not change, and the requesting store will get a notification alerting them that it has been denied.
If the transfer is denied the inventory levels will not change, and the requesting store will get a notification alerting them that it has been denied.

Fig.6 - Approve or Deny transfer
Requesting a Transfer
- From the Menu tab, navigate to the Transfer tab
- Select Request Transfer
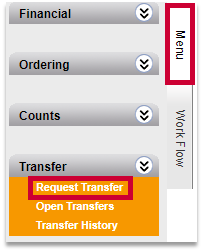
Fig.7 - Menu navigation to Request Transfer
- Alternatively, log on to the mobile site directly on a mobile device and select Inventory Transfer from the Menu
- Select Request
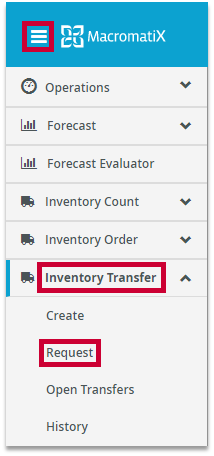
Fig.8 - Mobile navigation to Request Transfer
- From the list of stores, use the Select button to designate the restaurant to request items from
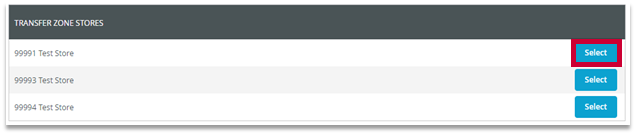
Fig.9 - Select store to transfer items with
- Select the +ADD NEW ITEM(S) button and use the pop-up that appears to search for items

Fig.10 - Add New Item(s)
- Start typing in the item name and select the SEARCH button
-
When the item appears in the search list, select it by ticking the checkbox on the left
-
Select the ADD ITEM(S) button
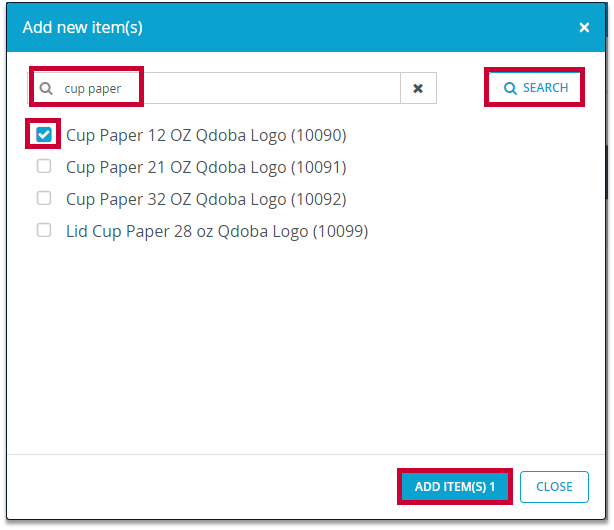
Fig.11 - Item search
- The item will appear with field(s) for you to enter in the quantities needed

Fig.12 - Updating quantity
- To add multiple items, select the ADD ITEM(S) button and repeat the previous steps
![]() Use the Trash Can icon to delete any unnecessary items.
Use the Trash Can icon to delete any unnecessary items.

Fig.13 - Delete item from transfer
- To complete the transfer request, select SUBMIT
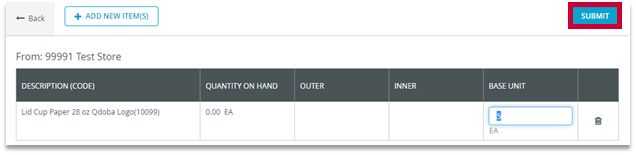
Fig.14 - Submit transfer
- A prompt will display Transfer successfully submitted.
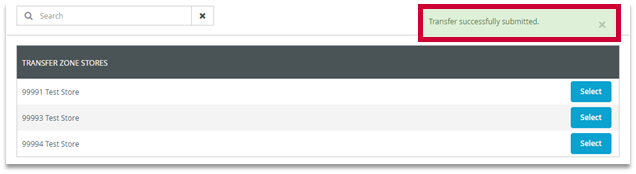
Fig.15 - Confirmation prompt
Viewing Transfer History
- From the From the Menu tab, navigate to the Transfer tab
- Select Transfer History
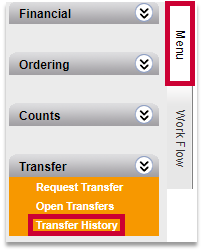
Fig.16 - Menu navigation Transfer History
- Alternatively, log on to the mobile site directly on a mobile device and select the Inventory Transfer from the Menu
- Select History
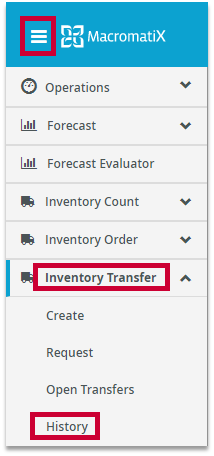
Fig.17 - Mobile navigation History
- A list of transfer requests and approvals will display here, and users can select VIEW to see the transfer details
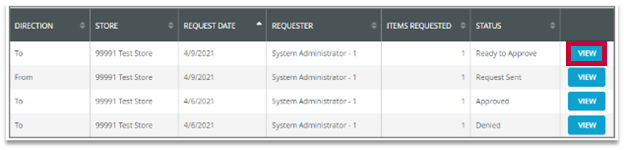
Fig.18 - View transfer details
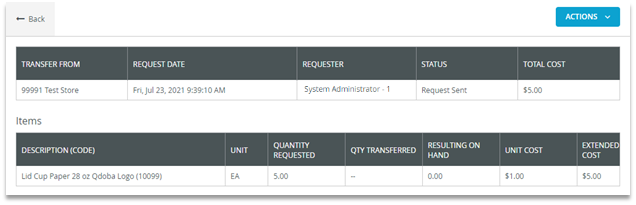
Fig.19 - Transfer details
Comments
Please sign in to leave a comment.