Overview
When managing the Adaco (formerly Purchasing & Inventory (P&I)) system from a Central Purchasing (CP) level, there are settings that inhibit the ability of Property-level users from being able to create new vendors. This can give a company full control of which vendors can be used at which Properties.
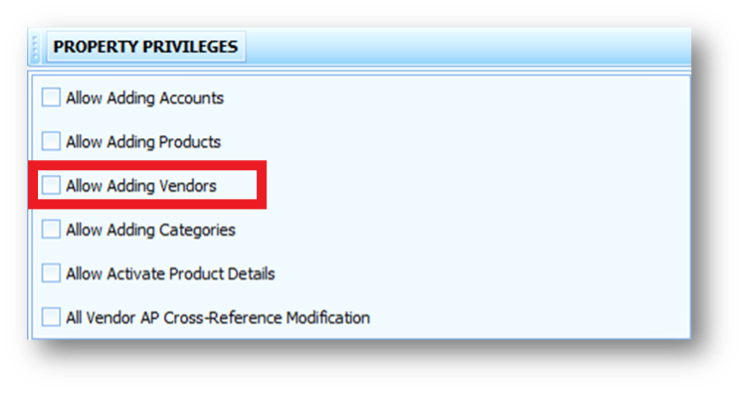
- Go to Property > Administration > Property Preferences > Property Privileges (this pathway is only available at CP)
- Untick the option Allow Adding Vendors

Fig.1 - With no options enabled, the CP will control everything listed from the options
Making a Single Vendor Available at Property Level
After a vendor has been created from the normal process of Property > Vendors > New, the vendor is made just at the CP level first.
To make the vendor available for the Property Level to use, it can be 'pushed' from CP to Property Level.
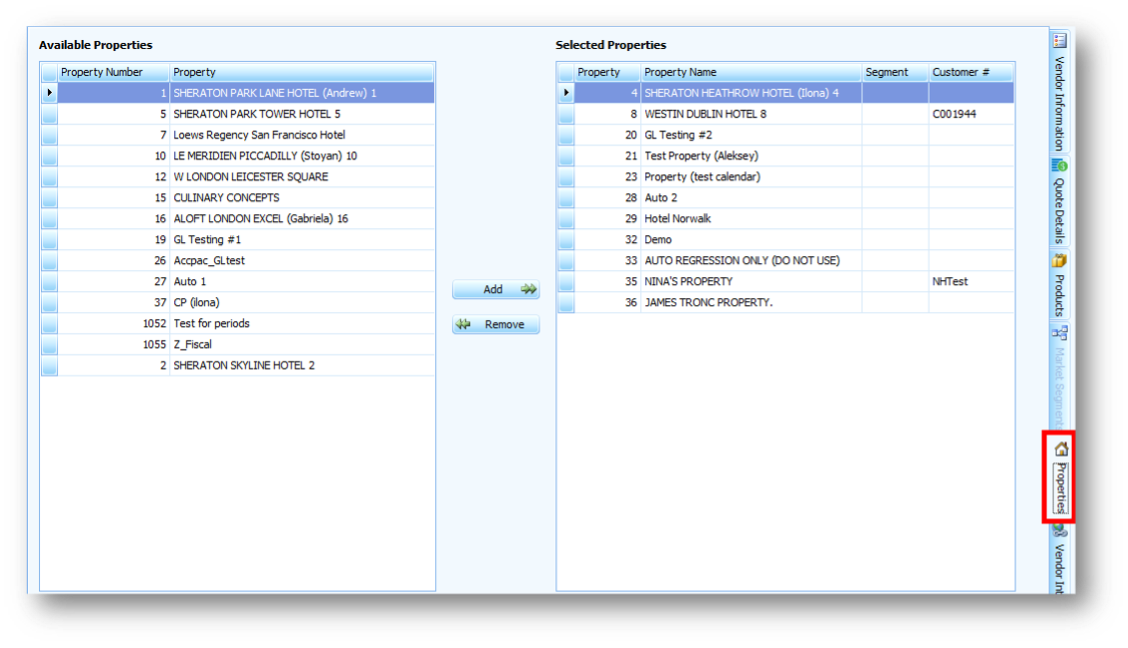
- Go to Property > Vendors > select Vendor > Properties tab
 Fig.2 – The Properties tab screen within a vendor
The list from the left are the available Properties that are available for the vendor to push to.
- Select the desired Property and then Add
This will push the vendor to the Property Level to be used. The list on the right shows the Properties that the vendor is already available at.
- To remove a vendor, follow the same process but use the Remove button after selecting a Property. The vendor will no longer be available there.
Making Multiple Vendors Available at Property Level
- Go to Property > Data Synchronisation
- Select Push Vendor > Next
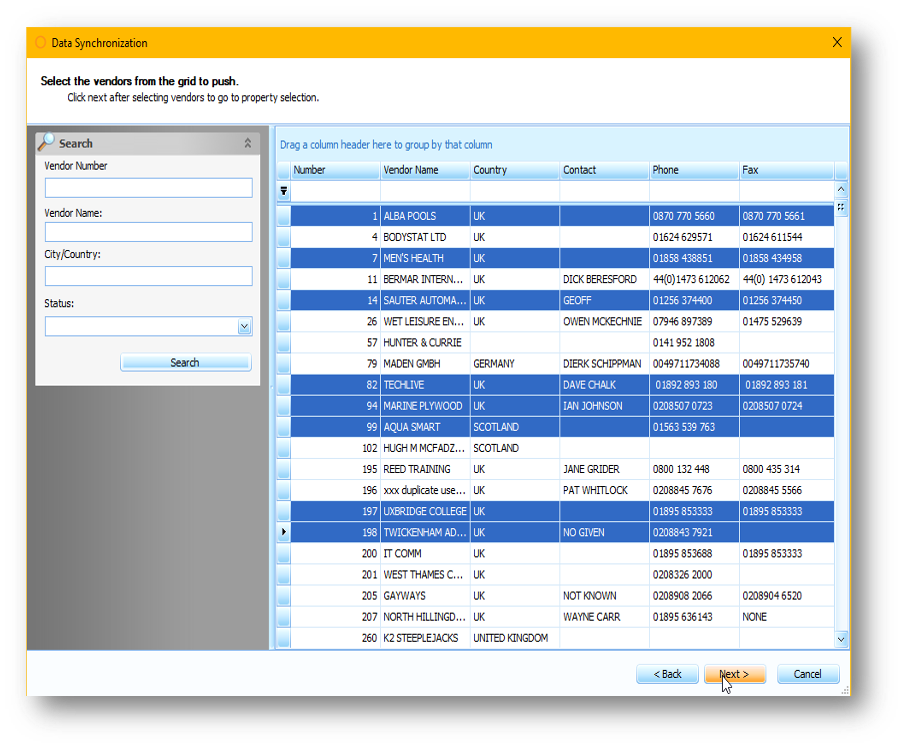
- Search and select vendors (to select multiple vendors, hold the Ctrl button on the keyboard whilst selecting) and then select Next
- Select the Property(s) to push the vendor(s) to
- Select Next
Please note: Using this process, it does not show the Properties that the vendor is already available at. Fig.3 – Selecting multiple vendors to push down to Property
Vendor Fields Synchronisation
There are settings that are only available at Property level (when there is a CP Property linked to it) that limit what fields can be changed once the vendor has been pushed to the Property.
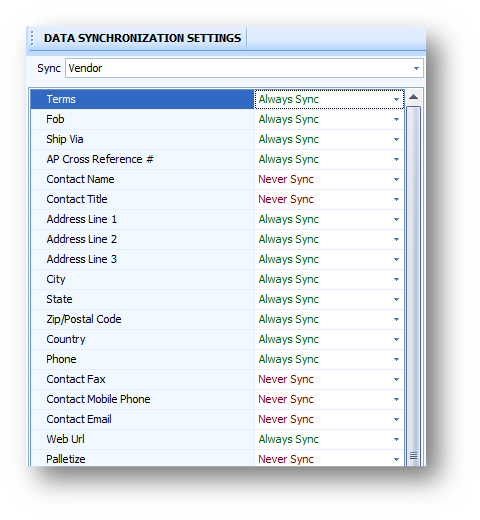
- Go to Property > Setup > Property Preferences > Data Synchronisation > Sync drop-down > Vendor

Fig.4 – Some of the fields that can be set up to sync with CP for a vendor
There are only two options to select for each field.
- Always Sync – Whenever a change is made to the same vendor field at CP, this will automatically update the same field for the vendor at all Properties that the vendor has been pushed to
- Never Sync – Whenever a change is made to a vendor field at CP, this will not automatically update the same field for the vendors at any Property (this can be overwritten if a vendor is pushed to a Property)

Comments
Please sign in to leave a comment.