The system is designed to help those in the hospitality industry manage their purchasing, stock control and time.
It’s important when creating recipes to future proof them so as to be able to easily edit them and update them.
The following document will outline the best practice method for creating recipes.
Before Creating a Recipe
- Check to see if the recipe already exists.

Fig 1 - Searching For A Menu Item
- Expand Menu Data Bank > Menu Items and search to check if the recipe is there, if it is check the recipe is correct, if it’s not then follow the steps to creating a new recipe.
Creating a Recipe

Fig 2 - Add New Menu Item Link
- To create a new recipe, expand Menu Databank > Menu Items.
- Click on the Add New Menu Item link.

Fig 3 - Mandatory Name Field
- When filling in the recipe name, be consistent in how it’s entered into the system. For example if there are a number of soup recipes, start each name with ‘Soup’ then the name of the recipe. It will make things easier going forward if recipes are named in a pattern when there are similar. Example Soup - Tomato, Soup – Chicken Noodle etcetera.

Fig 4 - Mandatory Menu Group Field
- The menu group is the categorisation for the recipe. The menu group will the same for all sites that use this recipe and also defines where this recipe is allocated on the system sales mix.

Fig 5 - Suggested Sales Price Field
- The code field is not mandatory and doesnt require data.
- If a selling price is known then it can be entered into the suggested sales price field or alternatively can be left blank.
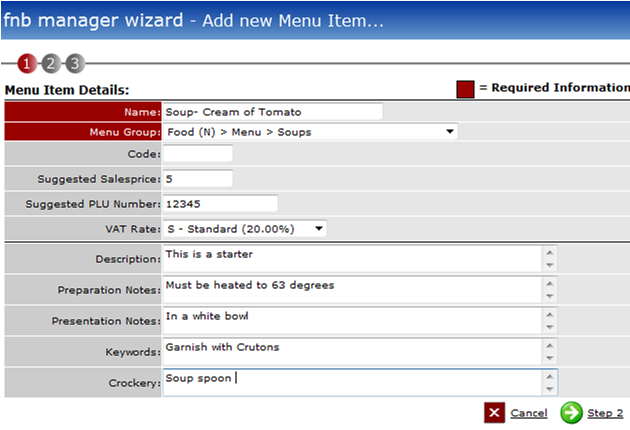
Fig 6 - VAT Rate & Other Descriptive Fields
- The VAT column, although not a mandatory field should be filled in to the correct VAT. This will dictate how the sales behave when they come into the system. Most items will have Standard VAT unless, for example, they are cold takeaway food items.
- There are 5 fields that can be populated with data about this recipe. None of these fields are mandatory. If the same phrase or instruction is used more than once then these can be saved and simply copied and pasted into the open fields.
- Once all the relevant data has been entered, click Step 2

Fig 7 - Recipe Without Ingredients
- Once Step 2 is clicked the system will have saved the recipe, but as yet, it will not have any ingredients.
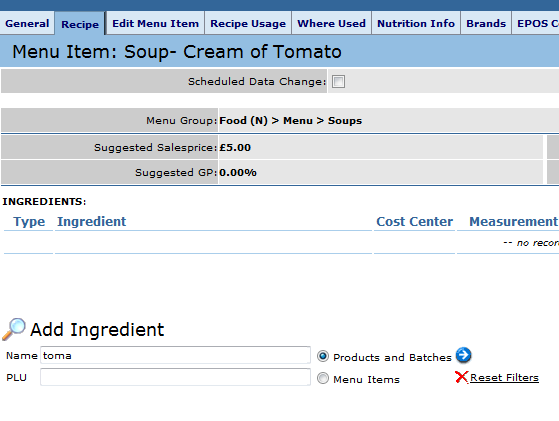
Fig 8 - Add Ingredients Area
- To add ingredients to the recipe, enter the name or a few letters of the product or batch in the field marked name and click enter. If another recipe should be added then tick the radio button called Menu Items and this will bring back any menu items.
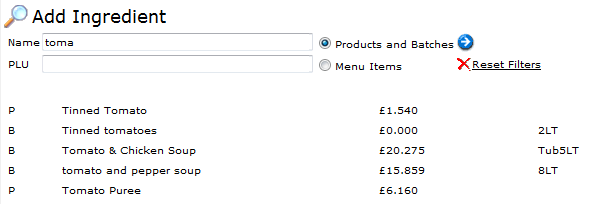
Fig - Adding Ingredients
- The list of suitable items will return.
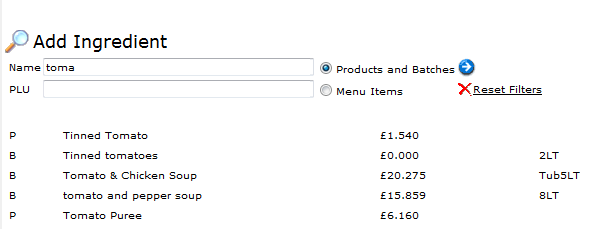
Fig 10 - Add Ingredient Quantity
- After finding the right ingredient, click on it and then add how much is required. If needed instructions relating to this particular ingredient can be added. Once satisfied click Add. This will add the quantity and cost to the recipe.

Fig 11 - Completed Recipe
- Continue to add the relevant ingredients until the recipe is complete.
- The total cost is displayed and also the ratio of the cost of the ingredients in the recipe.

Fig 12 - Suggested GP%
- Once the ingredients have been added, the system will use the selling price against the cost price to give an indication of the GP that will be achieved.
- The suggested GP is the theoretical GP based on the cost model used
- The Target GP is the target set against the menu group ‘Soups’
- The suggested selling price is the price entered into the system. The cost price is the cost of the ingredients from the cost model defined in the system.
- Note: The system defaults to using the highest supplier cost price when costing ingredients in both batches and recipes.
- It does this to enable users to see the worst case scenario when costing recipes. If the users must order from the more expensive suppliers then the expected GP can be seen. Ideally the users would order from the cheaper suppliers where possible therefore gaining a better actual GP versus suggested GP.
- Note - the system uses the product cost price assigned to site to calculate the site level recipe to generate a theoretical GP, this allows an accurate theoretical to be calculated if different sites order from different suppliers at different cost prices.
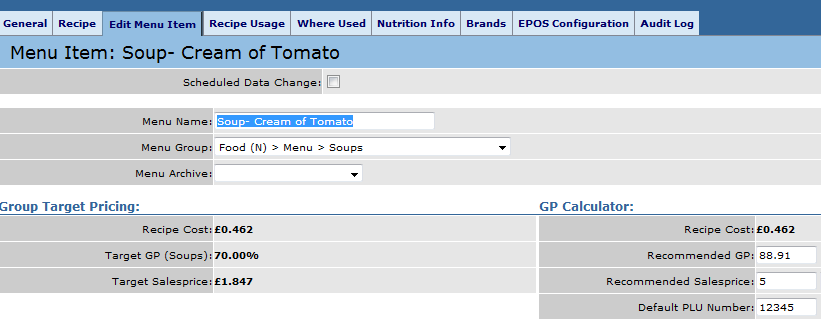
Fig.13 This diagram shows the editable fields available once the menu has been created.
- It is possible to edit the selling price of the recipe once it’s been created to see what the impact will be to the suggested GP. Change this in the recommended sales price field and it will indicate the suggested (recommended) GP that will be achieved.
- Alternatively, it’s possible to enter a GP in the recommended GP section and the system will give a recommended sales price against the cost for the recipe to achieve this GP.
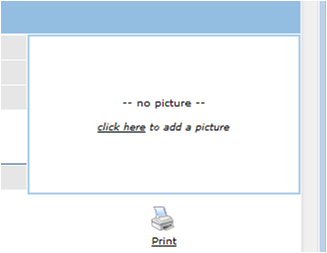
Fig.14 This diagram shows adding a picture to the recipe.
- Pictures can be added to the recipe also to show how they should look once completed. This is on the general tab of the recipe and there is a link click here to add a picture. The picture should be JPG and no larger than 300kb.
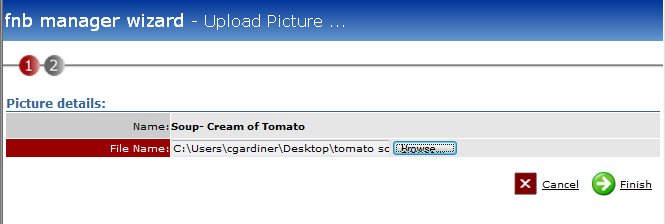
Fig.15 This diagram shows adding a picture to the recipe
- Click browse and find the picture to be uploaded then click finish. If the image is too large there will be given instructions on how to resize the image so that it fits.
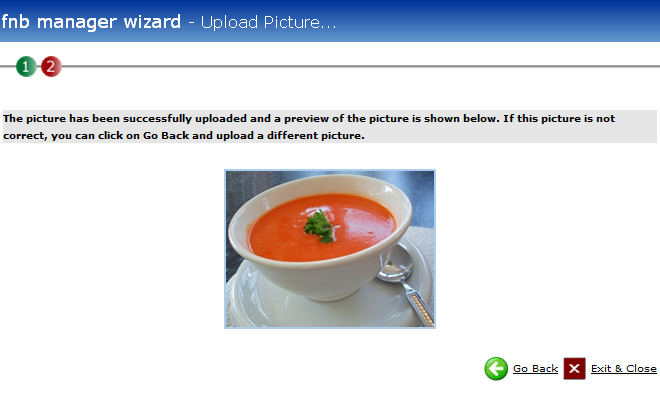
Fig.16 This diagram shows the added picture.
- Once the image is completely uploaded click exit and close, and the image is now part of the recipe. It’s possible to change the image at any time.
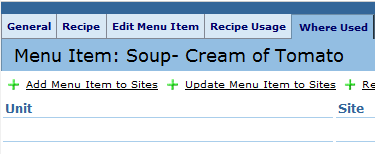
Fig.17 This diagram shows the ‘where used’ tab & the appropriate ‘add menu item to site’ link
- When the recipe is completed and ready to be allocated to site click on the where used tab.
- Click the link add menu item to sites.
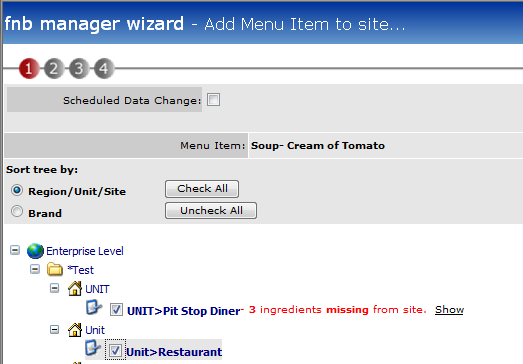
Fig.18 This diagram shows adding the recipe to site.
- A list of sites will be made available, tick the site(s) that require the recipe to be assigned. NB. Any site that sells this recipe will require it to be assigned to site
- If there are any ingredients missing at the site the recipe is being added to, the system will indicate this. It will pull the products with it and make them available for ordering at the site. Note batches must be added separately first as they need to be ticked to be produced on site or not. If the menu is added and the batch isn’t added first, the menu will bring across the batch name but not the recipe so this will require updating once the recipe has been added.
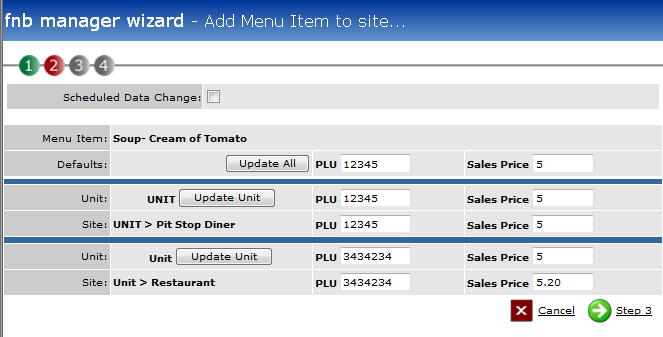
Fig.19 This diagram shows the open fields for editing when adding a menu item to site
- When adding the recipes to multiple sites it’s possible to have different PLU numbers or selling prices for the same recipe if required.
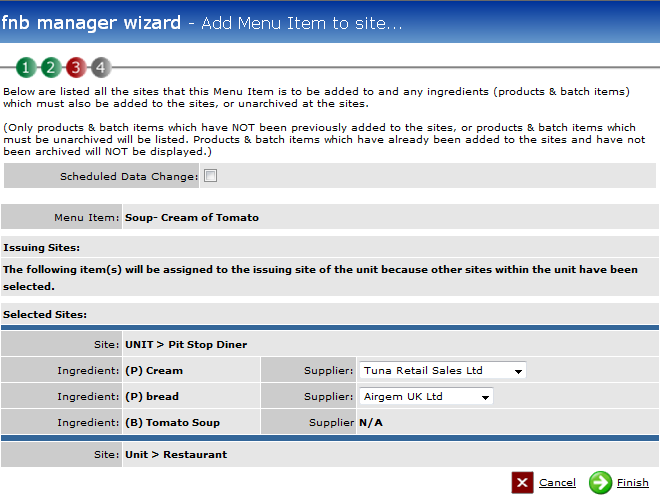
Fig.20 This diagram shows products being added to site, the relevant supplier can be selected at this point
- Click Step 3 and the next screen will show the sites the recipe is being added to along with any products or batches that are being pulled down to site. If there is more than one supplier available then the system will offer a choice. Choose the preferred supplier for that site, i.e. the supplier the site should order from most often.

Fig.21 This diagram shows the menu item successfully added to 2 sites, the cost price, selling price & GP achieved are different at each site
- When looking at the where used tab on the recipe it will be possible to see which sites the recipe has been added to.
- There may be differences in the Actual GP column (this is the actual theoretical GP) for different sites. This may be because there are different selling prices at the different sites or/and because the sites have different allocated preferred suppliers for the same products.
This means that a site’s theoretical GP can vary from the GP in enterprise.

Comments
Please sign in to leave a comment.