The system is designed to help those in the hospitality industry manage their purchasing, stock control and time.
It’s important when creating batches to future proof them so as to be able to easily edit them for transfer and also for yield.
Before Creating a Batch
- Check to see if the batch already exists.

Fig 1 - Browse Batch Item Page
- Expand Menu Data Bank> Batch Items and search to ensure the batch is there, if it is check the recipe, if it’s not then follow the steps to creating a new batch.
Creating a New Batch

Fig 2 - Add New Batch Item Link
- To create a new batch, expand Menu Databank and click on Batch Items. Click on Add New Batch Item.

Fig 3 - Mandatory Name Field
- When filling in the Batch Name, be consistent in how it’s entered into the system. For example if there are a number of sauce batches, start each name with Sauce then the name of the batch. It’s advised to differentiate the batches from products on the stock sheet by using “batch” in the name also. It will make things easier going forward if batches are named in a pattern when there are similar batches. Example Sauce-Béchamel Batch, Sauce- Tomato Batch etcetera.

Fig 4 - Mandatory Unit Size Fields
- The Unit Size should be the total quantity of the batch that’s produced with when making the batch (after peeling, cooking reducing etcetera). This will be the stock counting measurement and also the default measurement size. Example 2.5 Litres is the total usable Sauce prepared from the raw ingredients.

Fig 5 - Mandatory Category Field
- Chose the Category that this product belongs to by clicking on the magnifying glass. It’s advised that separate categories are created for the batches to separate them from any products of similar names. Keep the Yield at 100% it’s better to build the wastage quantity into the recipe.
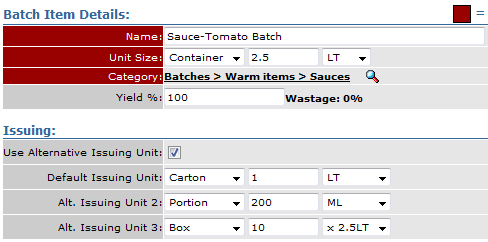
Fig 6 - Issuing Units
- The Alternative Issuing Unit is used to allow users to Transfer and Stock Count this particular Batch in different units of measurement. All options will show on the stock count and the default Issuing Unit will be the main transfer size.

Fig 7 - Green Next Button
- Click next and this will save the details for this batch and move to the next page.
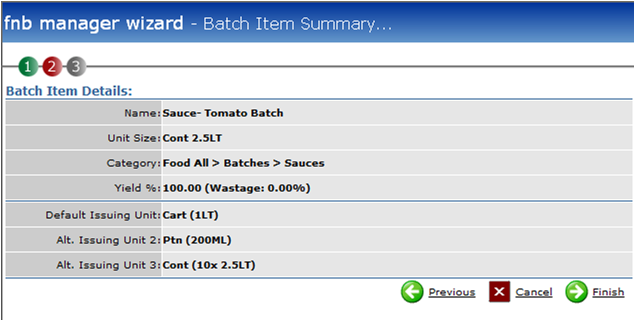
Fig 8 - Summary Page
- This page gives the opportunity to check the batch details are correct. If an error has been made click previous and it will go back to the first page, otherwise click finish.
Adding Ingredients
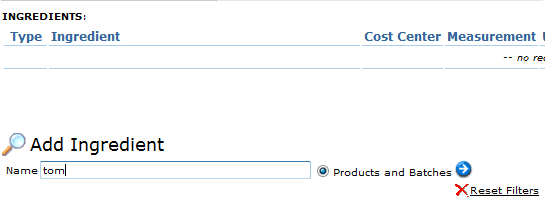
Fig 9 - Searing For Ingredients to Add
- The system will default to the Recipe tab where the ingredients can be added to the batch. Use the Add Ingredient search box and hit the enter key and it will bring up a list of products or other batches with these letters. It’s worth typing only a few letters in not the whole word just in case the item that’s being searched for was misspelt.
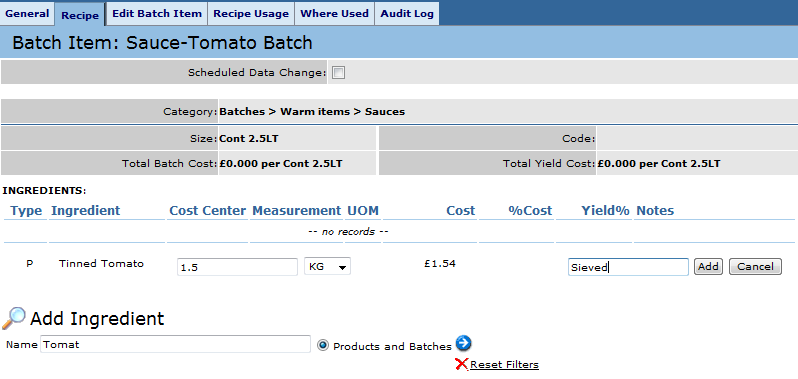
Fig 10 - Adding The Ingredient Quantity
- After finding the right ingredient, click on it and then add how much is required. If needed instructions relating to this particular ingredient can be added. Once satisfied click Add. This will add the quantity and cost to the batch.
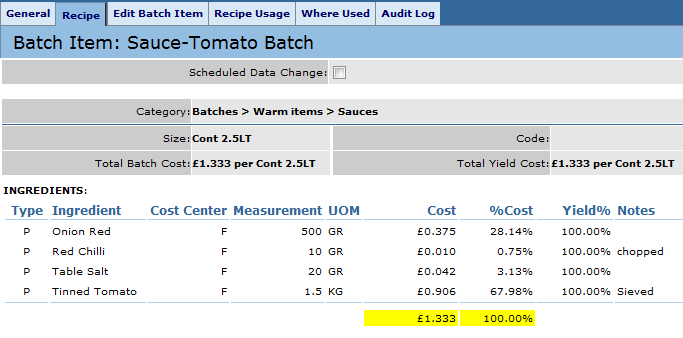
Fig 11 - Completed Batch
- Continue to add the relevant ingredients until the recipe is complete. The total batch cost is displayed and also the ratio of the cost of the ingredients in the recipe.
Preparation Notes & Image
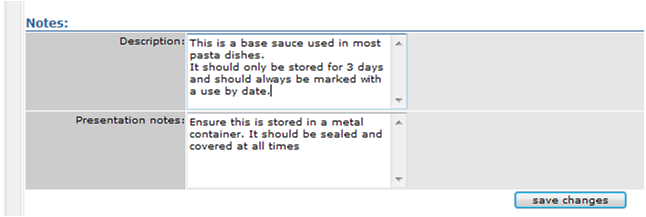
Fig 12 - Cooking Instructions & Preparation Notes
- Use the Edit Details Tab to enter notes and instructions on making the batch. This area can also be used to detail storage and presentation of the batch. Health and Hygiene could also be mentioned here to remind those preparing batches to be mindful of good food safety practises.
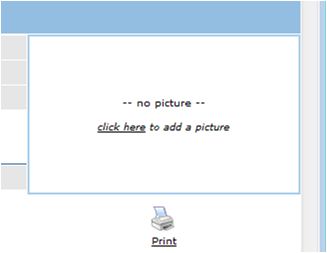
Fig 13 - Add Batch Image Link
- Pictures can be added to the batch so as to show how they should look once completed. This is on the general tab of the batch and there is a link click here to add a picture. The picture should be JPG and no larger than 300kb.
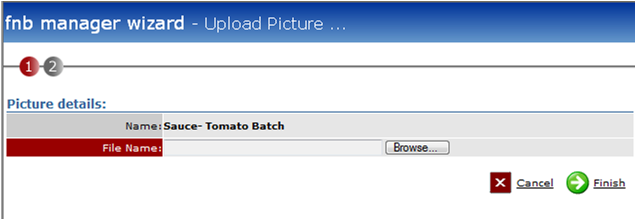
Fig 14 - Add Batch Image Dialogue Box
- Click browse and find the picture to be uploaded.
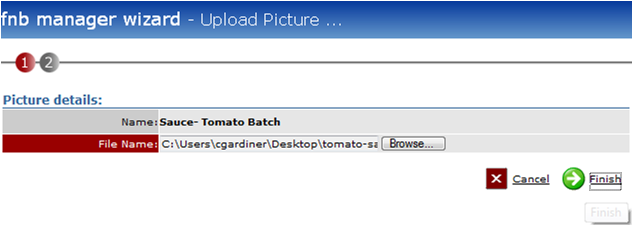
Fig 15 - Add Batch Image Dialogue Box - File Selected
- Once the image is uploaded click finish and this will complete the upload. If the image is too large there will be given instructions on how to resize the image so that it fits.
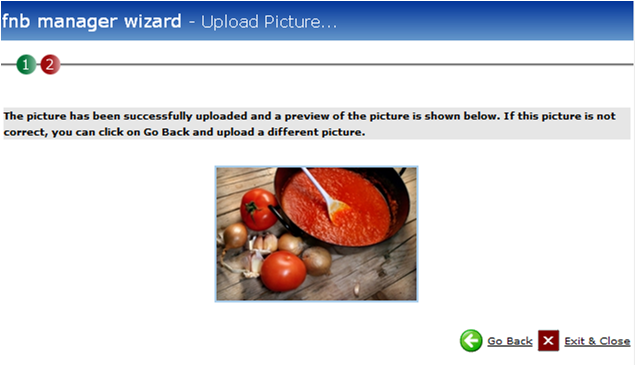
Fig 16 - Batch With Image
- Once the image is completely uploaded click exit and close, and the image is now part of the batch recipe. It’s possible to change the image at any time.
Adding Batches to Sites

Fig 17 - Add Batch Item to Sites Link
- When the batch is completed and ready to be allocated to site click on the Where Used tab.
- Click the link Add Batch Item to Sites
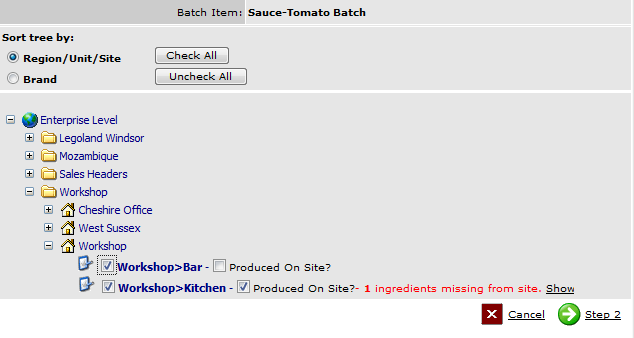
Fig 18 - Select Sites to Add Batch Item
- A list of sites will be made available, tick the sites that require the batch because they produce it or because they sell it.
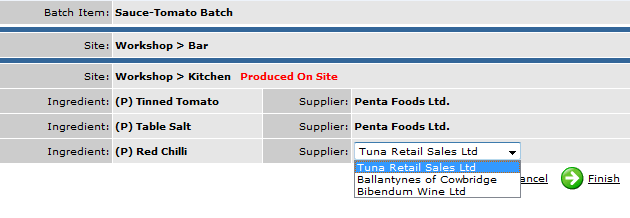
Fig 19 - Adding Missing Ingredients
- When a batch is produced on site, if any products are missing the system (as shown in Fig 18) will add the product making it available. The system asks which supplier cost should be associated to this ingredient when costing the batch at site.

Fig 20 - Batch Item Added to Sites
- Click Finish and the batch will be added to site(s). It’s clear (in this scenario) that the batch has been ticked to be produced onsite at the kitchen and not the bar.

Fig 21 - Batch Item on The Stock Reconciliation Report
- The quickest way to verify a batch being produced on site is to check the stock reconciliation. If the batch shows on the stock reconciliation then it’s not been produced on site. This will mean that all holding stock quantity and value will be against the batch and not the products contained in the batch. This will cause discrepancies on the stock reconciliation if the batch should be produced on site.

Comments
Please sign in to leave a comment.