Site Transfer Entry

Fig 01 - Stock Management Tab with Site Transfer Option
- Select the Stock Management tab to get the option to create a site transfer.
- Click on the Site Transfers Link.
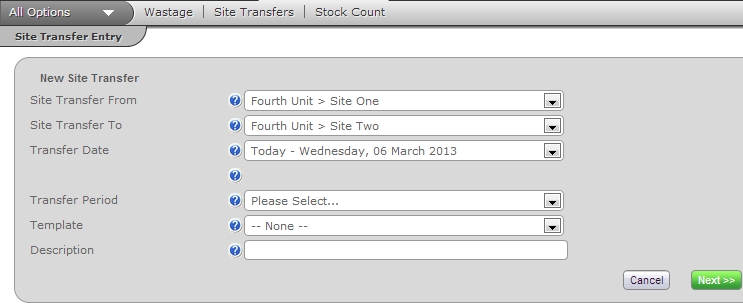
Fig 02 - Site Transfer Options
- The next page shows the group of text and drop down boxes that need to be completed.
- Select the site that the stock is being transferred from.
- Select the site that the stock is being transferred to.

Fig 03 - Tooltip for Each Text & List Box
Note: To understand each box’s function, place the mouse cursor over the blue help icon and a tooltip will appear with a brief description.
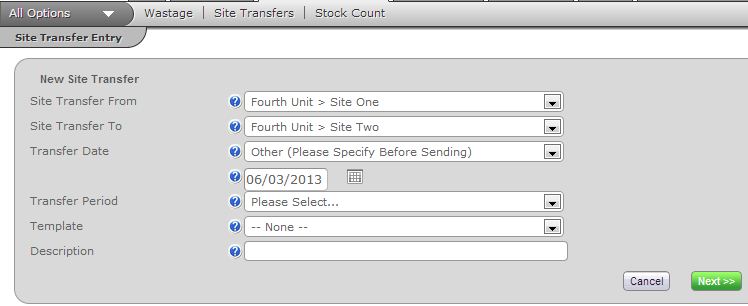
Fig 04 - Site Transfer Options (Other Date Selected)
- Choose the correct Transfer Date. If the required date is not shown on the drop down list then select “Other (Please Specify Before Sending)”
Note: The following is very important when selecting the Transfer Date:
- By default the system shows today’s date as the transfer date. If date is not today, then amend accordingly.
- It should be pointed out that sites may have different stock period lengths and date ranges, as long as the date cannot be in a past or closed stock period for either site.
- If the date of an approved site transfer is for a future stock period it will not show under ‘Approved’ tab on the Stock Management tab. To find future transfer see the section: Search for Site Transfers.
- If using templates to do a site transfer only the preselected items on the template are visible on the next page.
- A meaningful description may be added to the site transfer.
- After completing the relevant fields click the green ‘Next’ button.
Site Transfer Detail

Fig 05 - Types of Items That Can Be Transferred
- The type of item being transferred must be selected on the Site Transfer Detail page.
- After selecting the item type click the click the green ‘Next’ button.
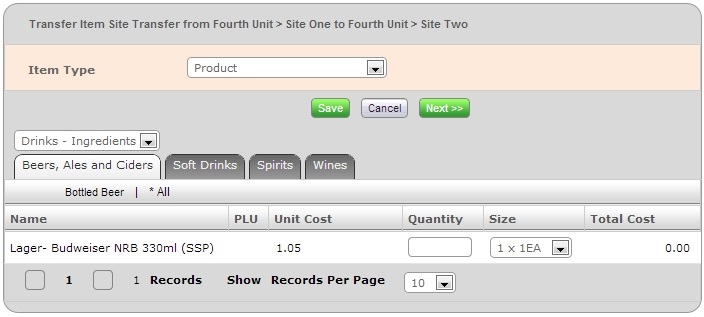
Fig 06 - Site Transfer Selecting Products
- On the next page, depending on the option chosen, the relevant Category (if product) or Menu Group (if menu item) in which the items are that are being transferred are location must be selected.
- Enter the quantity and correct pack size of the item being transferred.
Note: If templates are being used, pack sizes and quantities may also be predefined by an administrator.

Fig 07 - Total Cost Calculated Automatically
- The Total Cost is automatically calculated after the quantity has been inputted.
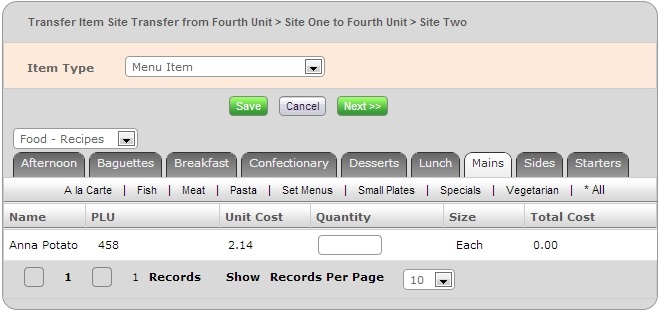
Fig 08 - Site Transfer Selecting Menu Items
- The transfer of menu items is very similar to that of products however pack sizes are not available.

Fig 09 - Item Unavailable For Transfer
- If an item is not available on the receiving site then the field to enter the quantity will be unavailable. To view the reason hover the cursor over the icon and a tooltip will indicate why the item cannot be transferred.
- After entering the quantities for all the items that are being transferred click the green ‘Next’ button.
Site Transfer Summary

Fig 10 - Site Transfer Summary Buttons
- There are 5 buttons across the top of the site transfer:
- ‘Edit Detail’ – Returns to the Site Transfer Detail page.
- ‘Save’ – Saves any changes made to the site transfer on the Site Transfer Summary page for example to the effective date, quantities etc.
- ‘Send’ – Sends the transfer to the other site. At this stage the site transfer is still not approved and as such has no effect on stock levels at either site.
- ‘Send and Approve’ – Sends and automatically approves the site transfer on both sites. This will affect stock levels at both locations.
- ‘Delete’ – Completely removes the site transfer from the system. If a transfer is deleted it cannot be recovered.
- Should all the details on the site transfer be correct and depending on access and or company policy, either the green ‘Send’ or grey ‘Send and Approve’ button should be clicked. If the green ‘Send’ button is clicked then the site transfer would need to be approved at the receiving site for the transfer to affect stock levels at both sites.
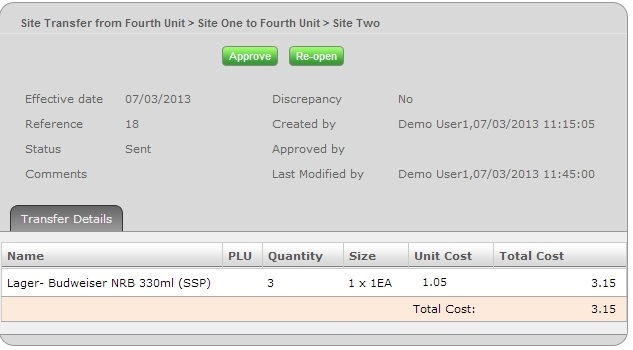
Fig 11 - Sent Site Transfer
- In the above example, the green ‘Send’ button was clicked so the transfer is sent to the receiving site and there are two green buttons:
- ‘Approve’ – This approves the items on the site transfer into stock on both sites.
- ‘Re-Open’ – This re-opens the site transfer so that it may be edited.
Note: The site transfer will be pending on one site.

Comments
Please sign in to leave a comment.