Overview
Account Transfers are used to record stock that is consumed for reasons other than Sales, e.g. transferring stock used for a Site Opening.
These reasons may vary for each organization. Prior to entering an Account Transfer, all the Products and/or Menu Items to be transferred along with the relevant accounts need to have been assigned to site.
This article describes the process of entering an Account Transfer.
Creating an Account Transfer
Account Transfers Page
- In the Stock Management tab, select All Options and then Transfer to Account

Fig.1 – Transfer to Account Option
The ‘Pending Transfers’ page will then display.
It is possible to search for any pending transfer by entering the relevant criteria in the search boxes provided.

Fig.2 – Pending Account Transfers Page
- To understand the function of each box, place the mouse over the blue question mark icon and a tool tip will appear with a brief description
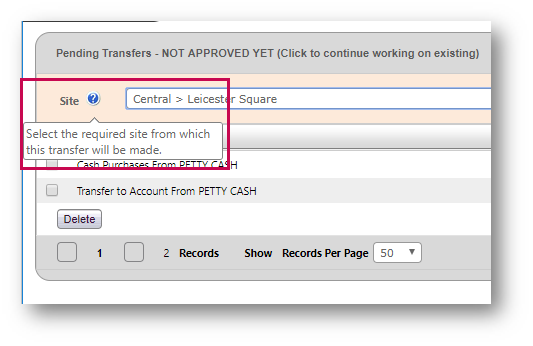
Fig.3 – Tooltip Display
- To begin creating a new Account Transfer, select the New Transfer link
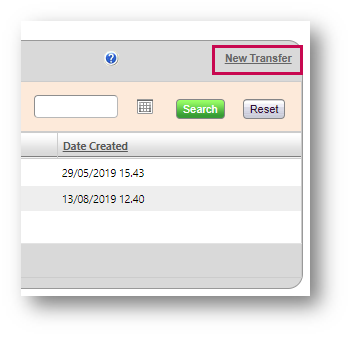
Fig.4 – New Transfer Link
New Account Transfer Page
- Select the Site that the Account Transfer relates to
-
Select the correct Date by manually entering or selecting the Calendar Icon (see Fig.5)
- By default, the system shows today’s date on the calendar as the Transfer date. Amend accordingly if necessary
- The date cannot be in a past or closed Stock Period as the system will not allow it to be approved
- Select from the appropriate Account drop-down box
-
Select whether the Stock Movement is from the account to stock or vice versa
- For example, Petty Cash purchases would normally be TO stock FROM whilst Marketing or Staff Food would be FROM stock TO
- Add a Comment if necessary
- Select Next when completed
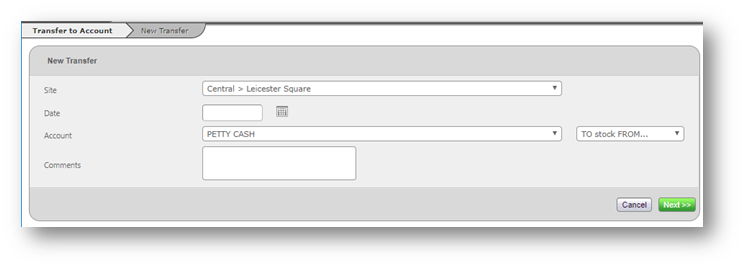
Fig.5 – New Transfer Page
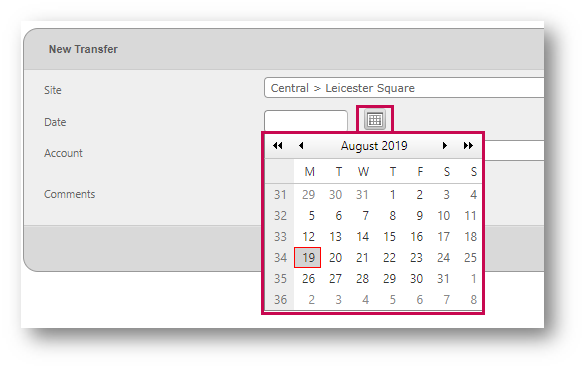
Fig.6 – Calendar Display
Account Transfer Detail
- Select the Item Type being transferred using the drop-down menu
Detail of each choice in the drop-down menu is displayed below.
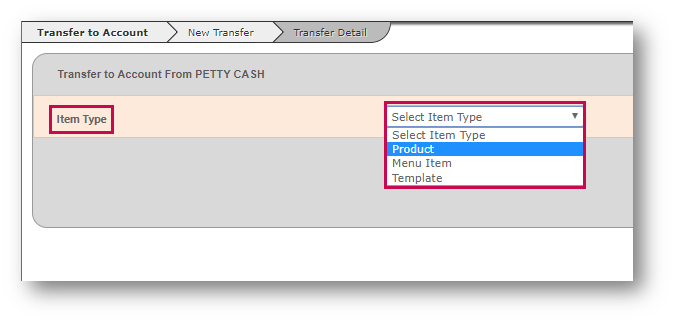
Fig.7 – Item Type Drop-Down Menu
- Select Product and then select the Cost Center from the drop-down menu which becomes available
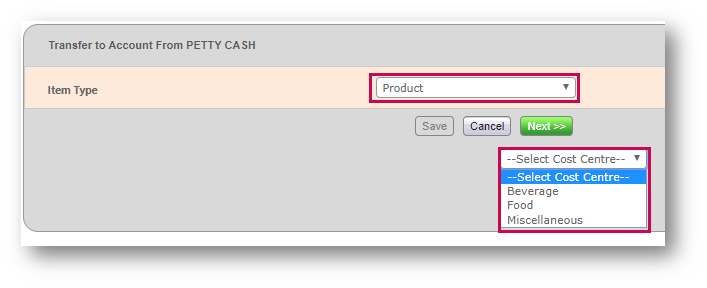
Fig.8 – Product Cost Center Drop-Down
- Select Menu Item and then choose from the Menu Item drop-down menu
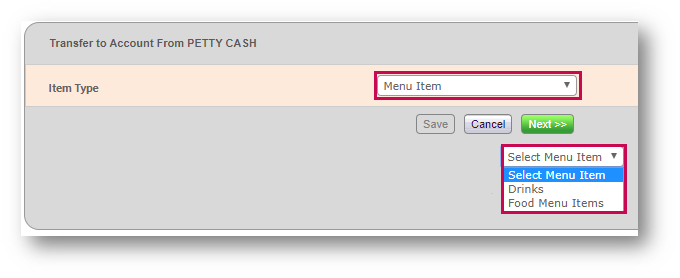
Fig.9 – Menu Item Drop-Down
- Select Template and then the required Template which has been set up
- Select Next
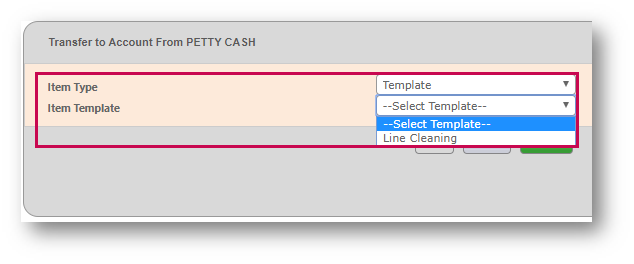
Fig.10 - Template Selection Drop-Down
In this example, ‘Product’ was chosen.
- Select the relevant Category (if product) or Menu Group (if Menu Item)
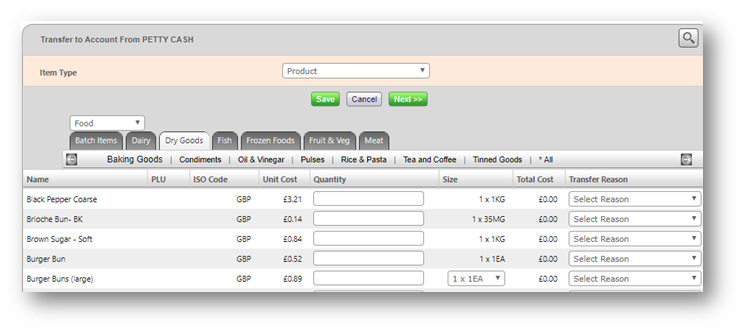
Fig.11 – Product Selection Page
-
Enter the Quantity and Transfer Reason required
- A Pack Size may also need to be selected
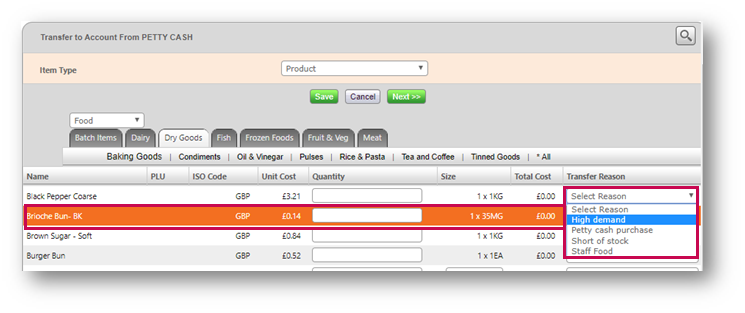
Fig.12 – Transfer Reason & Quantity Fields
Please Note: If Templates are being used, Pack Sizes and Quantities may also be pre-defined by an Administrator.
The Total Cost is automatically calculated after the Quantity has been entered.
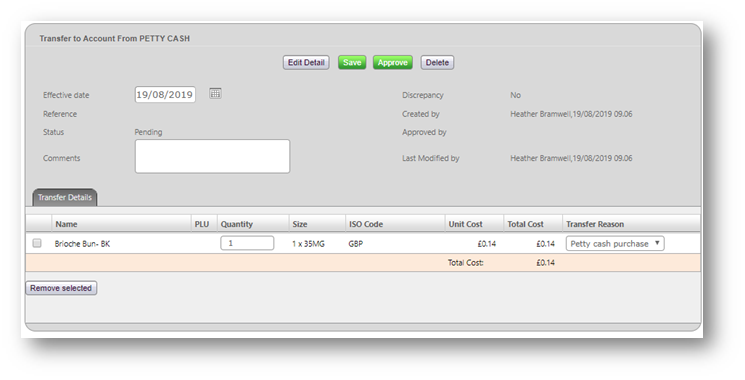
Fig.13 – Account Transfer Details
Account Transfer Summary
There are four options at the top of the ‘Account Transfer’ page.
- Edit Detail – Returns to the ‘Account Transfer Detail’ page
- Save – Saves any changes made to the Account Transfer on the ‘Account Transfer Summary’ page, e.g. the effective date, quantities etc.
- Approve – Approves the Account Transfer, this will affect stock levels
- Delete – Completely removes the Account Transfer from the system. If a transfer is deleted, it cannot be recovered
- Once the details on the Account Transfer are correct, select the Approve button

Fig.14 – Account Transfer Options
After approving, the Account Transfer page displays two buttons:
- Re-Open – This re-opens the Account Transfer so that it may be edited
- Cancel – Returns to the main Stock Management Page
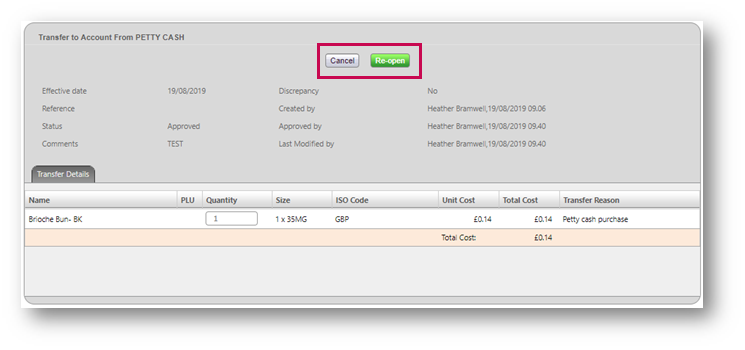
Fig.15 – Re-Open Option
Editing the Account Transfer
If the effective date for an approved Account Transfer does not fall within a closed or approved Stock Period, it can be re-opened and edited.
Update Quantities and Adding Lines
- To edit, select the Re-Open button
The Account Transfer will return to the editing state.
Various amendments can be carried out at this stage, including updating the quantities and adding other items to the Account Transfer.
Please Note: The Cost Price cannot be updated.
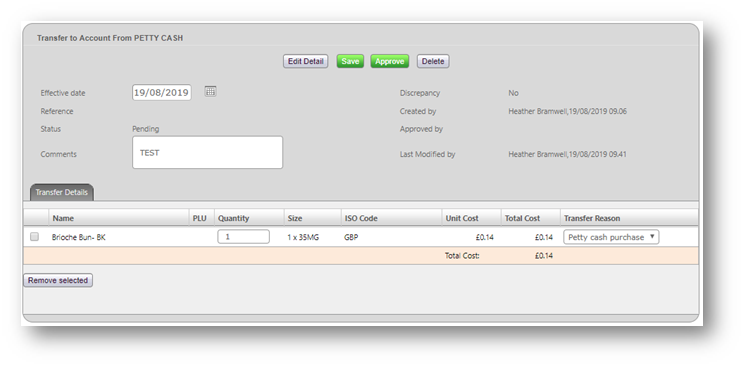
Fig.16 – Edit Detail to amend the Account Transfer
- After making the necessary amendments, select the Approve button
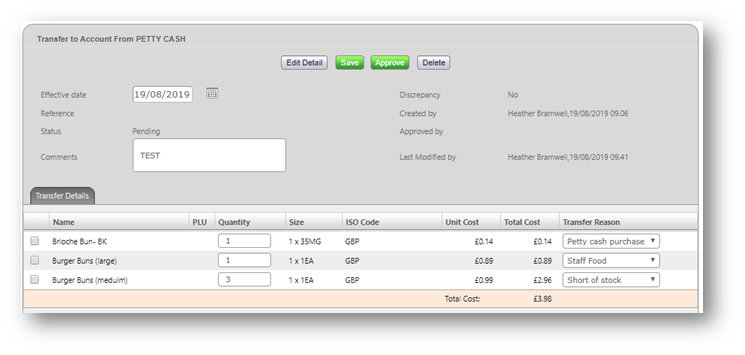
Fig.17 – Amended Account Transfer
Removing a Line
- Select the tick box for the required Item to be removed
- Select the Remove Selected button
Please Note: Do not attempt to remove all line items using this function.
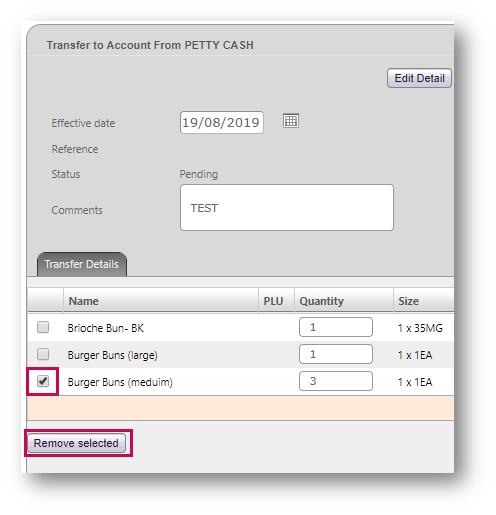
Fig.18 – Remove Selected Button
When the ‘Remove Selected’ button is selected, a prompt will appear for confirmation that this is the desired action.
- Select OK to remove the item, otherwise select Cancel
- After making the necessary amendments, select Approve
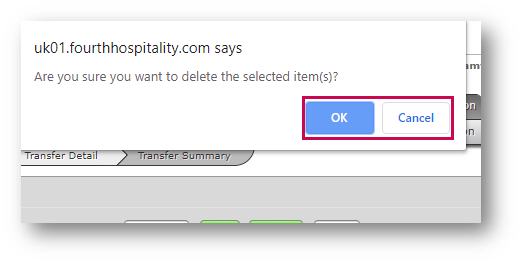
Fig.19 – Delete Prompt
Deleting an Account Transfer
It is possible to completely remove a pending Account Transfer if the appropriate level of access is assigned.
Please Note: If a transfer is deleted, it cannot be recovered.
- Select the Delete button
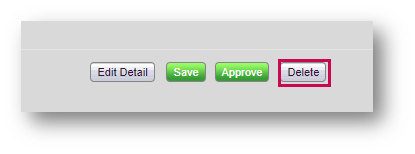
Fig.20 – Delete Button
A prompt will appear confirming if this is the required action.
- Select OK to delete the account
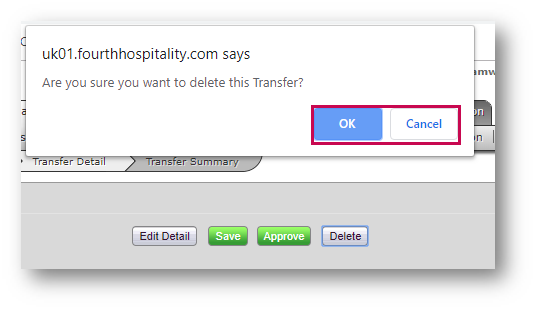
Fig.21 – Delete Transfer Prompt
Searching for Account Transfers
- To search in the Stock Management tab, choose Other Accounts in the Approved tab
- Prior to pressing the ‘Search’ button, the Transfer locations can be entered in the From and To fields and a Date From and Date To range may be entered
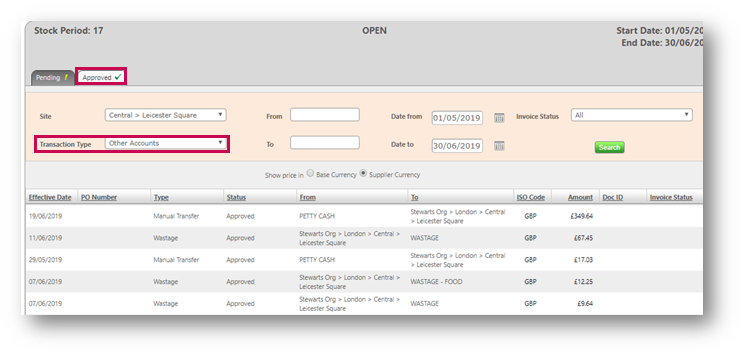
Fig.22 – Approved Account Transfer Search
- To search for a pending Account Transfer, select Site Transfer in the Pending tab
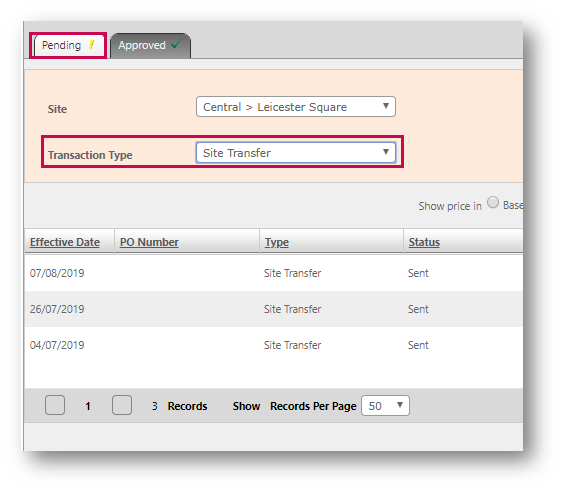
Fig.23 – Pending Account Transfer Search
Effect of Account Transfers on Cost of Sales
When setting up accounts for transfers, they can be set up to affect or not affect the Cost of Sales calculation. This is configured by an Administrator.
- In the Setup tab, select All Options and then Account Admin
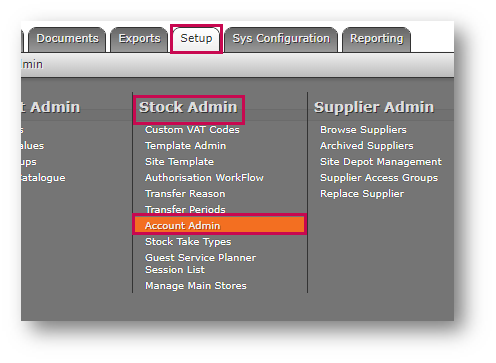
Fig.24 – Account Admin Option
- Select the required Account
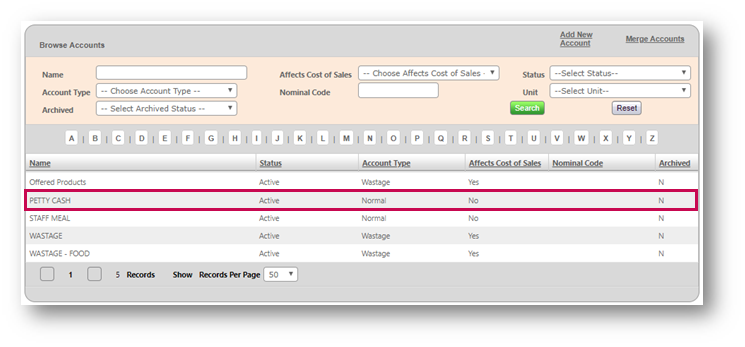
Fig.25 – Account Search
- Select if the account is to affect Cost of Sales by selecting the Affects Cost of Sales tick box
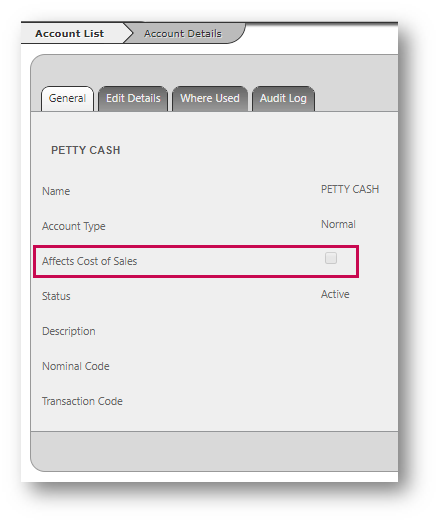
Fig.26 – Account Details – Affect Cost of Sales

Comments
Please sign in to leave a comment.