
Overview
Images can be added to any product within the Property database. Multiple images can be applied to a product and different images can even be applied to each detail.
How to Add an Image
The user should log in to where Products are managed. This will be at the Property level unless a Central Purchasing property exists.
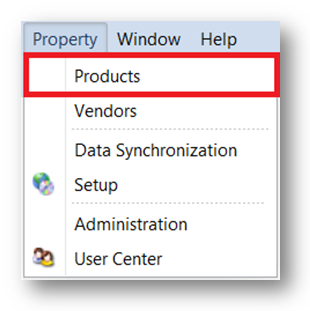
Fig.1 - Selecting the Products tab
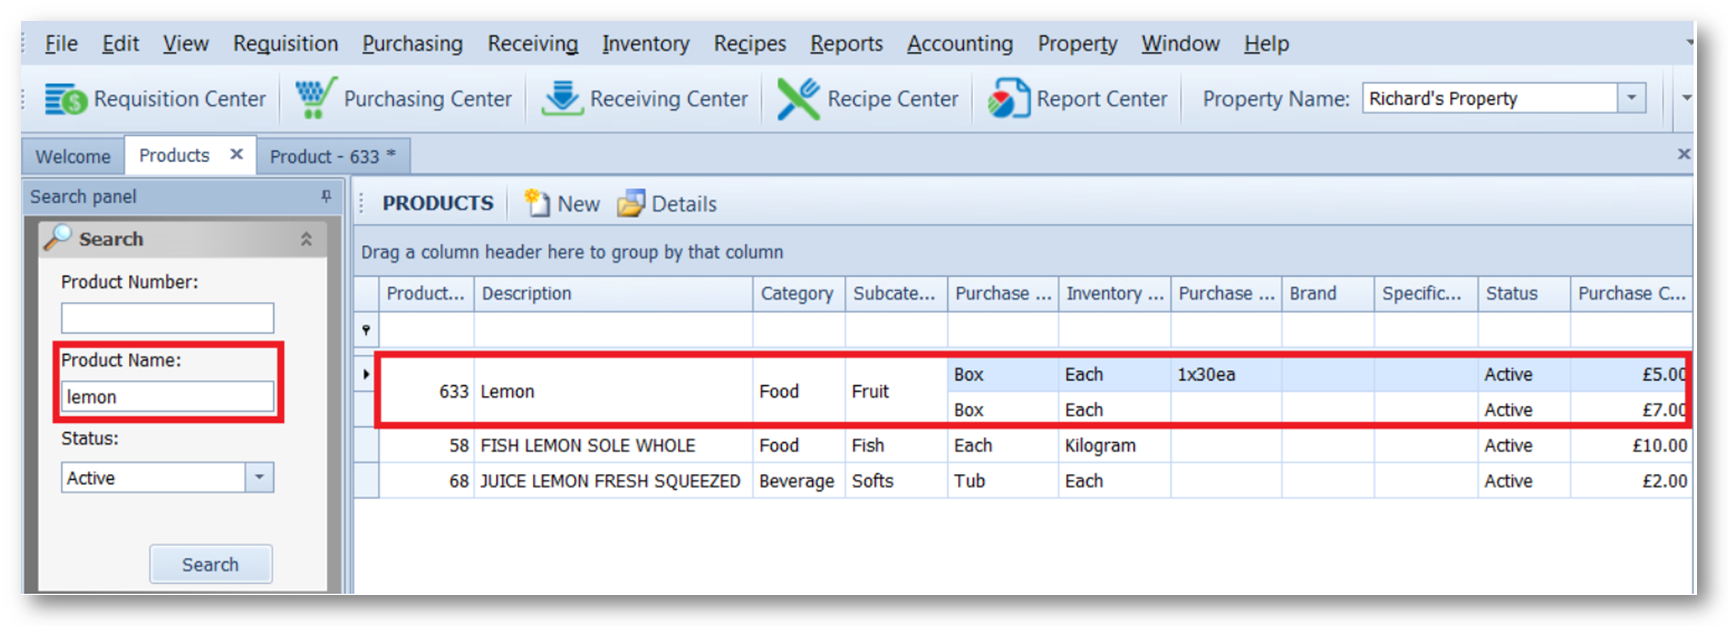
Fig.2 - The Products tab
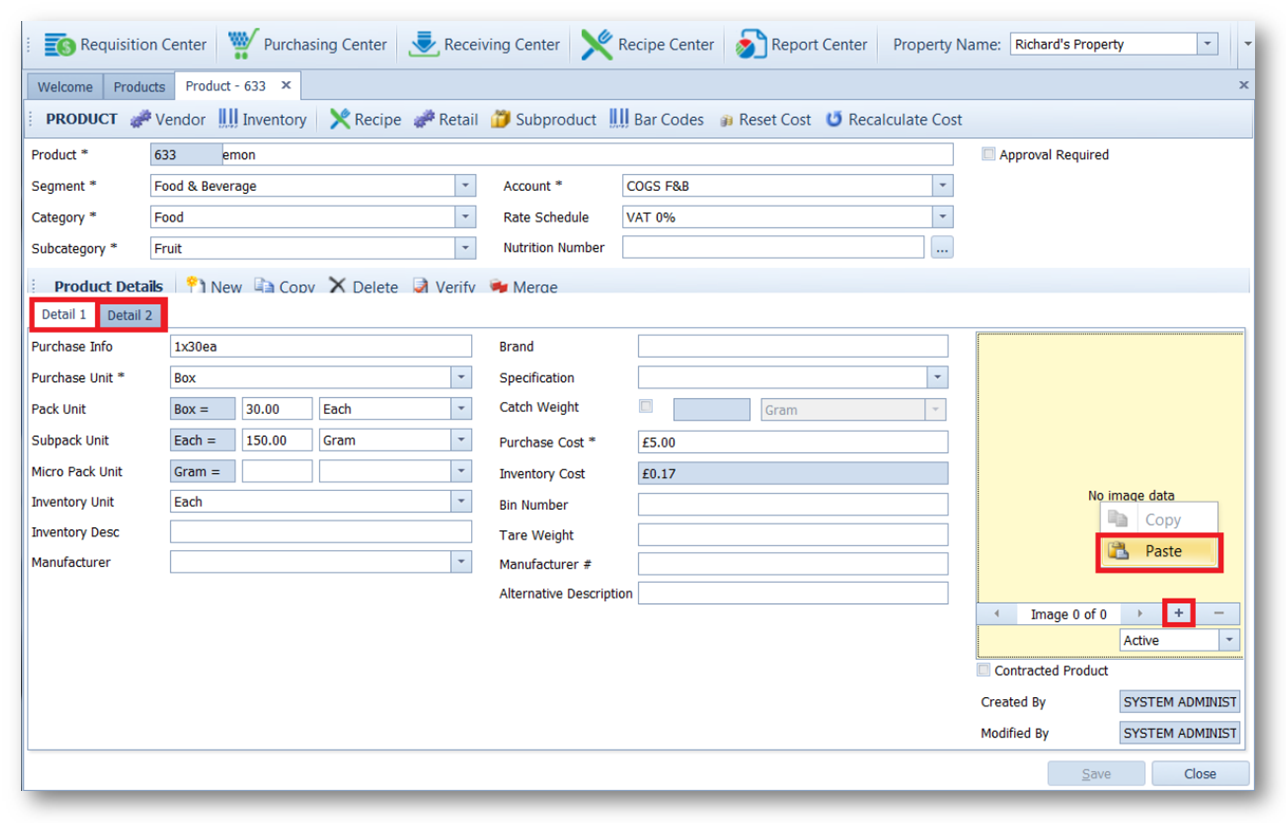
Fig.3 - Specific product tab with + and Paste buttons highlighted
To upload the image, choose the detail which the image is to be attached to. There are two ways to add an image:
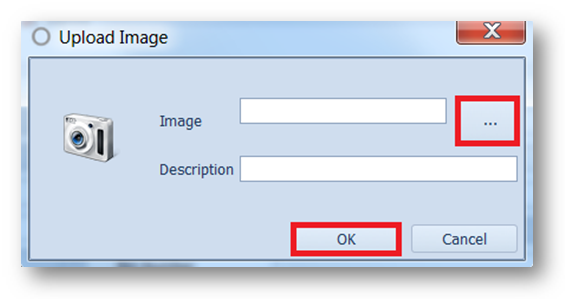
Fig.4- The Upload Image pop-up window with browse and OK buttons highlighted
Images can be added to any product within the Property database. Multiple images can be applied to a product and different images can even be applied to each detail.
How to Add an Image
The user should log in to where Products are managed. This will be at the Property level unless a Central Purchasing property exists.
- From the home screen move to Property > Products (Fig.1)
Fig.1 - Selecting the Products tab
- In the Products tab, search for the product using the search box on the right, (Fig.2). Alternatively an image can be added when initially creating the product
Fig.2 - The Products tab
- Use the Details tab or double-click on the product to which the image is to be added so that the specific product tab is opened (Fig.3)
Fig.3 - Specific product tab with + and Paste buttons highlighted
To upload the image, choose the detail which the image is to be attached to. There are two ways to add an image:
- The first is to simply copy the desired image and then, when on the image pane, right-click and choose Paste
- Alternatively, use the + button. This will open a pop-up window (Fig.4)
Fig.4- The Upload Image pop-up window with browse and OK buttons highlighted
- Use the ... button to browse for the image
- Select the image and use the OK button
- Once the desired images have been added, Save the product
Comments
Please sign in to leave a comment.