Overview
A Project is a planned set of interrelated tasks to be executed over a fixed period within certain costs and limitations. The project can be a Hotel renovation or a pre-opening project that has products listed, costs, dates, lead times, and more. A Project can also be used to create Purchase Requisitions.
Creating a Project
- To open the Project Center screen, go to Purchasing > Project > Project Center
- If editing an existing Project, use Search to find the project, as per Fig.1
- Select Details or double-click the Project to open it
- To create a new Project, select New, as per Fig.1

Fig.1 - Editing or Creating a Project
Project Header
-
When the 'New Project' screen opens, enter all required fields (denoted by an asterisk*), as per Fig.2 & Fig.2-1:
- Project Name
- Project Type
- Outlet Name
- Start Date
- End Date

Fig.2 - Project Header fields (part 1)
- Project Manager
- Budget Tolerance
- Notification Threshold
- Notification Contact

Fig.2-1 - Project Header fields (part 2)
Project Header fields:
| Field | Description |
| Project Number | Sequentially assigned number by the system when the Project is created. |
| Project Name* |
A short text entered field describing the Project.
|
| Project Type |
|
| Default Account |
|
| Project Reference |
|
| Single Outlet |
Please Note: When not enabled, users will need to right click on Products to assign the Outlet and quantities for each individual project in Outlet Details. |
| Allow All Products |
|
| Outlet Name |
|
| Start Date* |
|
| End Date* |
|
| Status |
Displays the current status of the Project as either:
|
| Project Cost | Will display the total of the Extended Cost of all products in the Project. |
| Project Rates | Will display the total of the Rate Schedule of all products in the Project, if the rate schedule is applied to the product in the Product Details screen (Property > Products). |
| Project Contingencies |
|
| Budget | When a Purchase Order or Purchase Requisition is created and the Project list selects the Project, the budget will then be updated and reflected in Project reports. |
| Project Manager* |
|
| Budget Tolerance* |
|
| Notification Threshold* |
Budget x Notification Threshold > Purchase Requisition or Purchase Order Total
|
| Notification Contact* |
|
| Comments |
|
| Created By | Displays the name of the user who created the Project. This field is populated by the system after the Project is saved initially. |
| Created Date | Displays the date the Project was created. This field is populated by the system after the Project is saved initially. |
| Modified By | Displays the name of the user who last modified the Project. This field is populated by the System after the second saving of the Project and each subsequent saving. |
| Modified Date | Displays the date and time the Project was modified. This field is populated by the system after the second saving of the Project and each subsequent saving. |
Project Products
This section will show how to add products to the project, and explain product fields.
Please Note: The 'Project Products' section is not available when the flag 'Allow All Products' is enabled.
- Select Add Product to open the 'Product Search' screen
- In the Item Search window, enter criteria as needed in the corresponding fields (Product Number, Product Description, etc...) and select Search

Fig.3 - Product Search screen
-
Use OK to add the selected product(s) to the project, as per Fig.4

Fig.4 - Project Products screen (part 1)
- In the Quantity field, enter the needed quantity of the product. This is a required field as per Fig.4-1
- In the Project Category drop-down, select the correct Category for the product. This is a required field as per Fig.4-1
- Project Categories can be created in Property > Setup > Category > Project
- Save

Fig.4-1 - Project Products screen (part 2)
Project Products fields:
| Field | Description |
| Product Number | Displays the Purchasing & Inventory Product Number. |
| Product Description | Displays the Purchasing & Inventory Product Description. |
| Unit Selection |
Displays information from the Product Details screen as follows:
|
| Purchase Unit | Displays the Purchase Unit (i.e. Bottle, Case, Packs, etc.) from the Product Details screen. |
| Account Number |
Displays the Account of the product being used in the Project.
|
| Need By Date |
User-entered field (specific date) used to calculate the Delivery Date when using the Create Requisitions function from the Project screen. Calculation - Need By Date - Lead Time = Requisition Delivery Date
|
| Rate Schedule | Displays the Rate Schedule, if available, as per the Product Details screen. This field can be edited if need be. |
| Quantity* | In the Quantity box, enter the Quantity of the product that is needed for the Project. Please Note: When Single Outlet and Allow All Products is not enabled, right click a product and select Outlet Details to assign quantities per Outlet, adding additional Outlets and quantities as needed. |
| Price | Displays the Purchase Price of the product as seen in the Product Details screen. This field can be edited as needed. |
| Extended Cost |
Displays the Extended Cost of the product. Calculation - Quantity x Price = Extended Cost
|
| Vendor |
|
| Assigned To | In the Assigned To drop-down, a user can be entered to a specific product for informational purposes. This field is not reported in Reports. |
| Project Category* |
|
| Purchase Info | Displays information of the Purchase Info field from the Product Details screen. |
| Attributes | Displays the information of the Value field of the Retail Attribute function in the Product Details screen, if enabled. |
| Attachment |
This field will display the paperclip icon if there is an attachment for the Product. To view or add an Attachment:
|
-
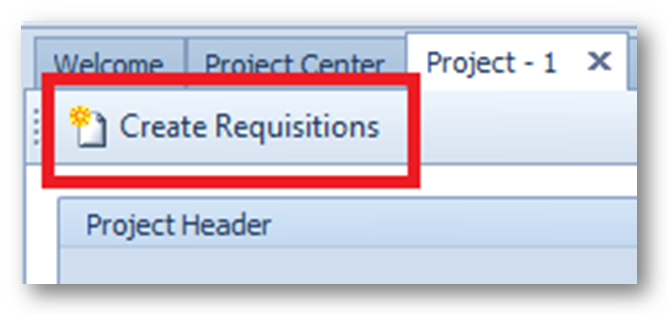
To create Purchase Requisitions from with a project, select Create Requisitions, as per Fig.5
The system will create purchase requisitions based on the products in the project and the entered Need By Date and Lead Time. As needed, notifications will be sent as well.

Fig.5 - Create Requisitions button
Using Purchase Templates/Requisitions in a Project
Purchase Templates and Purchase Requisitions can be used to link to a Project and will be applied to budget figures. To assign a Purchase Template/Requisition to a project:
- Open the template or requisition in Template Center or Requisition Center, respectively
- Either edit an existing template/requisition or create a New one
Please Note: For more information on creating a Purchase Template or Purchase Requisition, refer to articles, Purchasing & Inventory - Creating a Purchase Requisiton Template or Purchasing & Inventory - Creating a Purchase Requisition
-
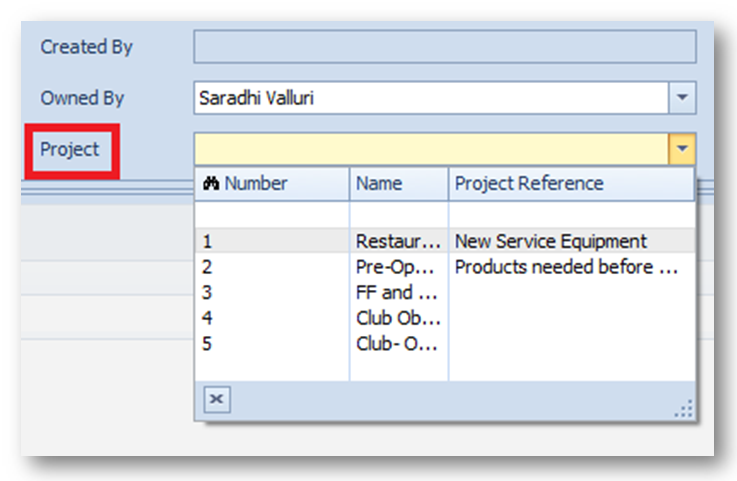
In the Project drop-down for either the Template or Requisition, select the correct Project as per Fig.6
Please Note: Only Active projects where the requisition delivery date is within the Project Start and End Dates will be available to select in the Project drop-down.
-
Finish the rest of the template/requisition, and Save

Fig.6 - Template details to link a Project
Please Note: If products in the Template or Requisition do not match the products in the Project, unless all products are allowed, the system will not allow the Template or Requisition to be saved, showing a red X, with the following bubble message, "The product is not in the project product list.", as per Fig.7.

Fig.7 - Incorrect product in Purchase Requisition for a Project
Please Note: The Template function, as per Fig.4, in the Project Products section, can be found in the Purchasing & Inventory - Using the Project Template Center article.
Project Name on Purchase Order
If a Purchase Order (PO) is associated with a capital project the name of the project will be shown on the printed PO (or the PDF PO which is emailed to vendors).

Fig.8 – Project Name shown in a PDF Purchase Order
Also See
Purchasing & Inventory - Project Report
Purchasing & Inventory - Project Listing Report
Purchasing & Inventory - Project Order Status Report
Purchasing & Inventory - Project Procurement Planning Report

Comments
Please sign in to leave a comment.