Overview
Within Adaco (formerly Purchasing & Inventory), approval routes are used for a number of tasks within the application to ensure actions are sanctioned by the designated users. Approvals are used for Requisitions, Recipes Creation, Projects Creation, Quotations, [Manual] Invoice Approval, Vendor Creation, and Product Creation. Once the configuration has been made to enable routing for the action, a route must be created so that it can be selected during the chosen action.
Creating an Approval Route
- Go to Property > Setup
- From the left-side menu, select Routing > Route Builder
- Select New, as per Fig.1 and then select the type of Route required

Fig.1 - Creating a new Approval Route
A pop-up window will open, displaying the names of the users who have been given 'Approver' access at the top - see Fig.2.
- Enter a name for the route in the Route Name field - this will enable users to select the correct route should there be multiple options available to them
- Select a user/users from the top list and then use the Add button to assign them to the new route

Fig.2 - Route Builder pop-up
Once a user has been added to the route, a role needs to be selected for them.
- For an added user, select the blank area in the Role column to activate the Role drop-down
If the user has been assigned multiple roles (Review, Approve or Final Approve), all will be displayed. This allows users to have different roles in different routes. See Fig.3.
Please note: Every route must have a Final Approver within the route at a minimum.
- Finally, select Save and the route is complete and ready to use
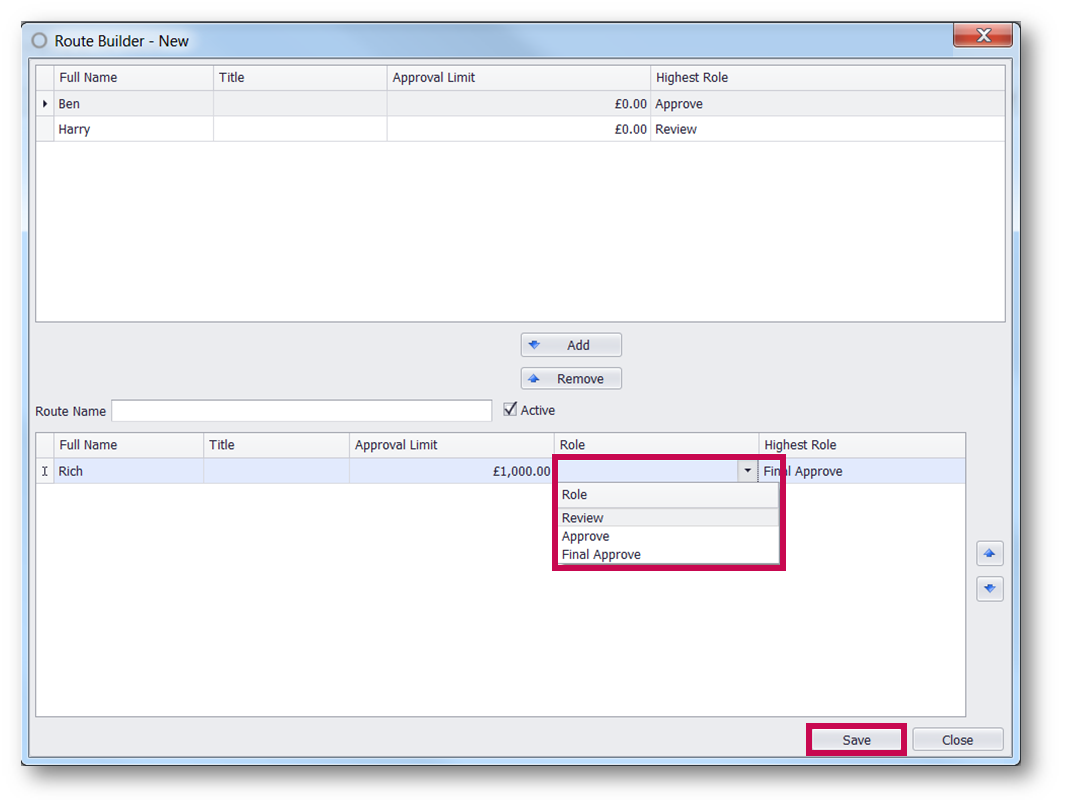
Fig.3 - User Name Selection
Giving Users Approver Access
An Approver is an individual in the route who needs to authorize the Requisition (or Invoice, Recipe, Project or Product) prior to it being converted into a Purchase Order.
A Final Approver must be the last person in the approval route, and when they approve the Requisition, Invoice, etc., then it will be ready to be converted into a Purchase Order either by the system or manually.
There can be multiple Final Approvers set up in an approval route, and using their approval limits, tiered Final Approvers can be set up. For example:
User 1 - £1000 approval limit. Any Requisitions, Invoices, etc. for less than £1000 can be approved.
User 2 - £50,000 approval limit. Any Requisitions, Invoices, etc. for over £1000 will be approved by User 1, and then need to be approved by User 2.
Please be aware that:
- Requisitions look at only the $ of items that require approval (as you know & others have confirmed)
- Invoices look at the total $
- Vendors, Products, Recipes ignore $
To set up users with Approver Access:
- Go to Property > User Centre
- Double-click the required user and then, from the pop-up that opens, tick the Reviewer, Approver, and/or Final Approver boxes as appropriate
- If Final Approver is chosen, the Approval Limit field becomes active and a monetary amount must be entered. This amount is used in Requisitions, Invoices, etc. as the total to which a user can approve in a single task.
Approval Groups
Within Approval Groups, multiple users can be assigned into these groups. This means that when an item requires review, approval or final approval, it can be actioned by any user who is assigned to this User Group.
- There is a new menu item under Property Setup > User Groups titled Approval Groups. Within this section, listings of all available Approval Groups are displayed, with the option to Create New or Edit existing groups
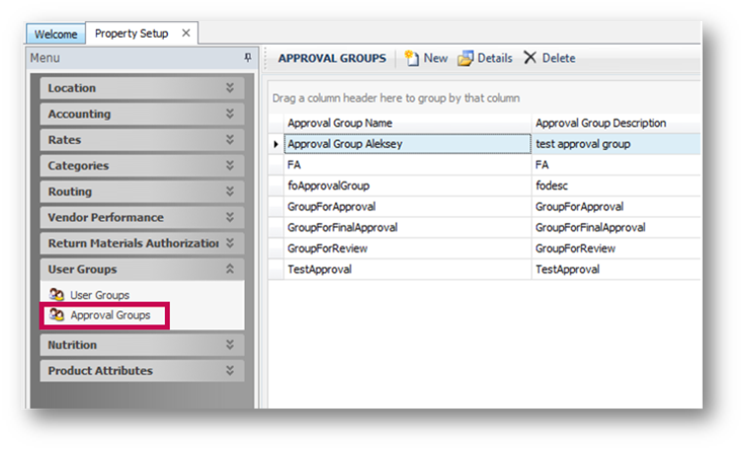
Fig.4 - New Menu Item for Approval Groups
When creating an Approval Group, the process is similar to the existing User Groups functionality, with additional fields for the action(s) which the Group can complete.
- Select whether the Group will have access to Review, Approve and / or Final Approve
- Set a Group Name, which should be unique
- Add an Approval Limit
- Use the Add and Delete buttons to add and remove users to the Group as required
Please Note: An Approval Group cannot be deleted if it is part of any Route.
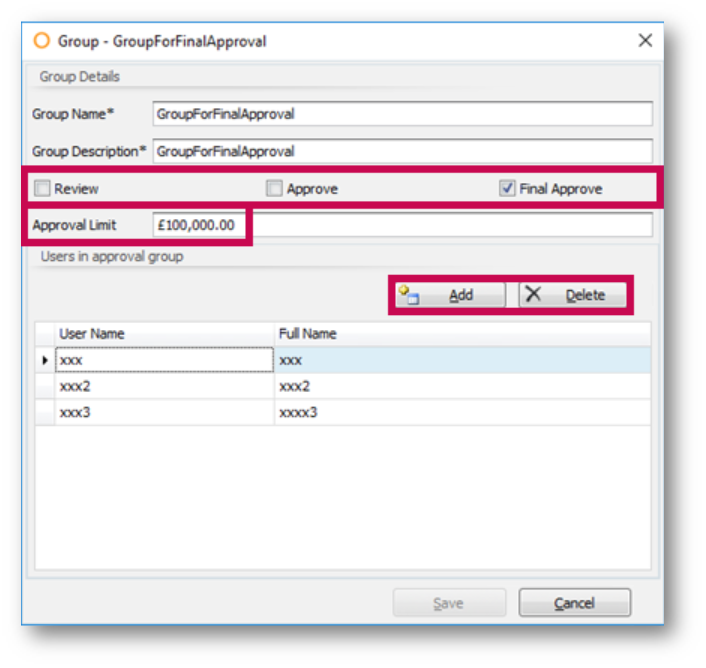
Fig.5 - Approval Groups Edit Screen
When adding a user, a User Search page will display for ease of filtering users by the following fields:
- Full Name
- Title
- User Group
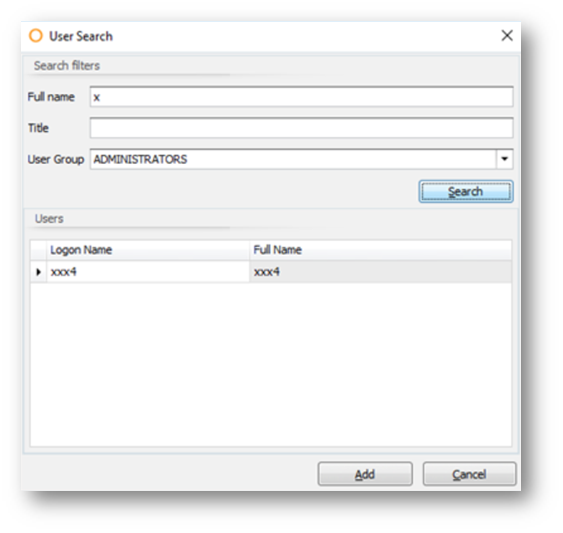
Fig.6 - User Search Screen
Within the 'Add User' screen, there is a User Approval Groups tab where users can be assigned to Approval Groups.
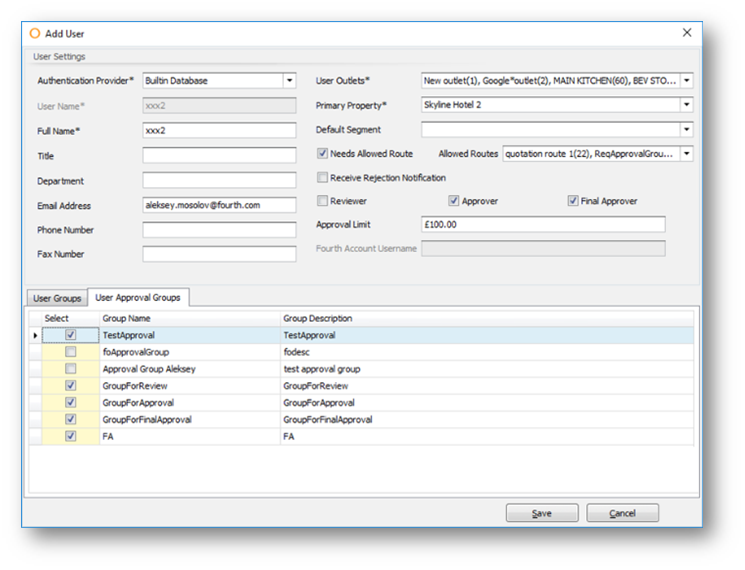
Fig.7 - User Approval Groups Tab
- Within the Route Builder screen, select either an Approval Group to accommodate a group of people for specifically assigned roles or individual Users
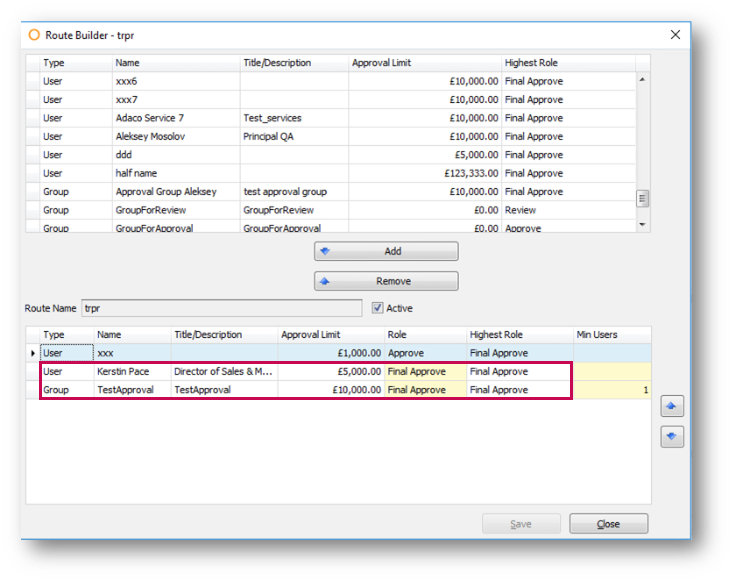
Fig.8 - Route Builder Assigning User Groups or Individuals
For example, the role 'Final Approver' which contains User A and User B is assigned to Approve, therefore, both users will receive the notification and can approve the Requisition, Invoice, etc.
If there are no users added to an Approval Group, this group will not be listed.
- The Min Users column can be edited to set a minimum number of users which should complete a specific action within the Approval Route
Please Note: If the number entered in the Min Users column is greater than the number of users in the Approval Group, an error message will display after Save is selected (see Fig.9).
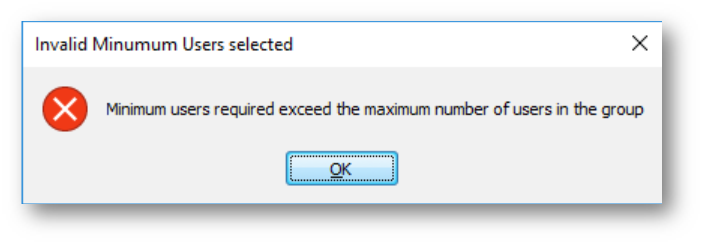
Fig.9 - Error Message
The highest action which a user from an Approval Group can complete is taken from the Approval Group setup. An Approval Limit will be taken from the Approval Group and not individual users.
When a document is submitted for Approval and the next step in the route is for an Approval Group, all users within this group will receive an email notification to advise that a document needs to be actioned.
Whenever the minimum required threshold of users for completing an action for the document is reached, the remaining users in the group will receive a notification that no further actions are required.

Comments
Please sign in to leave a comment.