
Overview
An Outlet’s guide represents the list of all products and recipes, which are used in an Outlet. Products are grouped by category or by location, dependent on an Outlet’s setup. There is a guide for a Category Outlet in the system and a separate guide for a Location Outlet in each location.
Purpose of Outlet Guides
The guides are used for the following purposes:
- The guide keeps the list of all the Outlets' products and allows a user to assign a different account for a product than its original. This way, costs for the same product on different accounts in different Outlets, can be accounted for
- The guide manages the list of products when a user creates a Purchase Requisition template. This way, when creating a Purchase Requisition a user selects products that are available on the Outlet’s guide and not from all products in the system
- The guide allows assigning for a product par and reordering values, which are used in the Reorder report.
A product (or recipe) is automatically added to an Outlet's guide after any action that creates stock in the Outlet, namely:
- A product is added to an Outlet's guide after a Purchase Order is created and received
- A product or a recipe is added to an Outlet's guide after an Outlet requisition is created and posted (where this Outlet is the ordering Outlet)
- A product or a recipe is added to an Outlet's guide after a transfer is created and posted (where this Outlet is the ordering Outlet)
- A product or a recipe is added to an Outlet's guide after an inventory adjustment operation at Inventory > Inventory Adjustment
- A product or a recipe can be added to an Outlet's guide manually on the Guide Details screen
- Guides can only be managed at Property level
- To access, go to Inventory > Maintain Guides
Different Types of Outlets in Guides
Category Outlet is an Outlet where the products are stored according to the categories they belong to. For example wines, spirits, or juice.
Location Outlet is an Outlet where the products are stored according to their location. For example, products may be stored in different refrigerators with each fridge having a number assigned.
For more information on setting up different types of Outlets please see Adaco - Property Setup
Adding/Removing Products on the Guide
On the Guide Details screen, it is possible to view details of products on the Guide currently, as well as to add or remove them.
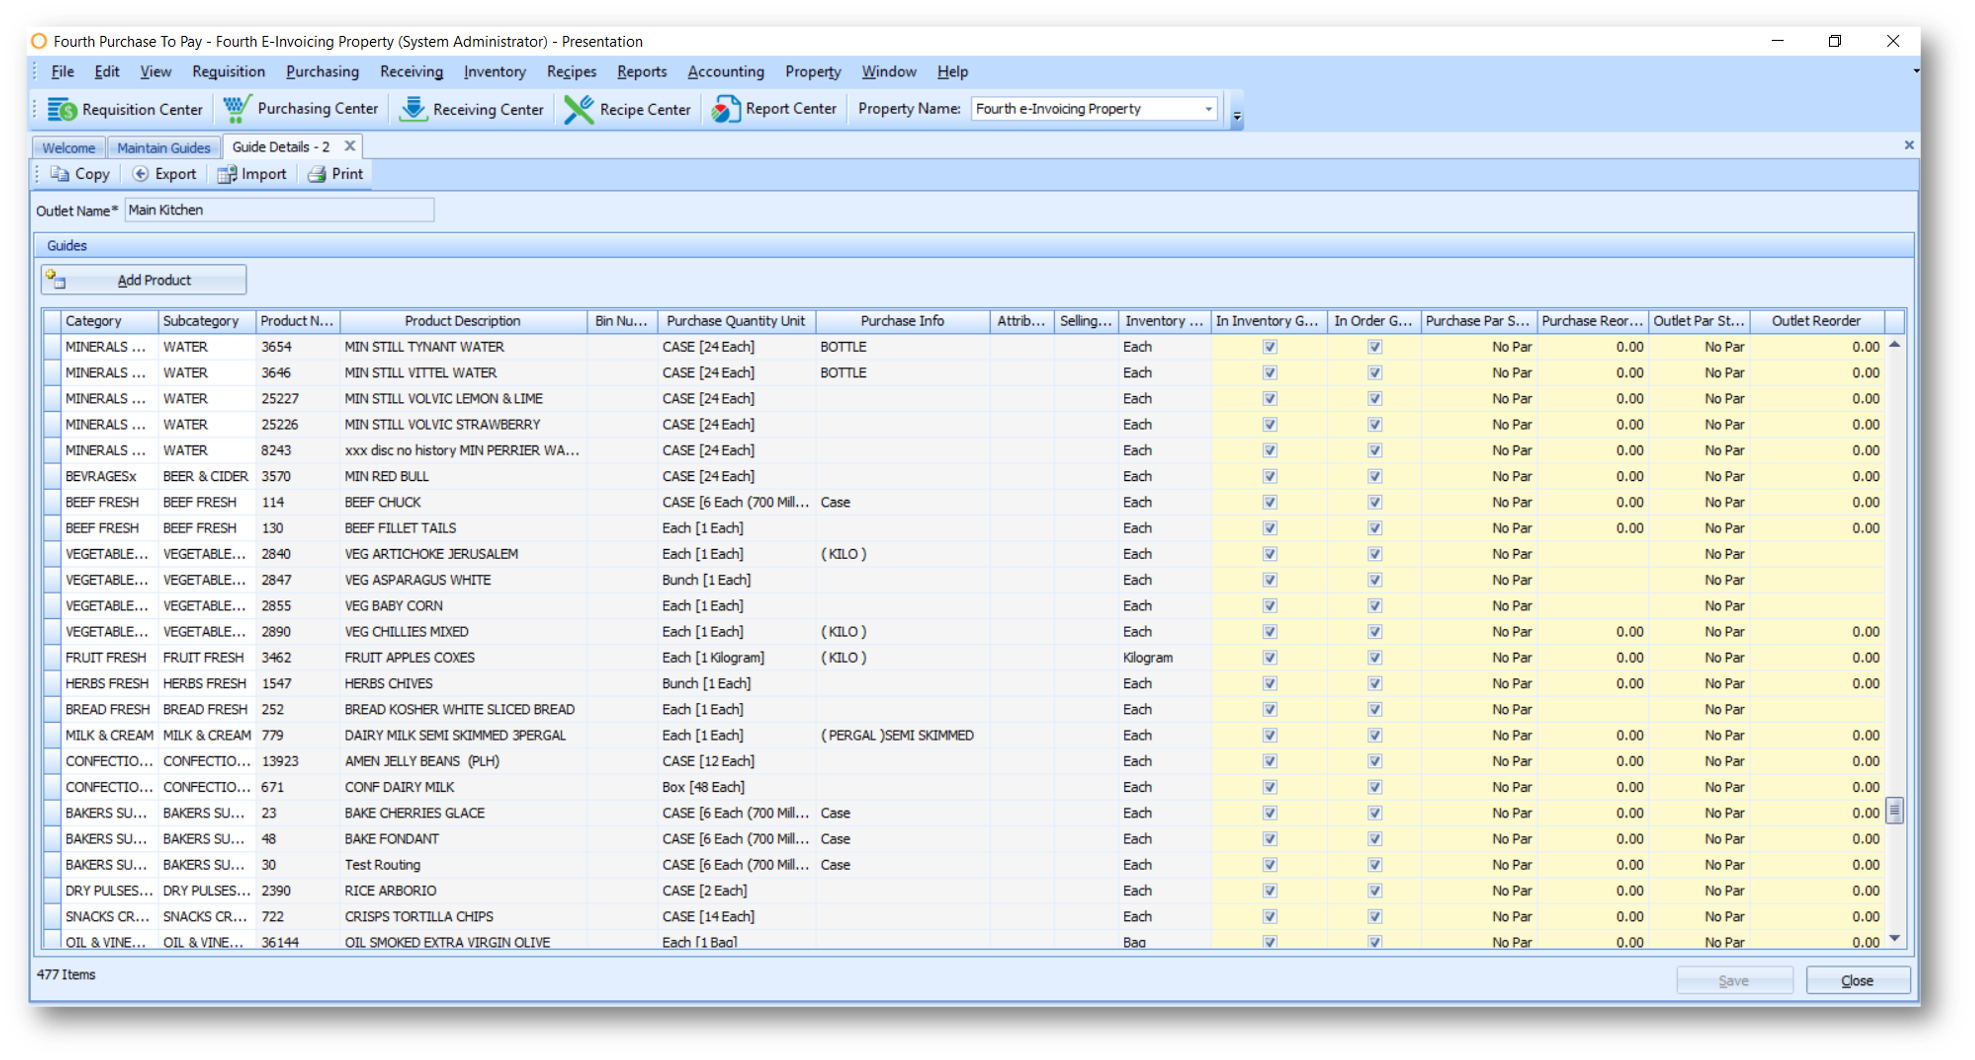
Fig.1 - Guide Details Screen
Table.1 - Toolbar
|
Field name |
Description |
|
Copy |
Copies the Guide from the current Outlet to another Outlet. This will overwrite any products already in the destination Guide |
|
Export |
Exports the Guide as an Excel file |
|
Import |
Imports the Guide from an Excel file |
|
|
Prints the list of products and recipes as a report |
|
Outlet Name |
The name of the Outlet Guide that is currently being managed |
|
Location Name* |
If the Guide that is being managed is for a location within an Outlet, the Location Name will display beneath the Outlet Name. |
- To add a product, select Add Product and locate the Product using the Search dialog box, as shown in Fig.2
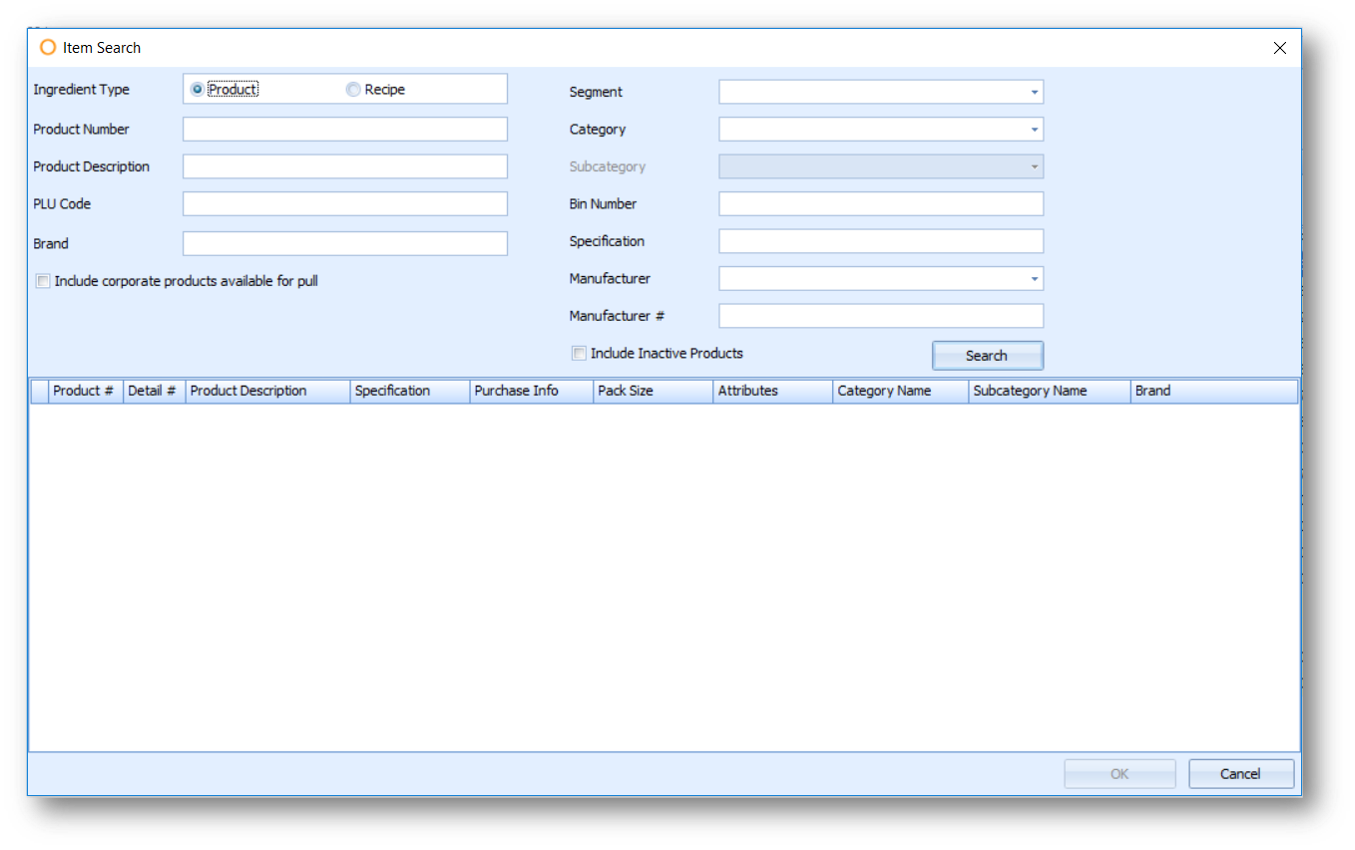
Fig.2 - Item Search Box
It is possible to search for both products and recipes. There is also an option to include inactive products if those products have been unlisted from Ordering, but remain in Inventory.
Removing a Product
Products can be removed/adjusted on a guide in three stages
- Untick In Inventory Guide

Fig.3 – Unticking ‘In Inventory Guide’
By unticking the In Inventory Guide box against the product/recipe, it will no longer appear in the inventory sheets. This is a good way to manage the inventory sheets so that only products that need to be counted appear on the list.
- Untick In Order Guide

Fig.4 – Unticking ‘In Order Guide’
By unticking the In Order Guide the product/recipe will no longer be able to be added to templates. But as long as In Inventory Guide is still ticked the team will be able to count stock. Therefore, if a product is being phased out, yet there is still stock of the product:
- Untick In Order Guide so it cannot be ordered
- Leave In Inventory Guide so that any remaining stock can still be counted. This can be managed by the Outlet
If a product/recipe should be removed entirely then:
- Right-click on the line, and select delete
If this product is received, posted on an Outlet Requisition, or transferred to this Outlet in the future, then the product will once again appear on the guide.
Sequence of Products on the Guide
The first columns of the guide will differ between those Outlets configured through Location Guide Sequence, and those set up through Category Guide Sequence.
In location-based Outlets, the first column will be the Sequence Number, which determines the order of the products in the Guide. This can be renumbered to reorder the products in the guide.
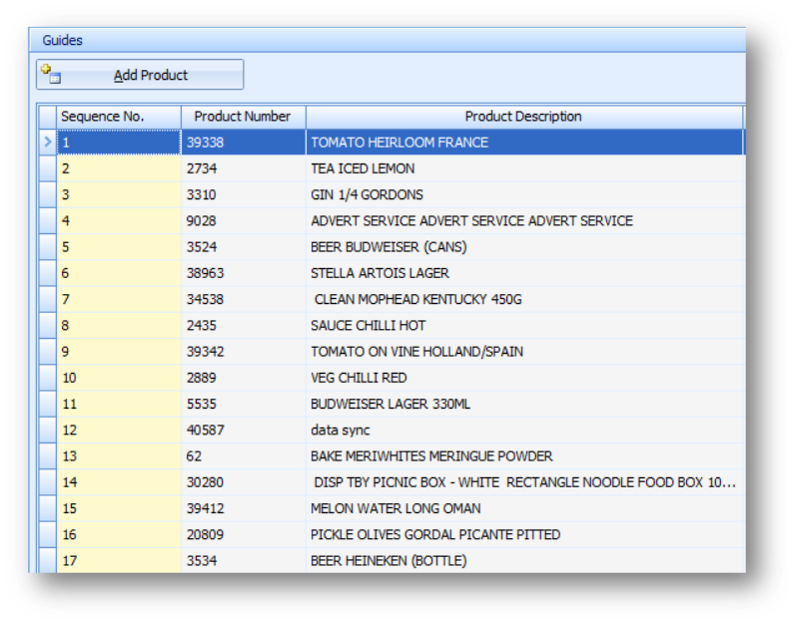
Fig.5 - Sequencing Options for Location Outlets
In Category-based Outlets, the first two columns list the Category and Subcategory of the product as defined in the Product Master. For all lines, the products are listed by Category number and then Subcategory number in ascending order.
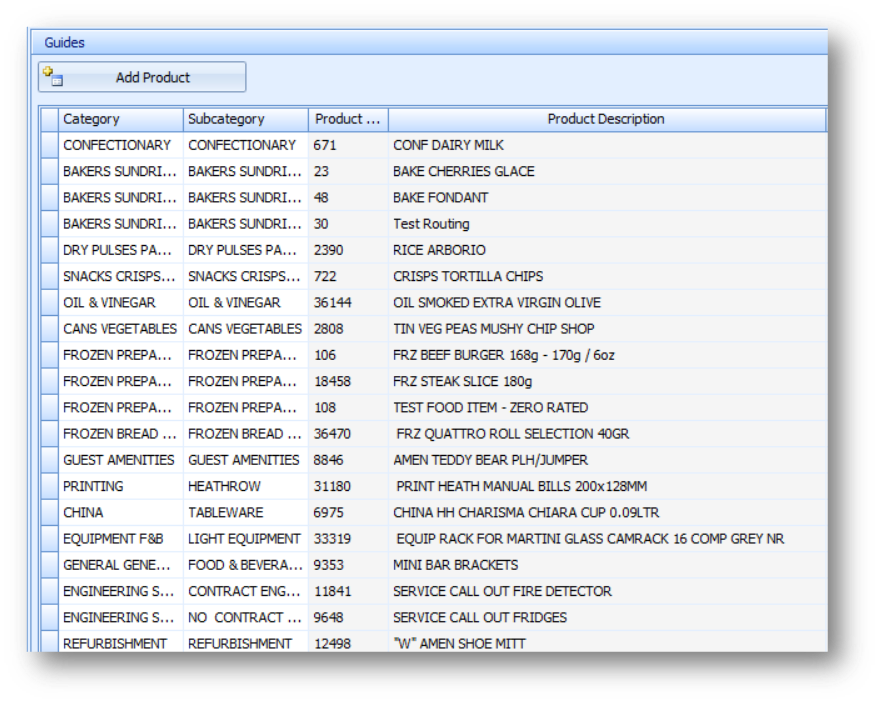
Fig.6 - Sequencing Definition for Category Outlets
The remaining columns of the Guide are explained below:
Table.2 - Guide fields explained
|
Product Number |
The number of a product or a recipe |
|
Product Description |
The description of a product or a recipe name |
|
Bin Number |
Displays the Bin Number assigned to a product (if any) |
|
Purchase Quantity Unit |
This field displays the purchase quantity unit for product or serving size for a Recipe |
|
Purchase Info |
This column displays the purchase information specified on the Product Details screen (this field is empty for a recipe) |
|
Attributes |
Attributes are additional characteristics defined for retail products on the Product Detail screen (Retail tab). For example, if the product is a T-shirt, a first attribute 'size' can be created with the values S, M, L, and XL, as well as a second attribute 'colour' with the values white, green, grey, pink |
|
Selling Unit |
Displays the selling unit assigned to the Product Details |
|
Inventory Unit |
Displays the inventory unit selected for the product on the Product Details screen or portion size for a recipe |
|
In Inventory Guide |
Indicates whether a product or a recipe is included to the Inventory guide |
|
In Order Guide |
Indicates whether a product or a recipe is included in the Order Guide |
|
Purchase Par Stock |
Displays the recommended stock of the product in this Outlet (this value can be changed by a user). Par stock is used in the Purchase Reorder report |
|
Purchase Reorder |
Displays the minimum stock of the product in this Outlet (this value can be changed by a user). Reorder is used in the Purchase Reorder report |
|
Outlet Par Stock |
Displays Outlet par stock for the selected product |
|
Outlet Reorder |
Displays the minimum stock of the product in this Outlet |
|
Location |
Available for 'Location' Outlets only. Displays the name of the location assigned to the product |
|
Account |
Displays the account assigned to the current Product or a Recipe in this Outlet. This value can be changed by a user. The field is only available if the Enable GL Account option is selected at Property > Administration > Inventory |
Managing Par Levels in a Location Outlet
Par levels are associated with an Outlet, not a location. Therefore, when assigning a par level to a product in multiple locations the user must use the par level for the whole of the Outlet.
i.e. If stock is required in the following locations, then the total par required would be 10.
| Outlet | Location | Par |
| 1 | Aisle 1 Shelf 1 | 4 |
| 1 | Aisle 1 Shelf 2 | 4 |
| 1 | Aisle 5 Shelf 2 | 2 |
Total Par = 10


Fig.7 - Product in multiple locations
As shown in Fig.7 the product is shown in multiple locations each showing a par of 10, this par level is the total value for the item across all locations.
Account
The Account option is used if the account for that Outlet differs from the account that is used to purchase the product/recipe.
For example, bottled water in the Beverage Storeroom purchased using the Beverage Inventory/Beverage COS account would need to be changed to the Guest Supplies account if this product was used as an in-room amenity by housekeeping. This would mean that each time this product was used on a purchase or outlet requisition or transfer for housekeeping the product would be assigned the Guest Supplies account.
Only products/recipes that have different coding from the master product/recipe need to be adjusted otherwise the original account number will be used.
Comments
Please sign in to leave a comment.