
Purchasing & Inventory Mobile Fresh Installation – MC40/TC51/ET1 Jellybean
Introduction
This guide is for the installation of Purchasing & Inventory (formerly known as Adaco) Mobile and DataWedge configuration for the MC40, TC51, and ET1 Jellybean models.
The guide skips over basic setup such as enabling wi-fi, changing display settings, changing time settings, etc. See Purchasing & Inventory - Mobile / ET1 / MC40 / TC51 User Guide – Android 4.1 Jelly Bean for more detail on those topics.
The MC40 handheld device is used for scanning product barcodes and feeding the information into Purchasing & Inventory. This helps users to manage and maintain stock levels within the system.
This article may refer to 'Adaco' in places, which is the old product name for Purchasing & Inventory.
The Handheld Device
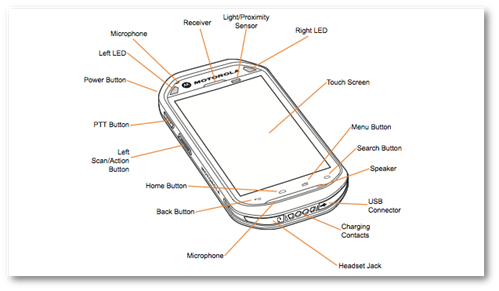
Fig.1 - Front-facing side of the MC40 device
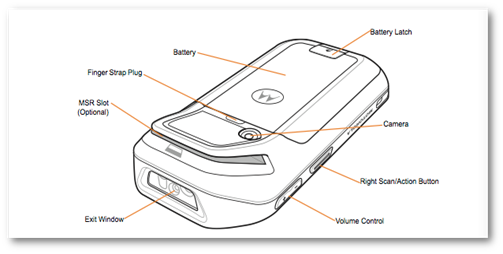
Fig.2 - Rear-facing side of the MC40 device
Downloading the Software
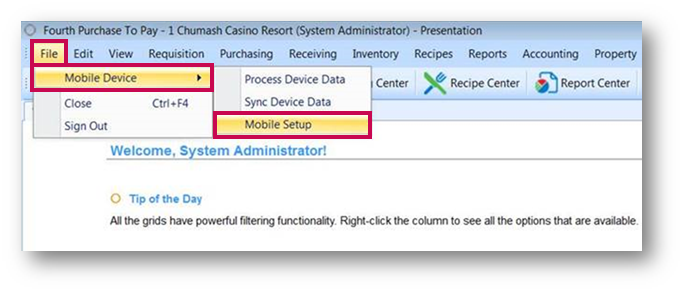
Fig.3 - Accessing Mobile Setup via Purchasing & Inventory
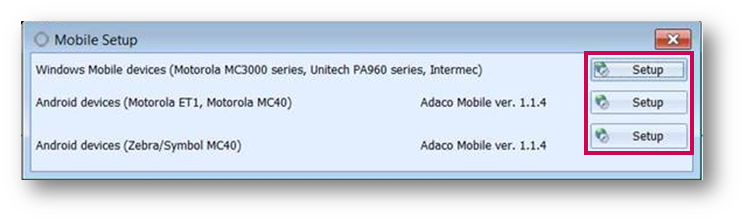
Fig.4 - Choosing a Setup option
Installing Purchasing & Inventory Mobile:
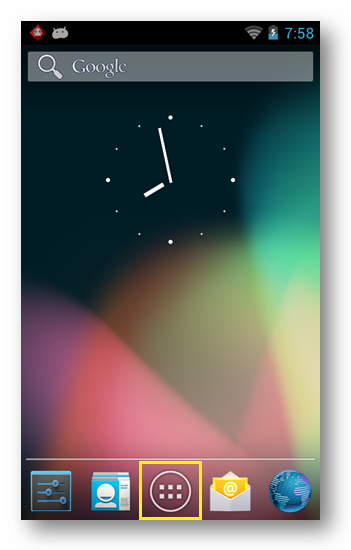
Fig.5 - The Applications button
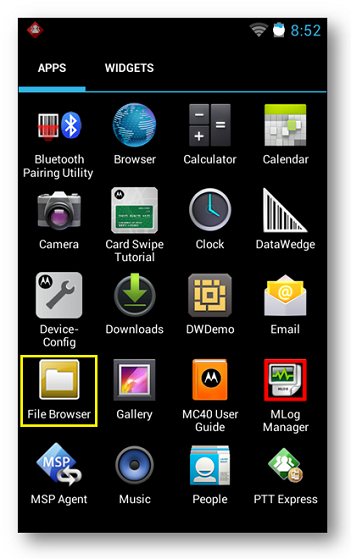
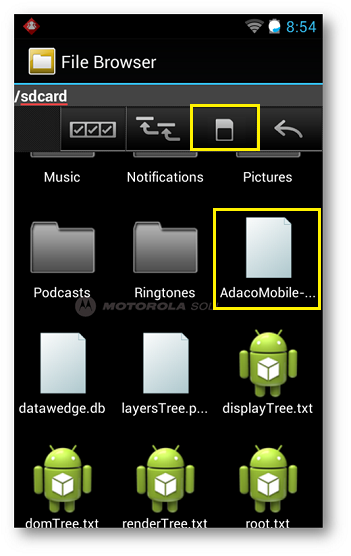
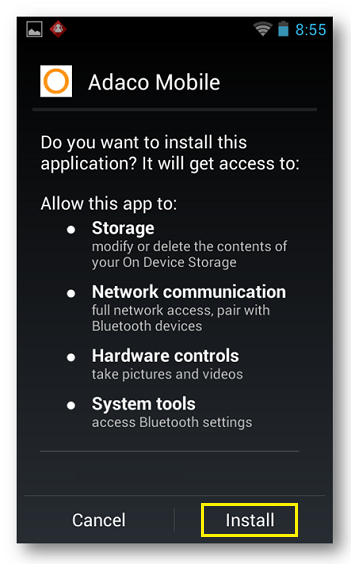
Fig.8 - The Install button
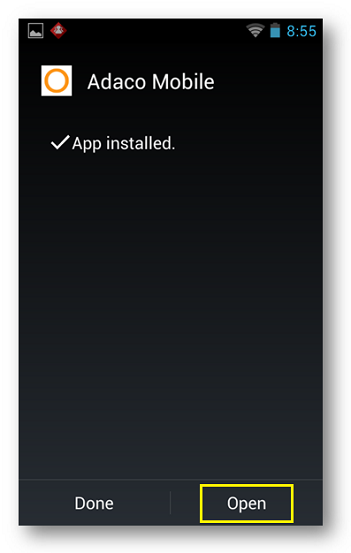
Fig.9 - "App installed" notification and the Open button
Configuring Adaco Mobile
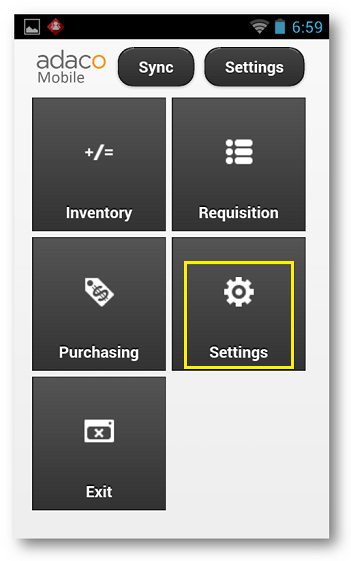
Fig.10 - The Settings button within Adaco Mobile
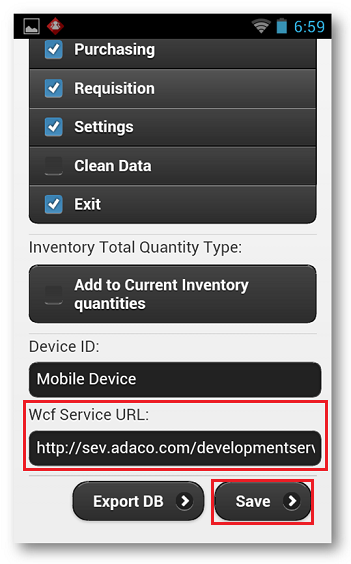
Fig.11 - The Wcf Service URL: field and Save button
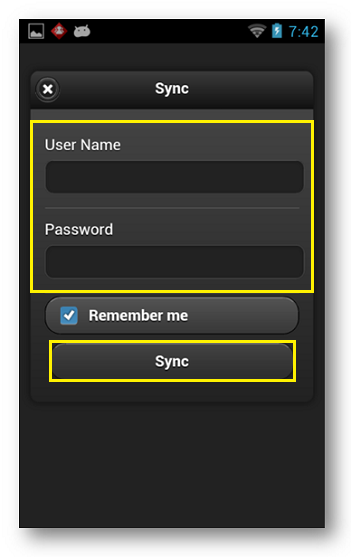
Fig.12 - User Name & Password fields and the Sync button on the main menu of Adaco Mobile
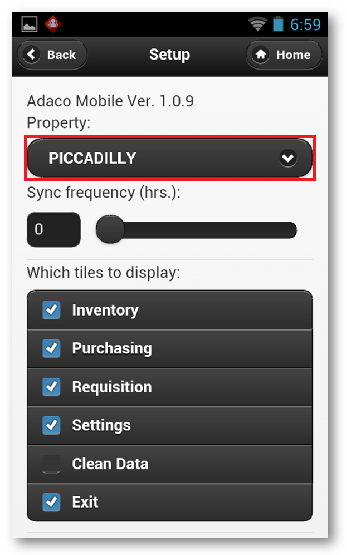
Fig.13 - Selecting a property from the drop-down
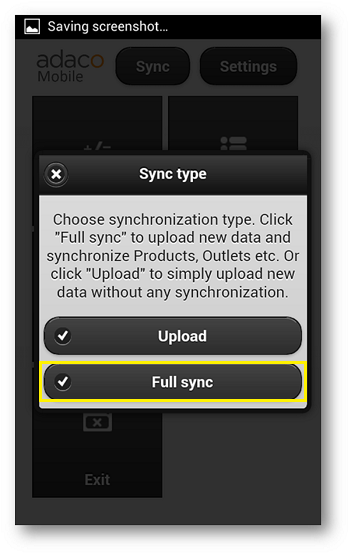
Fig.14 - The Full sync button
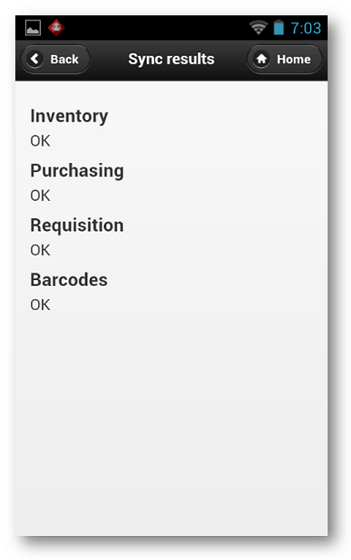
Fig.15 - Sync results, all showing OK
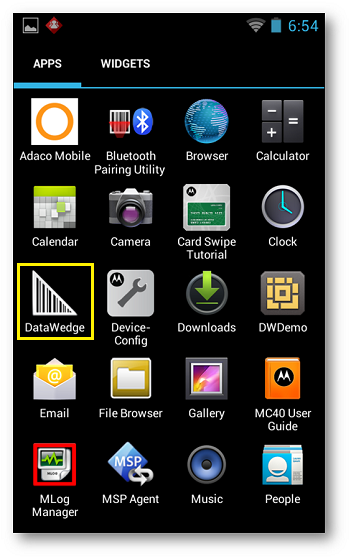
Fig.16 - The DataWedge button
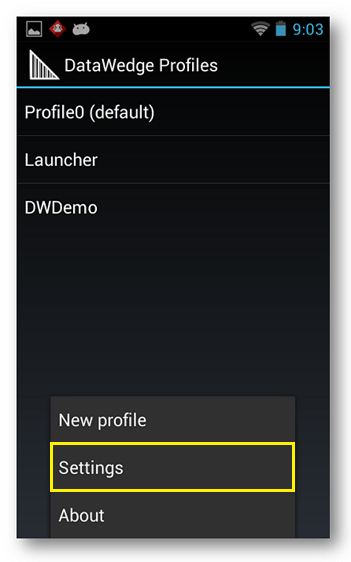
Fig. 17 - The Settings button in DataWedge Profiles

Fig.18 - The Import DataWedge configuration button and subsequent Import button
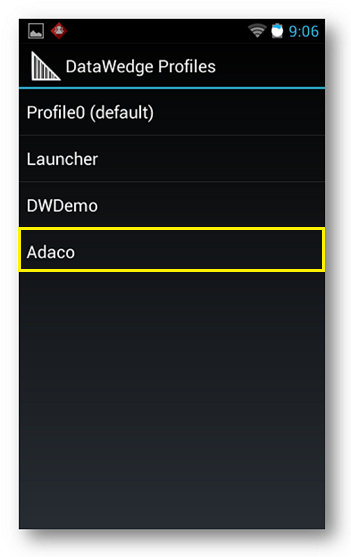
Fig.17 - The newly created Adaco profile
Introduction
This guide is for the installation of Purchasing & Inventory (formerly known as Adaco) Mobile and DataWedge configuration for the MC40, TC51, and ET1 Jellybean models.
The guide skips over basic setup such as enabling wi-fi, changing display settings, changing time settings, etc. See Purchasing & Inventory - Mobile / ET1 / MC40 / TC51 User Guide – Android 4.1 Jelly Bean for more detail on those topics.
The MC40 handheld device is used for scanning product barcodes and feeding the information into Purchasing & Inventory. This helps users to manage and maintain stock levels within the system.
This article may refer to 'Adaco' in places, which is the old product name for Purchasing & Inventory.
The Handheld Device
- Become familiar with the device (see Fig.1 & Fig.2)
Fig.1 - Front-facing side of the MC40 device
Fig.2 - Rear-facing side of the MC40 device
Downloading the Software
- Download the necessary software directly from Purchasing & Inventory via the following path - File > Mobile Device > Mobile Setup
Fig.3 - Accessing Mobile Setup via Purchasing & Inventory
- Select the appropriate Setup option (see Fig.4)
Fig.4 - Choosing a Setup option
- Select where on the computer to Save the files
- Secure the battery in the device and connect to the PC/laptop
- In Windows, open My Computer and select the device name from the left side, followed by On Device Storage
- Copy and paste the Data Wedge and the Purchasing and Inventory (Adaco) mobile files (downloaded and saved earlier) from the computer to the On Device Storage
Installing Purchasing & Inventory Mobile:
- From the main screen of the device, select Applications button (center button with the 6 squares)
Fig.5 - The Applications button
- Select File Browser
Fig.6 - The File Browser button
- Scroll down and select the AdacoMobile… file (whole file name may not appear)
Note: If the Adaco Mobile file is not listed at all, the screen may need to refresh (especially if the device is still connected to the computer, charging). Click the SD Card icon to refresh the File Browser.
Fig.7 - The AdacoMobile... file - full name not displaying - and SD Card icon for refreshing
- Select Install
Fig.8 - The Install button
- Once “App installed” displays, select Open to proceed to the next section
Fig.9 - "App installed" notification and the Open button
Configuring Adaco Mobile
- Open Adaco Mobile, either by selecting Open after the installation (Fig.9) or from the main screen by going to Applications > Adaco Mobile (should be in the upper left of the Applications menu)
- Select Settings
Fig.10 - The Settings button within Adaco Mobile
- Scroll down to the Wcf Service URL: field
- Here, enter the URL used to access Adaco, adding “service” to the end - no spaces, slashes, periods, etc
E.g., http://titan.adaco.com/companyname becomes http://titan.adaco.com/companynameservice
Fig.11 - The Wcf Service URL: field and Save button
- After verifying the URL is correctly entered, select Save
- On the main menu of Adaco Mobile, select Sync
- Enter Adaco user name and password and select Sync
(Please Note: Wi-fi must be enabled/connected and the device allowed on the network for this process to be successful).
Fig.12 - User Name & Password fields and the Sync button on the main menu of Adaco Mobile
A property will then need to be selected.
- Go back to Settings and make a selection from the Property drop-down menu
- Select Save
Even if the property is already selected/displayed, it is still necessary to select Save.
Fig.13 - Selecting a property from the drop-down
Another Sync will now be required. This time there will be a prompt for either "Upload" or "Full sync".
- This will be the first time the database is accessed so Full sync should be chosen
Fig.14 - The Full sync button
It may take a while to sync (please do not be alarmed – it takes about a minute per 1000 products, so 5000 products will be about 5 minutes; 30,000 products may take 30 minutes).
Once complete, a message will display which should have “OK” listed under all sections.
Once complete, a message will display which should have “OK” listed under all sections.
Fig.15 - Sync results, all showing OK
Now Adaco Mobile is ready. However, the DataWedge needs to be setup in order to properly scan and recognize barcodes.
Configuring DataWedge
- Press the Pentagon/House button (second button from left) on the device itself to quickly go back to the home screen
- Select the Applications button
- Now select DataWedge
Fig.16 - The DataWedge button
- Now press the Stacked Square button on the device itself (second from the right) to bring up a menu with additional options
- Select Settings
Fig. 17 - The Settings button in DataWedge Profiles
- Select - Import - Import DataWedge configuration
- Select Import again when prompted to “Import from…” (there is only one location: SD Card)
Fig.18 - The Import DataWedge configuration button and subsequent Import button
- Press the back arrow on the device itself (first on the left)
- There should now be a profile named Adaco – select this
Fig.17 - The newly created Adaco profile
- Scroll down to the section “Keystroke Output”
- Right under the section name, mark the checkbox next to Enabled
- Now scroll down further to the section “Intent Output”
- Make sure the Enabled box right under this section header is not checked.
It's advisable to change the scanner sound/ringtone as the default can be a bit long.
To do so:
To do so:
- While in the Adaco Profile as above, select Scan Params
- Select Decode Audio Feedback to choose a different ring tone
- Default is “Big Easy”. “Altair”, “Argon” are suggested alternatives. None are as long as "Big Easy"
A setting in the DataWedge configuration may need to be changed for barcodes to scan correctly.
- Go to Adaco Profile > Decoder params
- Click on Code39
- Mark Verify Check Digit
All of these menus auto-save, so just exit either by pressing the Back Arrow button repeatedly or the Pentagon/Home button once.
Scanning and Recording/Associating barcodes in Adaco Mobile should now be possible!
Scanning and Recording/Associating barcodes in Adaco Mobile should now be possible!
Comments
Please sign in to leave a comment.