Overview
TC51 Devices have to be set up in order to make them compatible with Fourth’s Purchase to Pay and Inventory platform.
This article describes the process of setting up TC51 Devices within Purchasing & Inventory to make them compatible.
TC51 Setup
Downloading the Purchasing & Inventory Device Files
- Within Purchasing & Inventory, select the File menu
- Select Mobile Device and then Mobile Setup

Fig.1 - Mobile Setup
- Select the Setup button for Android Devices (Zebra/Symbol MC40, TC51)

Fig.2 - Setup button
- Save the files – they are generic files and so can be used repeatedly
Setting up a New TC51
- Unpack TC51 and connect battery
- Connect the TC51 device to a computer
- On the TC51, select Start on the main screen
- Connect to Wi-Fi (the wi-fi which is selected must be unprotected without any restrictions)
- Select set up as new
- Skip Google Account setup
- Skip Name
- Select Not Now for the protecting your phone option
- Scroll down on Google Service and select Accept
- Select No for any other options which display
Connecting the TC51 Device to a Computer
- On the TC51 screen, drag the menu down from the top
- Select Android System – USB Charging
- Select Transfer Files
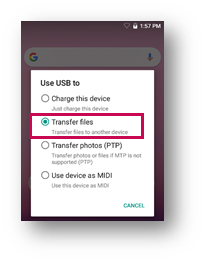
Fig.3 - Transfer Files option
Uploading Software to the TC51 Device
- Open File Explorer on the computer
- Locate the files which were downloaded from Purchasing & Inventory (the first step in this article)
- Copy Data Wedge and the Adaco Mobile files from the computer to the TC51 C Drive within the ‘Download’ folder
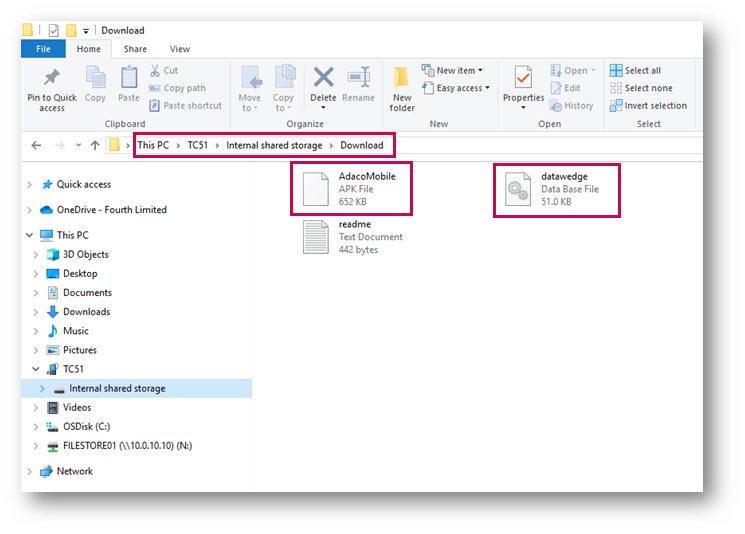
Fig.4 - TC51 files
Installing Purchasing & Inventory Files onto the TC51 Device
- Select the Home button (circle at the bottom of the screen)
- Slide up on the screen to open Applications
- Select File Browser > Download
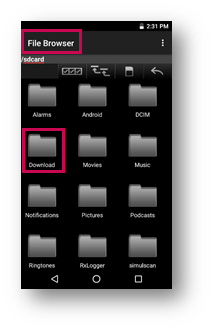
Fig.5 - File Browser and Download dile
- Select Adaco Mobile > Install > Open
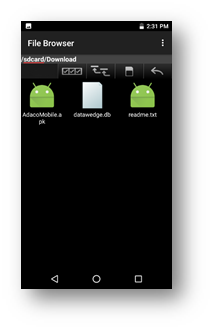
Fig.6 - Adaco Mobile files
Installing DataWedge on the TC51 Device
- Select the Home button
- Slide up on the screen to open Applications and select DataWedge
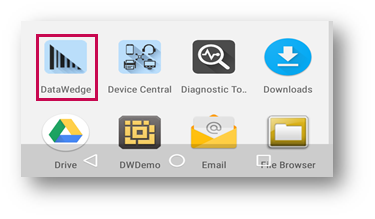
Fig.7 - DataWedge application
- Select the . . . icon on the right side of the screen
- Select Settings
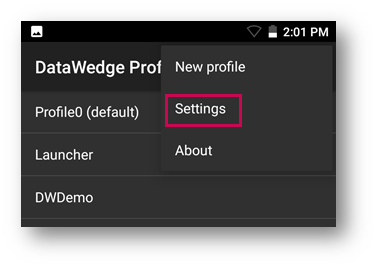
Fig.8 - Settings in Menu
- Select Import – Import DataWedge Confirmation
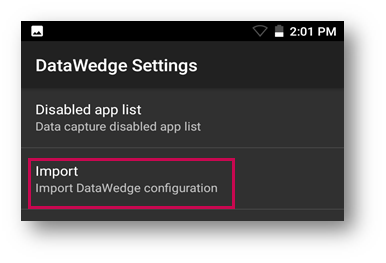
Fig.9 - Import DataWedge configuration
- Select the first ( . )
- Scroll down to SD Card
- Scroll up to Download
- Click into the DataWedge File
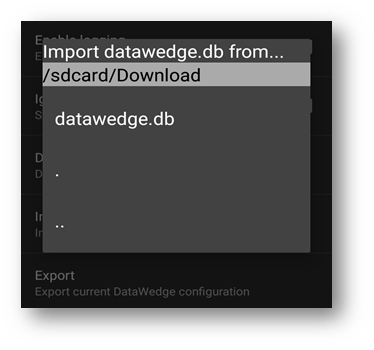
Fig.10 - SD card download screen
- Click back to the Apps screen and check that Adaco Mobile appears on the screen
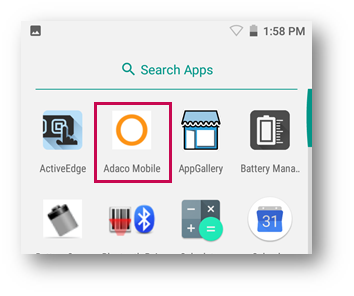
Fig.11 - Adaco Mobile in apps screen
Selecting the Property
- Go back to the Home screen
- Slide up from the bottom of the screen to open Apps
- Select the Adaco Mobile icon

Fig.12 - Adaco Mobile app
- Select the Settings button
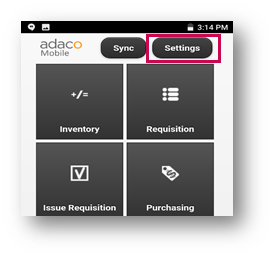
Fig.13 - Settings button
- Scroll down to Wcf Service URL
-
Enter in the URL
- Remove the s on http, and add service at the end after the URL Property Name
- Save
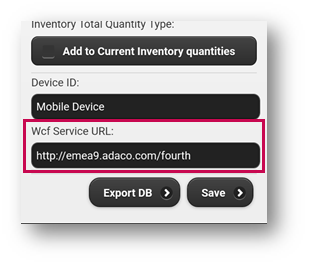
Fig.14 - Wcf Service URL
- Select Property and a username screen will display
- Enter in the required credentials
- Do not select ‘Remember Me’
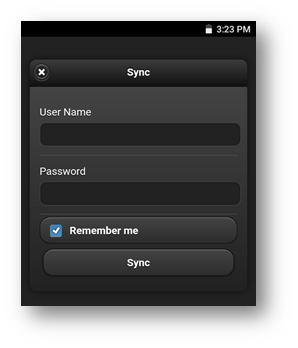
Fig.15 - User Name and Password
- Choose the Property (in a multi Property scenario)
- Select Save
- On the main page, select Sync and then Full Sync to upload the Property Data
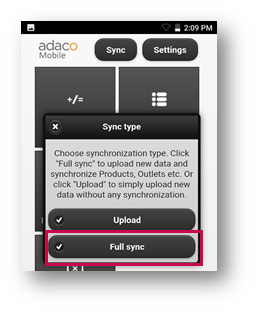
Fig.16 - Full sync button
The process is then complete.

Comments
Please sign in to leave a comment.