
Enter the Employee Information into HR
Log into the Fourth system.
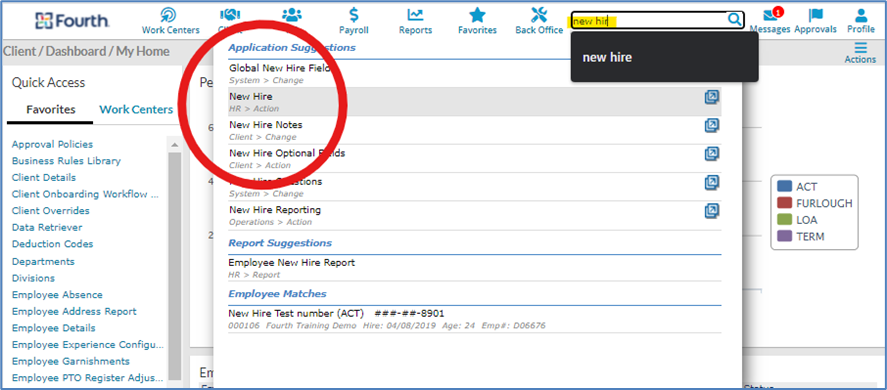
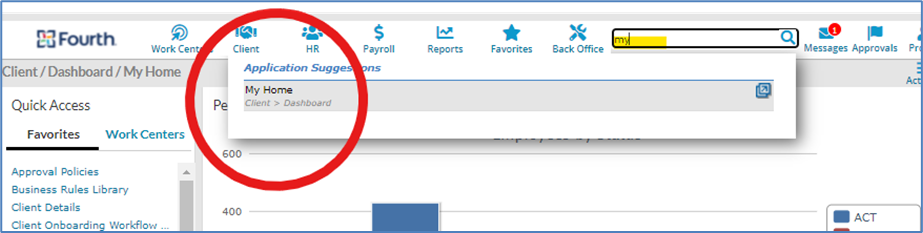
Navigate to “New Hire” using the search bar:
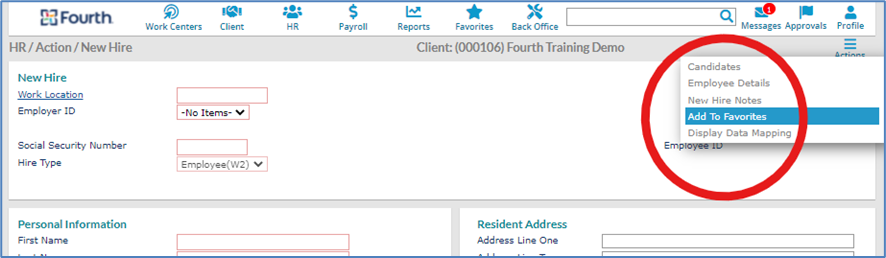
Add to Favorites:
Notes:
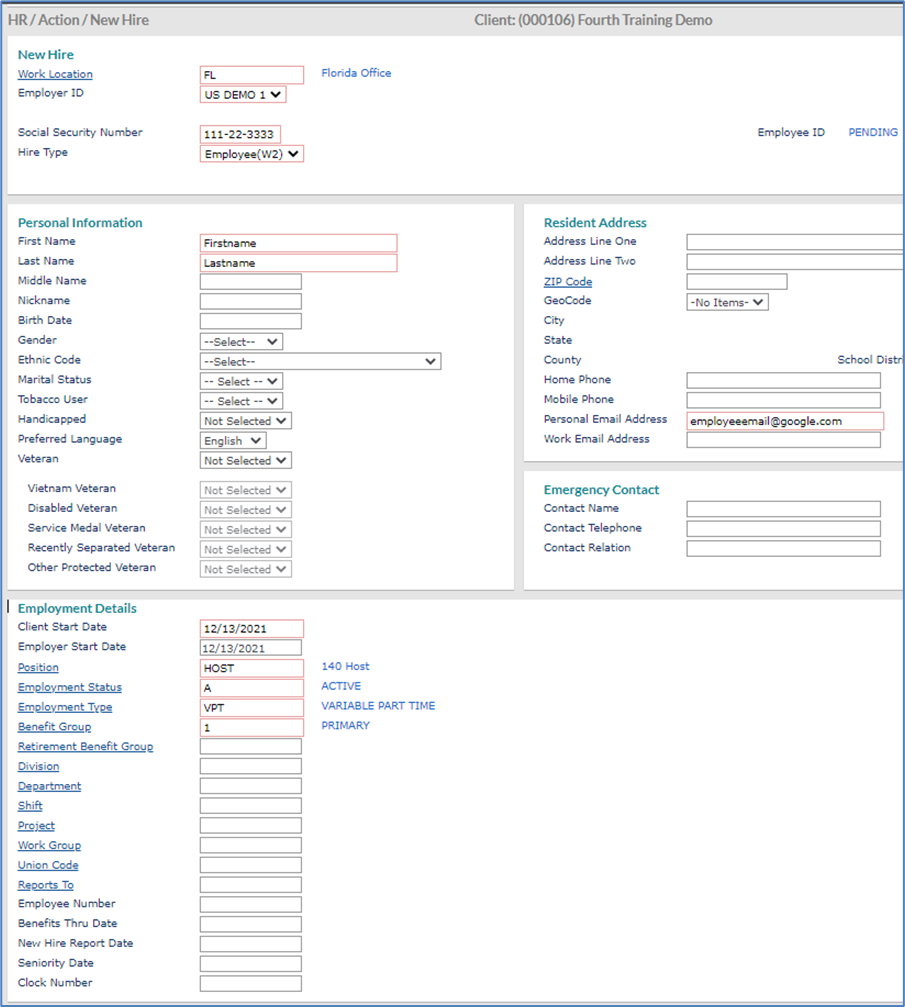
- Complete the New Hire fields that are highlighted RED.
- If a field has a Blue Underlined Word next to it, it is a link out to your existing Fourth date.
- Employment Status - Always “Active”.
- Employment Type - If an employee is Part Time, Select “Variable Part Time”.
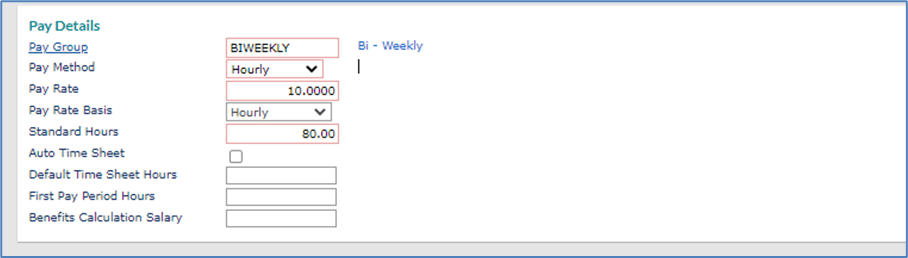
- Pay Rate and Pay Rate Basis must match:
o If the Pay Rate is an hourly rate, then the Pay Rate Basis must be “Hourly”.
o If the Pay Rate is an annual salary, then the Pay Rate Basis must be “Yearly”.
Click Save.
- Ensure that you receive the message: “Successfully created onboarding pre-hire…”.
- The Newly Hired employee will receive an email to complete Electronic Onboarding.
Monitoring the Onboarding Paperwork
Navigate to “My Home” using the search button. Save to Favorites.
From “My Home”, select the Dropdown and choose “Onboarding Tasks by Status”.
Select the second dropdown to narrow the view by:
- I-9 Section 1
- Employee Information
- I-9 Section 2
- All Other Forms
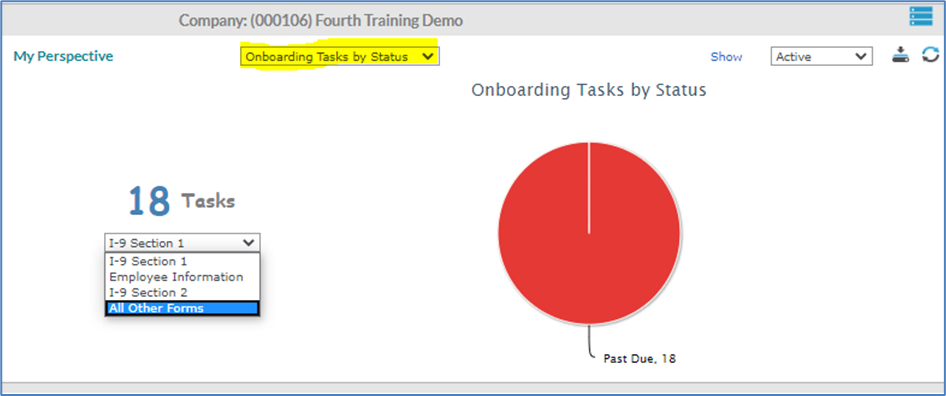
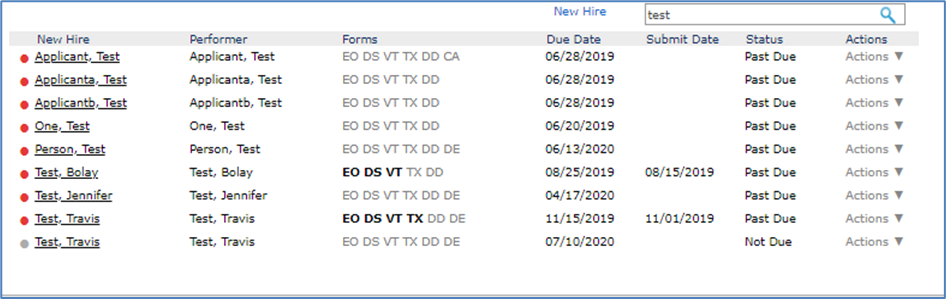
Progress of onboarding paperwork can be monitored from this view:
- Black indicates that the form has been completed.
- Gray indicates that the form is not complete.
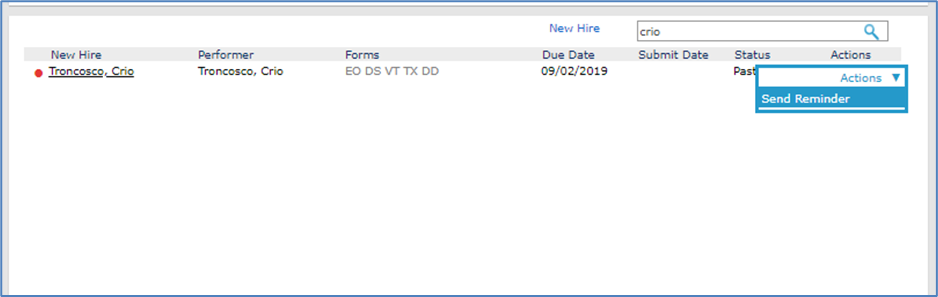
The manager can send a reminder to the new employee using the Action dropdown to the right:
The manager can click the name to open the employee’s onboarding to see the status details:

Completing Section 2 of the I9
Once the new hire has completed Section 1 of the I-9, the manager will receive an email to complete I-9 Section 2.
The manager can access the I-9 by clicking on the checkmark in the top right of their Fourth screen.
Note: Once the employee brings in their I-9 documents.


To complete Section 2, click on the line item and select “Grab”.
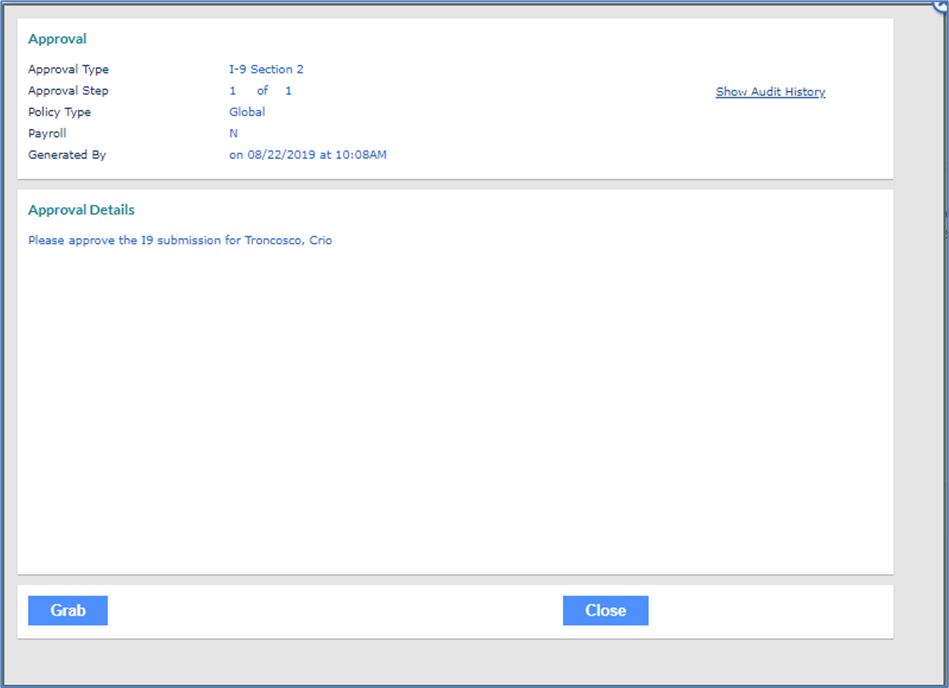
The item will move to the top section of the screen. Click to open it again:

The manager has three options:
- Return to Queue- If another manager will be completing section 2.
- Deny- If something is incorrect and the employee needs to update section 1.
- Next- To move forward with completing section 2.
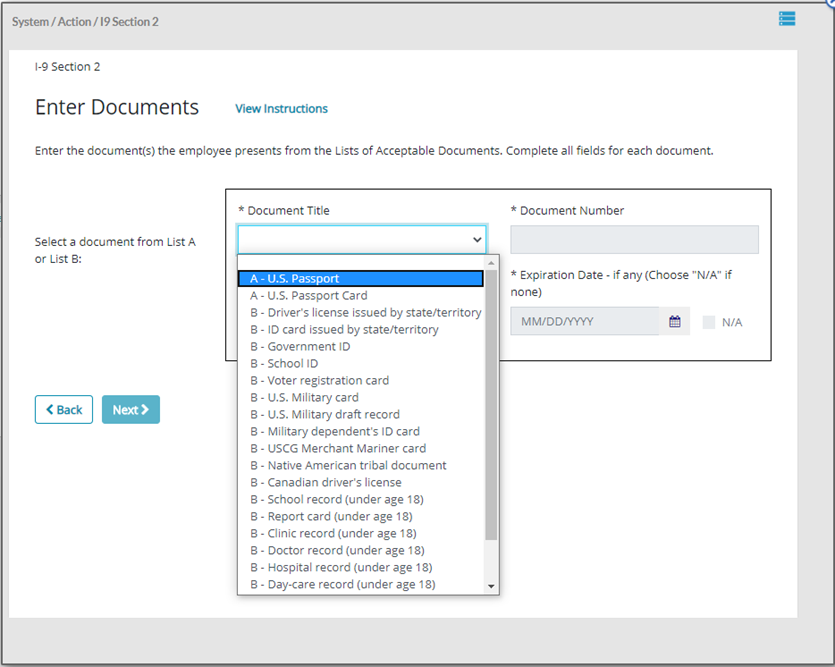
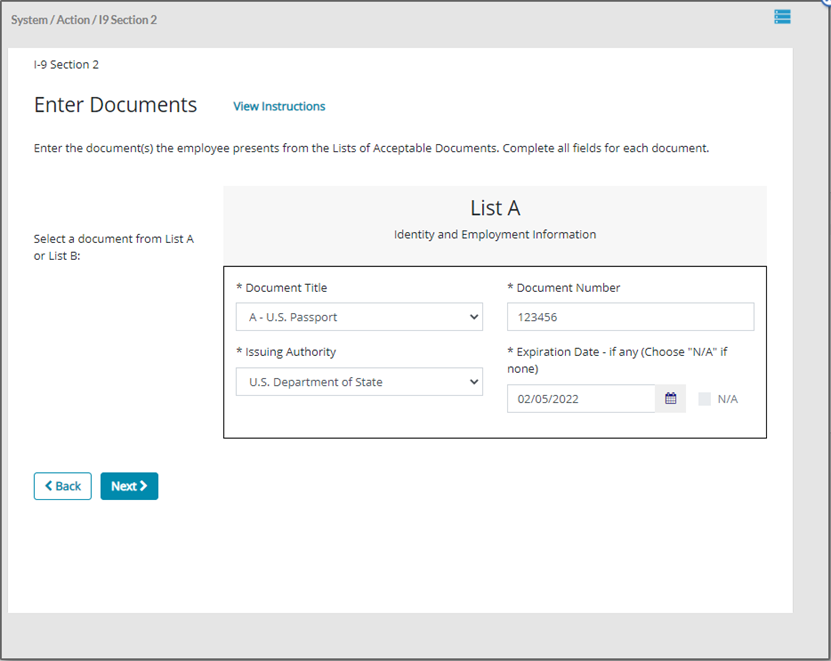
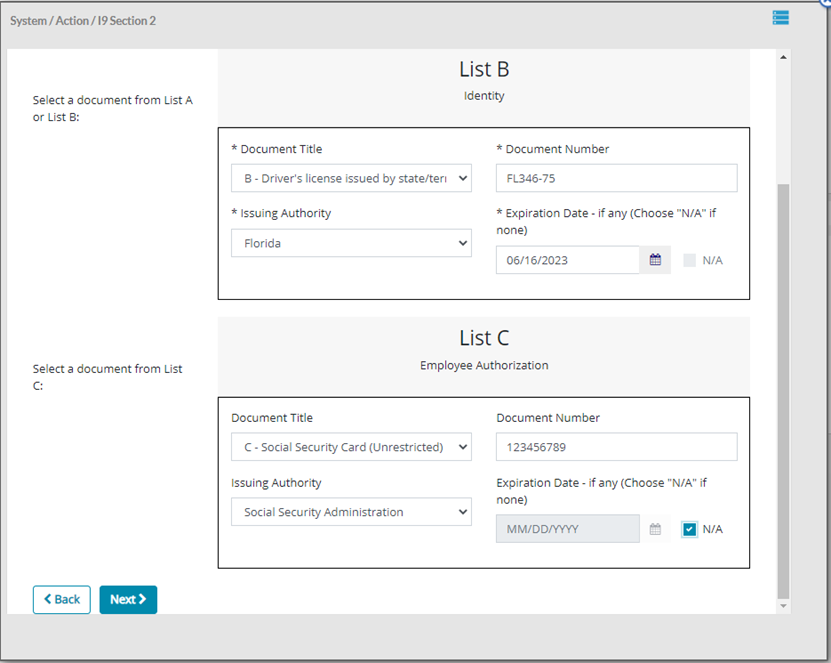
Using the dropdowns, select the item from the list that the employee brought as backup. Examples:
Click Next > Next.
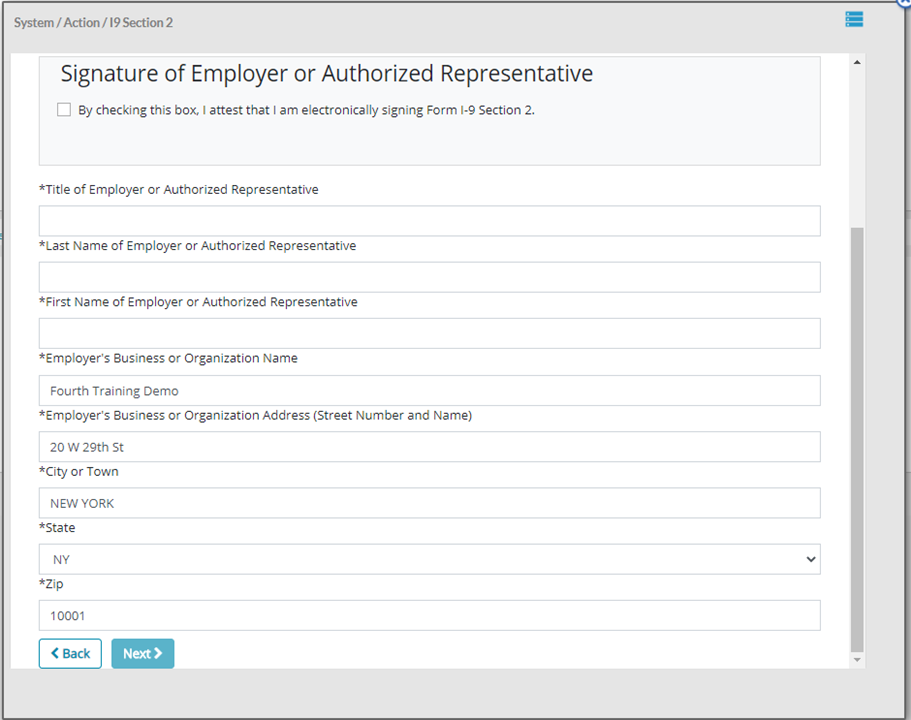
Complete the Certification on the next page:
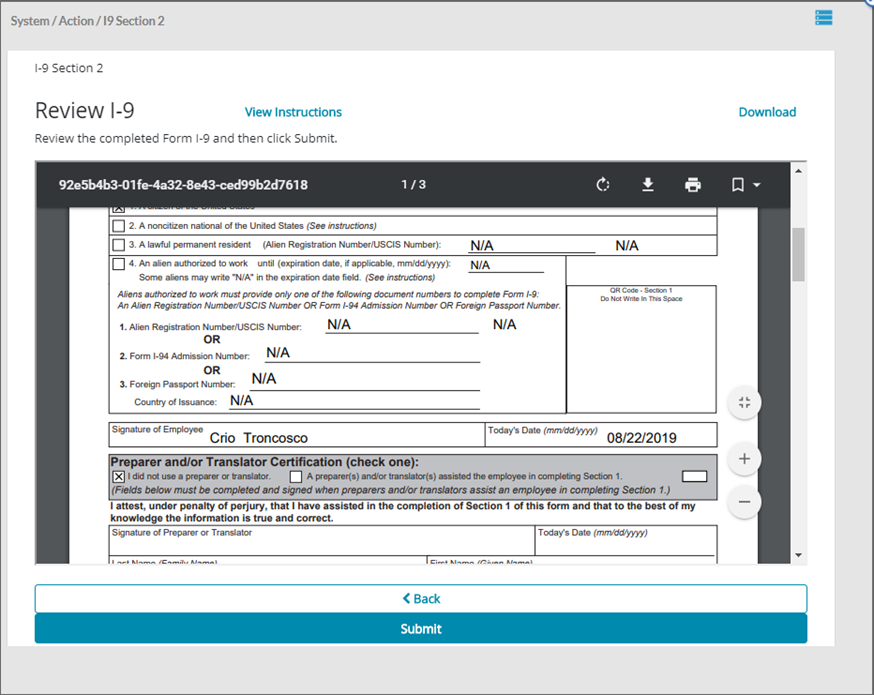
Review the I-9 and Submit
Click Done.
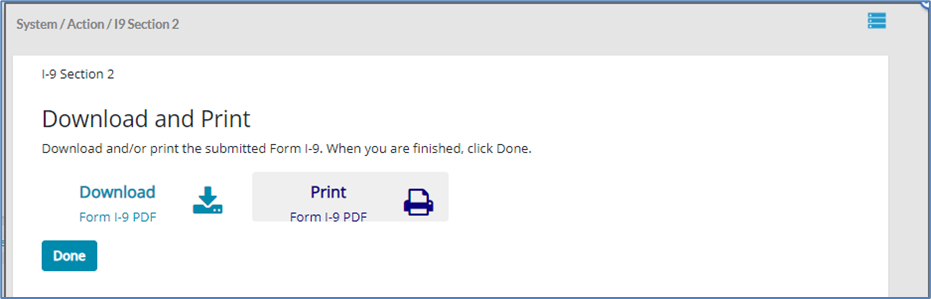
The I-9 is saved in the employee Documents section:

Comments
Please sign in to leave a comment.