Overview
This article will show how to place an order on the Inventory product, using the different methods available.
It is important to use the system when placing orders to suppliers to ensure the correct product, product UOM and quantity are ordered to fulfil supplier requirements. This will also ensure standardised practice across all sites within the organisation and that an audit trail of order information is maintained to aid head office when reviewing supplier performance.
Before Placing an Order
Before placing an order on the system, it is good practice to make sure that the order has not been created and sent by another user.

Fig.1 - Stock Management tab
- Select the Stock Management tab and view the orders on the Pending tab to check what orders have been sent
All orders raised on the system that have yet to be delivered are displayed on this page.

Fig.2 - Pending Delivery Notes
- The supplier, delivery date and cost of the order are displayed, however a specific order can be selected to view the detail if required
- Once it is confirmed that the relevant order required has not been raised, proceed with the following steps
Placing an Order
- Select the Purchasing tab to view the order options.
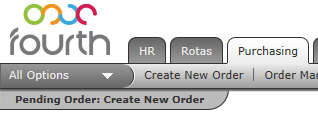
Fig.3 - Purchasing Tab
- The purchasing tab defaults to the ‘Create New Order’ screen when selected. However, if already in another area of the purchasing tab, Create New Order needs to be selected
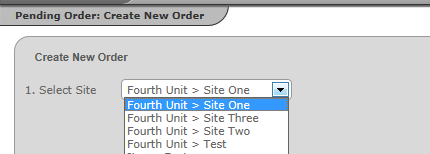
Fig.4 - Selecting a Site
In the top left hand section of the screen the relevant site that the order relates to is displayed. This is controlled by the user profile and only sites where access has been designated will be visible.
- Select the relevant Site from the drop-down (if applicable)
Once a Site is selected, 4 different order interface options can be chosen:
- New By Category - browse through each category individually and input the quantity of each product required within that category, regardless of supplier.
- New By Supplier - browse and select all products associated with a specific supplier on a page-by-page basis
- New By Template - input the quantity of each product required from a pre-defined template
- New By Search - search for products using a filter criteria and input the quantity of each one required
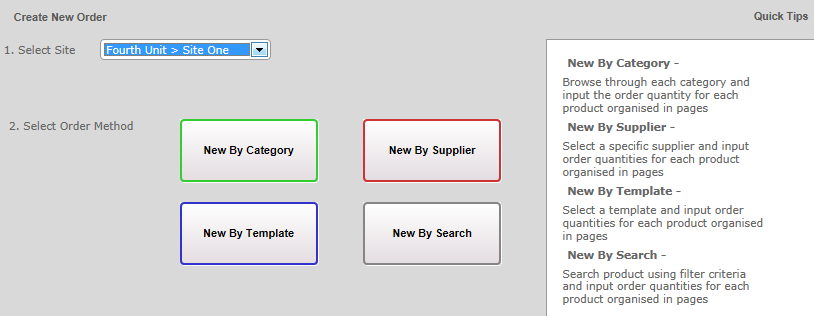
Fig.5 - Order Interface Options
- The Quick Tips on the right side of the screen detail more information regarding each option
- Only products that have been assigned to the specified site will be displayed, regardless of order interface option selected
- The ‘stock on hand’ and ‘stock on order’ will be displayed against each product, regardless of order interface option selected
- The user must have the relevant profile assigned that allows order creation to be able to view the relevant order sheets
- Select a Cost Centre from the drop-down and a Category tab
- Select a Sub-Category tab or *All or to display the products accordingly. In Fig.6, the Cost Centre is 'Drinks - Ingredients' and the Category/Sub-Category is 'Spirits'/'Brandy'

Fig.6 - Order Page - ‘New by Category’
- Enter the quantity of each product required in the Order fields
- See Authorising Orders to be Sent for next steps
- Select a Supplier from the drop-down
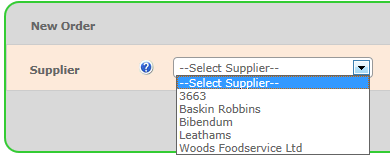
Fig.7 - Supplier Drop-down List
Only suppliers that have been assigned to the relevant site will be displayed. Once a supplier is selected the system will automatically move to the Order Input page.
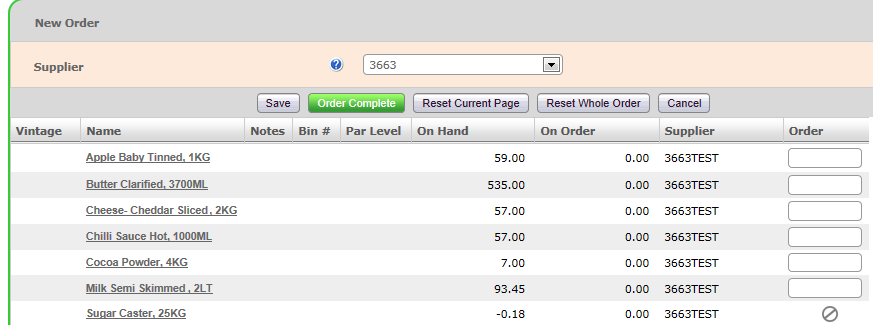
Fig.8 - Order Page - 'New by Supplier'
The products are displayed by category & alphabetically by category in a ‘page-by-page’ view.
- Enter the quantity of each product required in the Order fields
- See Authorising Orders to be Sent for next steps
-
Select a Template from the drop-down
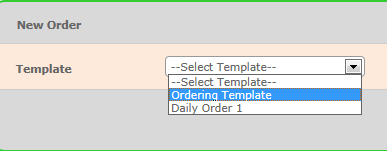
Fig.9 - Template Drop-down List
Only templates that have been assigned to the relevant site will be displayed. Once a template is selected the system will automatically move to the order input page.

Fig.10 - Order Page - 'New by Template'
The products are displayed by category & alphabetically by category in a ‘page-by-page’ view and only products assigned to the specified template are available to view.
- Enter the quantity of each product required in the Order fields
- See Authorising Orders to be Sent for next steps
- Enter the relevant search criteria and select Search to see the returned results

Fig.11 - Product Search criteria
At the top and bottom of each order interface page, a number of options are displayed. See Fig.12.

Fig.12 - Order maintenance buttons
- When all products have been added and the order is ready to be sent, select Order Complete. The order will then become a 'Pending Order'
- To keep the order as a 'draft', select Save
- Draft orders can be accessed by going to Purchasing > Order Management and selecting Draft from the Status drop-down. Then select Search

Fig.13 - Example draft order
Pending Orders
- Once Order Complete is selected, the system will display the 'Pending' order details:
- Order status – Pending or Draft (only pending orders can be sent to a supplier)
- Supplier Name – If order interface options of Category, Template or Search were selected, the system will still separate the order(s) into relevant individual supplier orders at this point)
- Quantity of lines entered
- Total cost of the order
- There is also ability to copy or delete the order
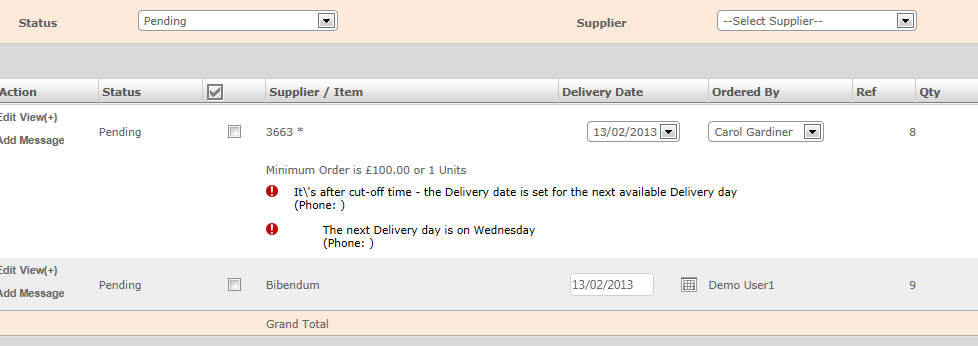
Fig.14 - Pending Orders
- Select View(+) against the pending order to see all products that it contains

Fig.15 - Viewing an order's products
- Select a Delivery Date from the available drop-down. The available dates will be based upon the configuration of delivery logic in the system (as specified by the supplier(s))

Fig.16 - Selecting a Delivery Date
- If the order needs to be changed in any way, select Edit from the 'Action' column of the Pending Order screen. Products can then be added/removed as required

Fig.17 - 'Action' options - Edit, View, and Add Message
- To include a message to the supplier, select Add Message and type in the displayed field
Approving the Order
- When happy that all of the information provided is correct, place a tick in the 'Approval' box (next to 'Status') and use the Approve Selected button
![]()
Fig.18 - Selected Order

Fig.19 - Approve Buttons
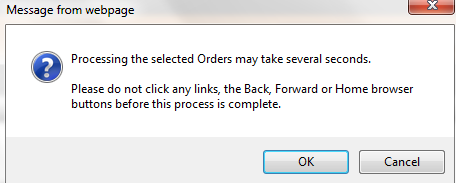
Fig.20 - Message After Approving an Order
Once the order has been sent, it will appear as a 'Pending Delivery' in the system.

Comments
Please sign in to leave a comment.