
Configuring Recipe Approval
To enable Approval routing for recipes:
- Go to Property > Administration > Property Preferences > Recipes
- Tick the box next to Enable Recipe Approval Routing and then use the Save button

Fig.1 - Enabling Recipe Approval Routing
Recipe Approval Routing
To configure Recipe Approval Routes:
To configure Recipe Approval Routes:
- Go to Property > Set-Up > Routing > Route Builder > New > Recipe Route
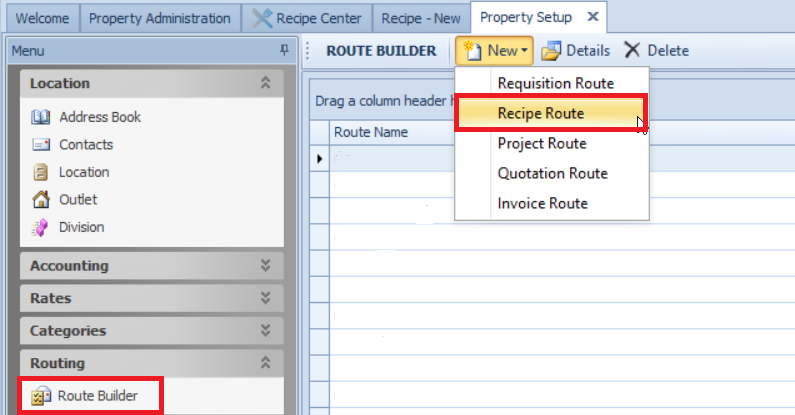
Fig.2 - Recipe Approval Routing Creation
- Select the Users to make up the Route and press Add to include them in the Route
- Add a Route Name so the correct Route can be identified if multiple Routes are available
- Ensure the Route is marked as Active
- Each User in the Route requires a Role
- Reviewer — A user can review or reject the recipe
- Approver — A user can make modifications to a recipe only reviewed before them
- Final Approver — A user can final approve a recipe, converting it from Draft status into Active status
- Press Save when complete
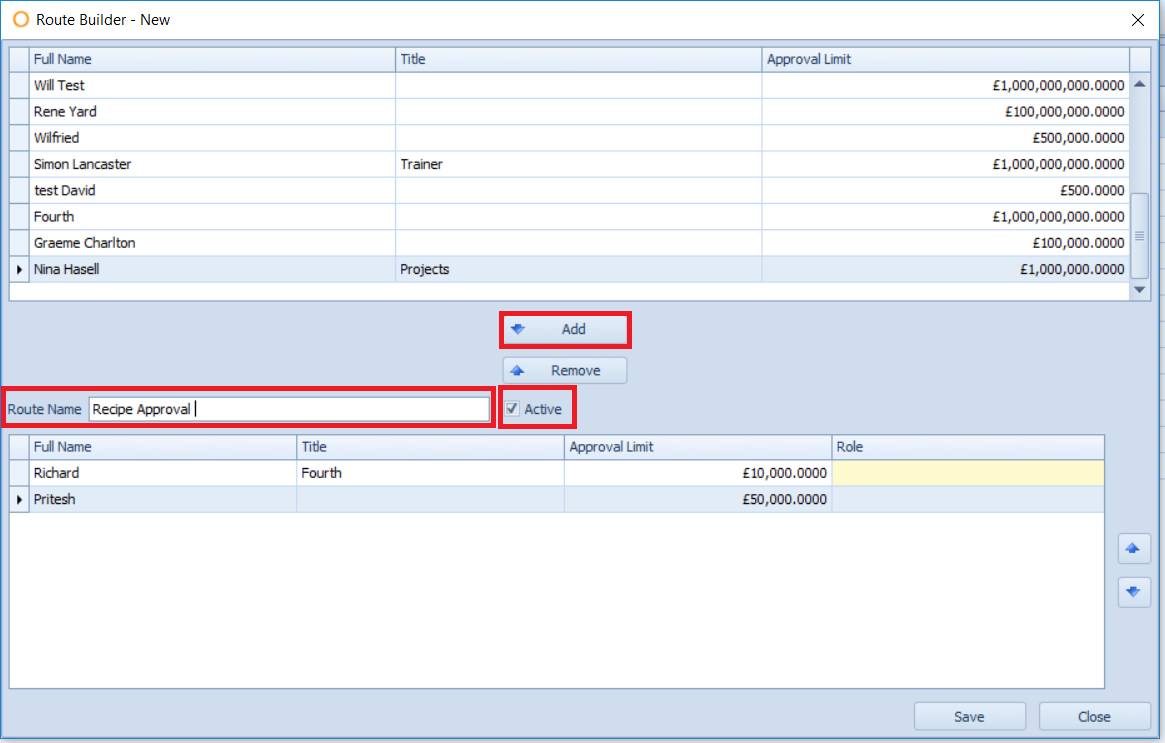
Fig.3 - Recipe Approval Route Builder
Recipe Creation
To create a recipe refer to the document here: P2P&I - Creating a Recipe
- When the recipe is created press Save. This will create the recipe as a Draft until it is final approved.
- Press the Approvals button to open the Routing Screen.

Fig.4 - Recipe Saved As A Draft
- Select the Route Type
- Select the Route List
- Press Select Route
- Press Route
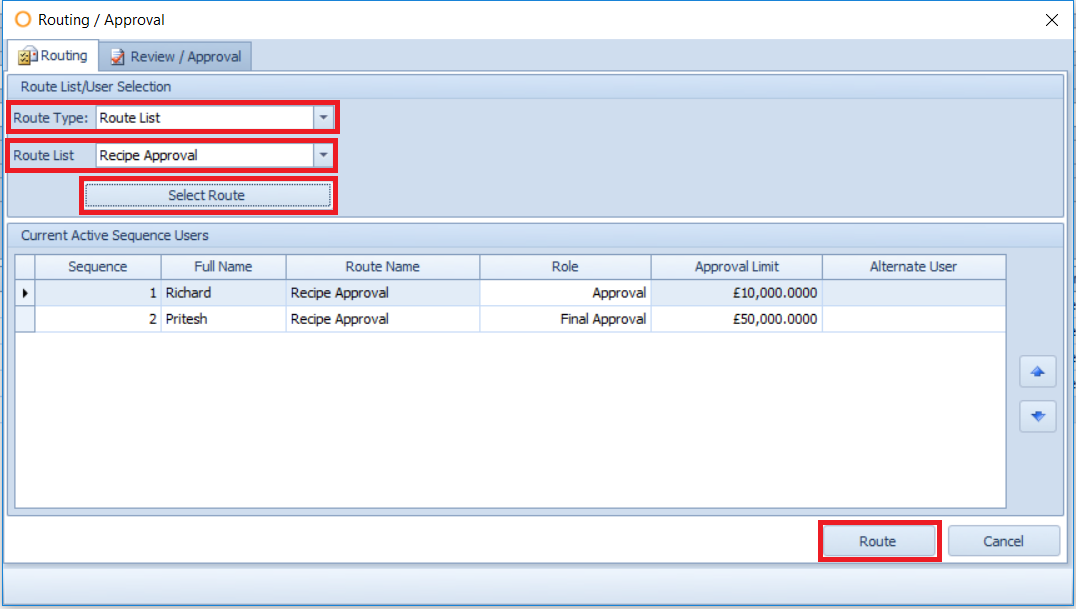
Fig.5 - Recipe Approval Routing Screen
Recipe Approval
To approve the Recipe, the user on the approval route opens the recipe: Recipe Centre > Search > Status: Draft
- Open the Recipe by double-clicking
- Press Approvals > Review/ Approval
- Press Final Approved
- This will change the Recipe Status from Draft to Active
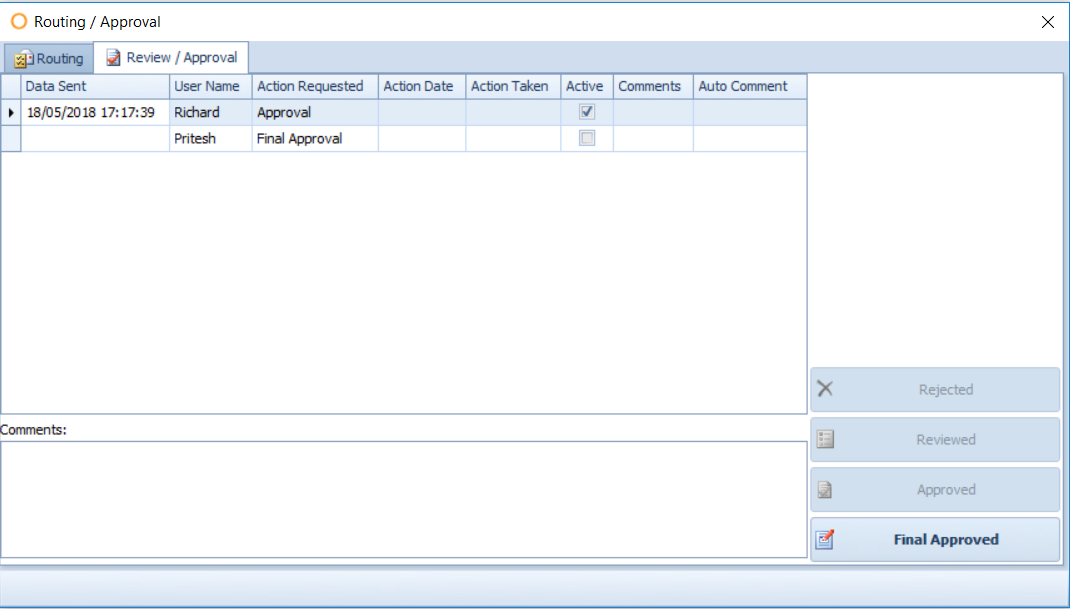
Fig.6 - Recipe Approval Screen
Comments
Please sign in to leave a comment.