
Event Control
Event Controls are used to track sales/consumption of beverages at Events. This feature supports Events where beverages are served at multiple bars (stations) in an Outlet.
Setup
Before any events, the Event Control Categories should be looked at to make sure that categories and subcategories are checked, as per Fig.1.
- Property > Setup > Categories > Event Control Categories
This determines which products may be used in Events, the checked ones, and which products cannot be used - the unmarked ones.
If Event Control Categories need to be created, please follow the instructions in this article - Adaco: Setting up Event Categories.
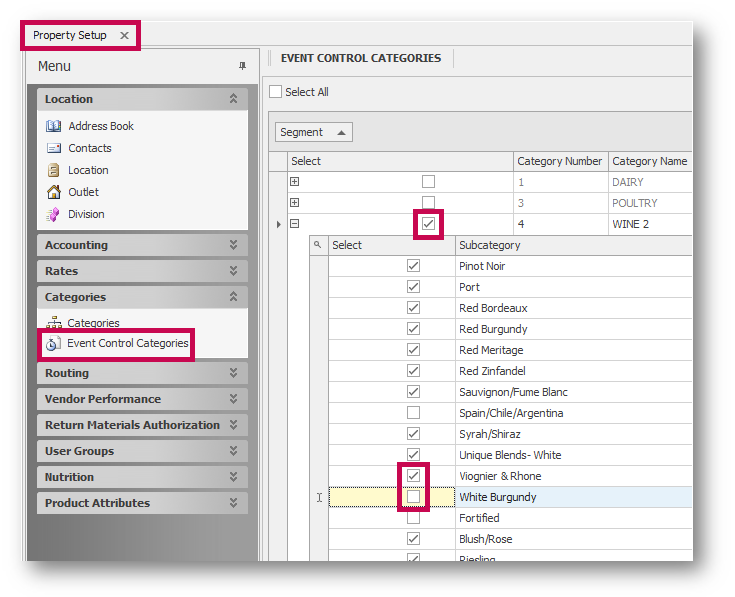
Fig.1 - Setting up the Event Control Categories
Note: marking subcategories is necessary as only having the category marked will not show any products when searching.
Creating the Event
- After the products are setup, the Event can be created by going to Recipes > Events > Event Control > New > Event Control, as seen in Fig.2
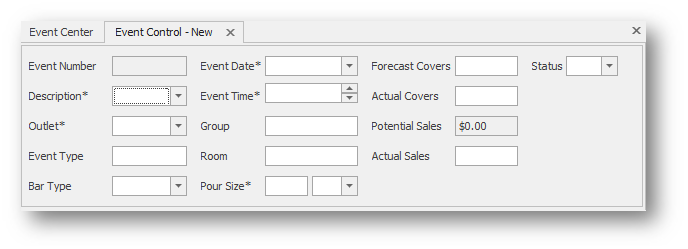
Fig.2 - Event Control header
Creating Stations
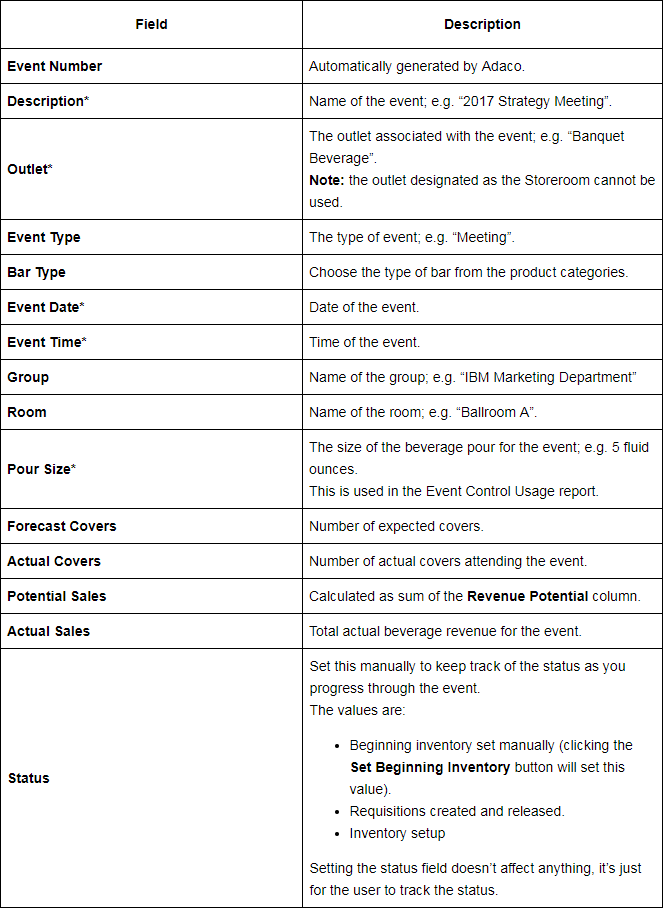
- To create a station, select the + (plus sign) button to access the Station Setup screen, as per Fig.3
- Type in the name of the station and either select Save & New to create another station, or Save & Close if all stations have been created
Fig.3 - Creating a station for an event control
Adding Products
After filling out the header, the next thing to do is to create Stations for the different areas selling beverages.

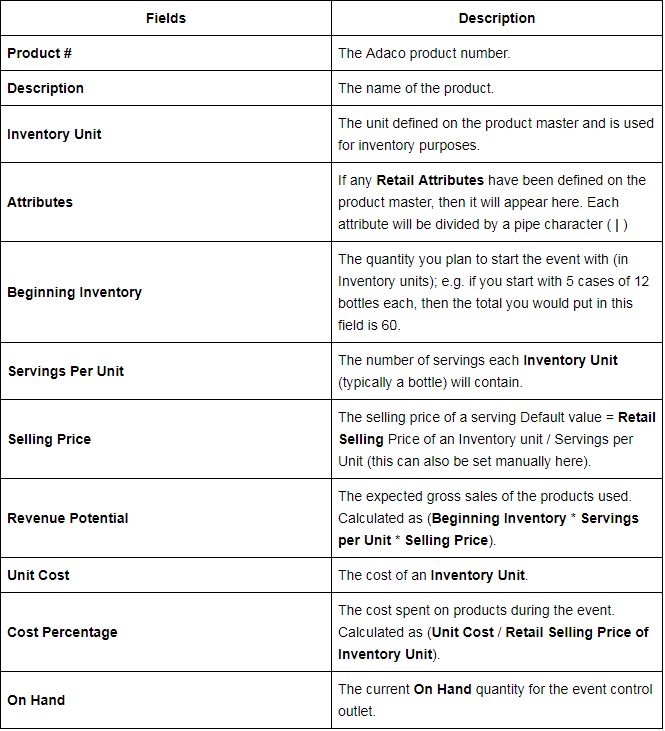
Fig.4 - The product fields on an Event Control
Creating an Outlet Requisition
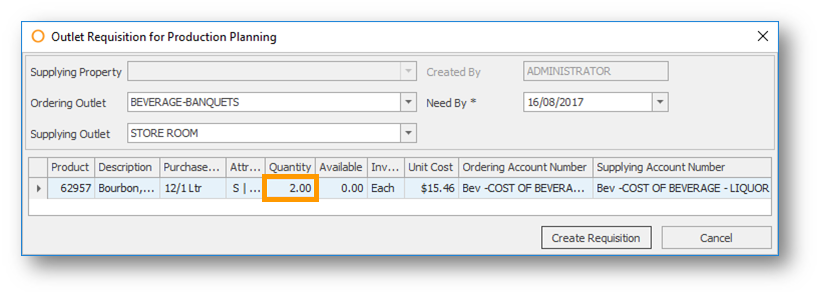
When all the products and products' fields are filled out, then the outlet requisition can be created, as per Fig.5.
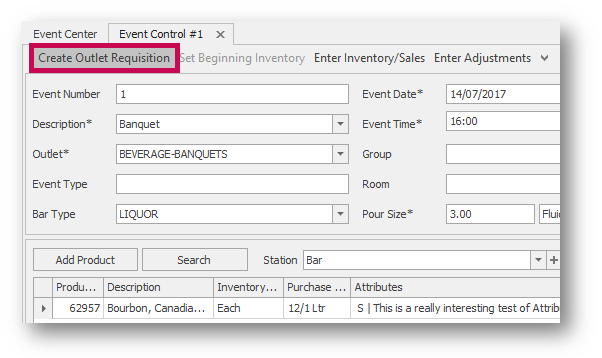
Fig.5 - Creating an Outlet Requisition from the Event Control
The quantities in the requisition will be the Beginning Inventory values for all stations in the Event Control (they can be changed, if desired). The Ordering Outlet is the outlet in the Event Control.
Any on hand for the product in the event’s outlet is ignored; the full Beginning Inventory quantity is always specified in the Outlet Requisition, as per Fig.6.
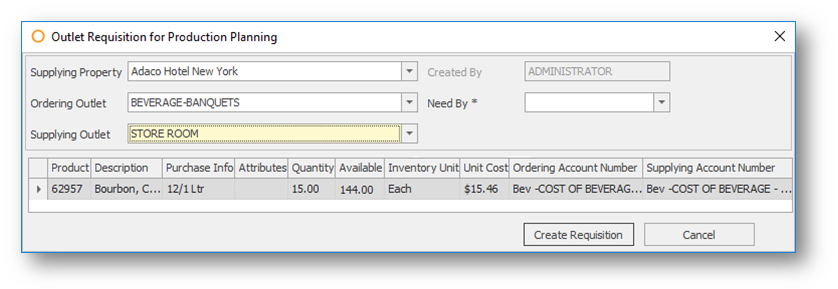
Fig.6 - Creating an outlet requisition from an event control
An outlet requisition will automatically be created and released to the supplying outlet to process.
If there are any adjustments to take into consideration, ie. bartender breaks a bottle or sells a bottle at a discount, the revenue must be adjusted.
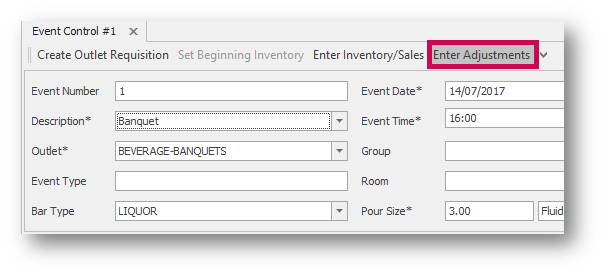
Fig.8 - Select Enter Adjustments to make any adjustments to the Event Control
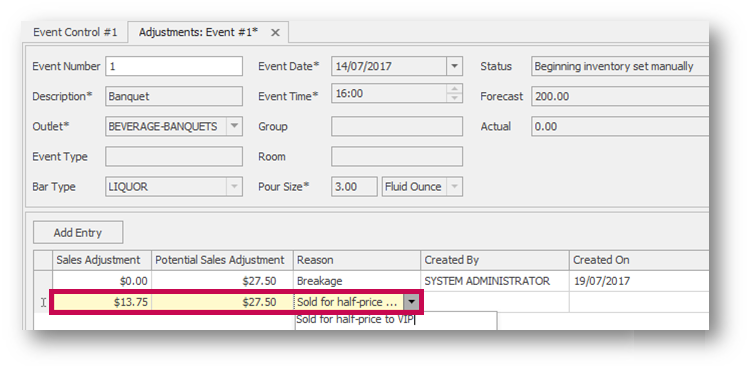
Fig.9 - New adjustments entry
As many adjustments as needed may be added to this area of the Event Control. These adjustments will appear on the Events Control Usage report.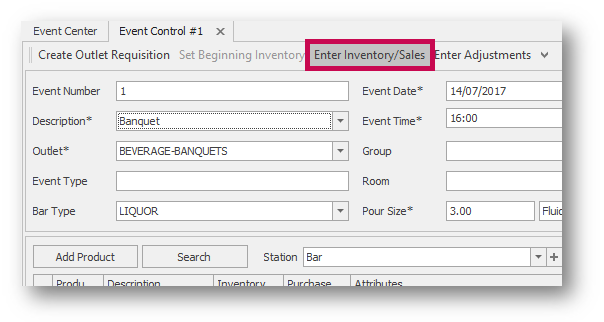
Fig.10 - Select Enter Inventory/Sales to add the final stock count and total sales
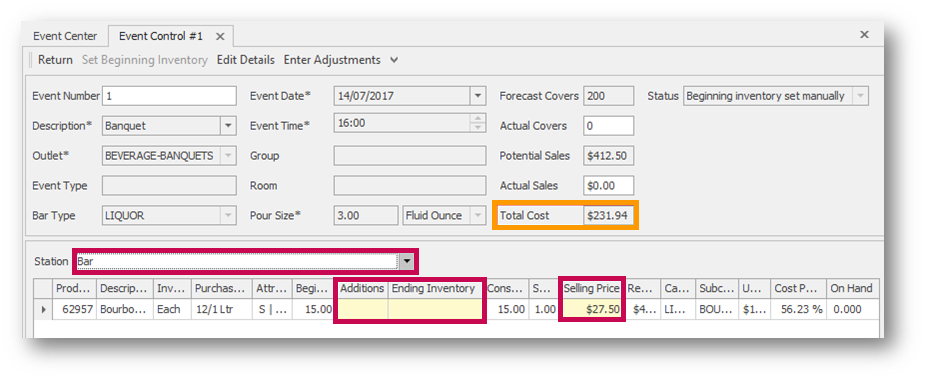
Fig.11 - Enter the sales and inventory from the Event Control Sheet
Process Returns
Any excess stock can be returned to the Supplying Outlet using the Return function, as shown in Fig.12
The Additions are added here because they need to be requisitioned “after the fact” (they were not part of the original requisition). The entire Ending Inventory is assumed to be physically returned to the supplying outlet.
The quantity field is auto-populated using the numbers input in the Additions and Ending Inventory fields. However, this can be modified. The Outlet Requisition for Production Planning window will only open the first time Return is used. Any time Return is used after, the Outlet Requisition is automatically created and released to the supplying Outlet for them to process.
- Then, for each Station, select either Add Product or Search to locate products that will be sold in each area
- Once a product is added, the fields associated with it will need to be filled out, as per Fig.4
Fig.4 - The product fields on an Event Control
Creating an Outlet Requisition
Fig.5 - Creating an Outlet Requisition from the Event Control
- Select Create Outlet Requisition to make an outlet requisition for the products in the Event Control
The quantities in the requisition will be the Beginning Inventory values for all stations in the Event Control (they can be changed, if desired). The Ordering Outlet is the outlet in the Event Control.
Any on hand for the product in the event’s outlet is ignored; the full Beginning Inventory quantity is always specified in the Outlet Requisition, as per Fig.6.
Fig.6 - Creating an outlet requisition from an event control
- Once all fields contain the correct information, select Create Requisition
An outlet requisition will automatically be created and released to the supplying outlet to process.
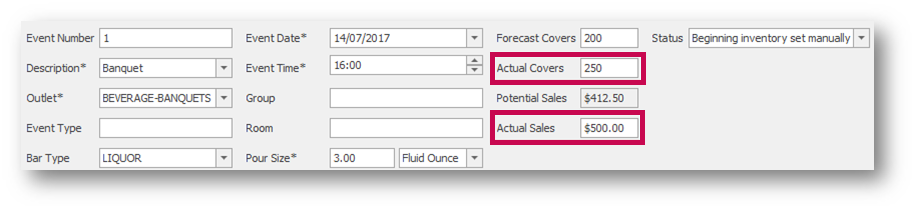
Entering Actuals
Fig.7 - Entering in the actual covers and sales
Entering Adjustments
If there are any adjustments to take into consideration, ie. bartender breaks a bottle or sells a bottle at a discount, the revenue must be adjusted.
- To do this, select Enter Adjustments, as per Fig.8
Fig.8 - Select Enter Adjustments to make any adjustments to the Event Control
- On the next screen that appears, select New Entry and fill in the highlighted fields, as per Fig.9
Fig.9 - New adjustments entry
As many adjustments as needed may be added to this area of the Event Control. These adjustments will appear on the Events Control Usage report.
Enter Inventory/Sales
- To add the information on the Event Control Sheet to Adaco, open the Event Control by selecting Recipes > Events > Event Control
- Search for the event and double-click the Event Control to open it
- Then select Enter Inventory/Sales, as per Fig.10
Fig.10 - Select Enter Inventory/Sales to add the final stock count and total sales
- This will open the Adjustments windows so that the data from the Event Control Sheet may be entered into the Event Control, as per Fig.11
Fig.11 - Enter the sales and inventory from the Event Control Sheet
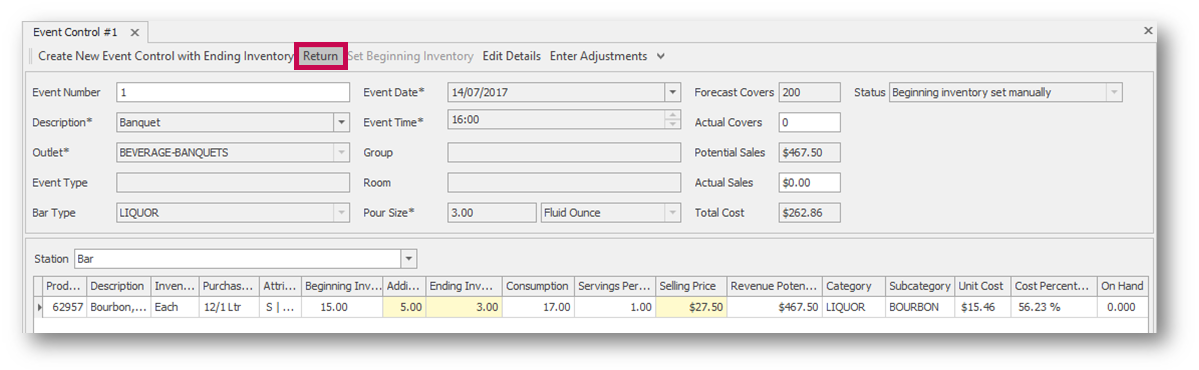
Process Returns
Fig.12 - Use Return to open the Outlet Requisition creation window
- Use the Return button to create an outlet requisition, shown in Fig.13, for Additions less the Ending Inventories, to the supplying outlet for each product
The Additions are added here because they need to be requisitioned “after the fact” (they were not part of the original requisition). The entire Ending Inventory is assumed to be physically returned to the supplying outlet.
Fig.13 - Returning products to the supplying outlet
The quantity field is auto-populated using the numbers input in the Additions and Ending Inventory fields. However, this can be modified. The Outlet Requisition for Production Planning window will only open the first time Return is used. Any time Return is used after, the Outlet Requisition is automatically created and released to the supplying Outlet for them to process.
Comments
Please sign in to leave a comment.