Sending Site
After a requisition has been sent to the issuing site, it will have a status of ‘Sent’.
- To view a requisition, go to the Stock Management tab
- Select the Pending tab
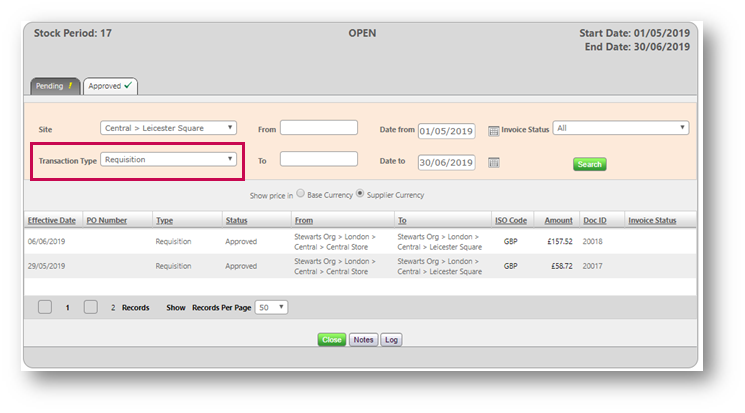
- Select Requisition from the Transaction Type drop-down menu

Fig.1 – Requisition in Transaction Type Drop-Down
The sent requisitions will then display.
- Select the required requisition

Fig.2 – Sent Requisitions
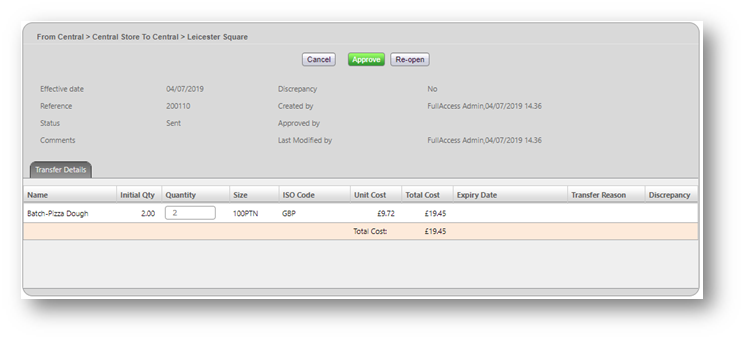
An example sent requisition is displayed in Fig.3 as seen by a user at the site where the requisition was created.
The requisition can be ‘Re-Opened’ and edited or ‘Approved’ if the stock has been received from the issuing site.

Fig.3 – Re-Open a Sent Requisition
Issuing Site
The Issuing Site has a slightly different view of the requisition, however, the process to view a sent requisition is the same as above:
- Go to the Stock Management tab, select the Approved tab
- Select Requisition from the Transaction Type drop-down

Fig.4 – Approved Requisitions
Editing a Sent Requisition
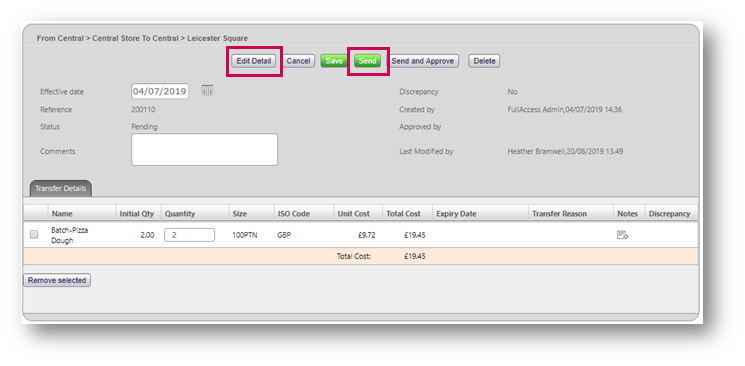
- Select the required requisition and select Re-Open to update the quantities or remove items
- Edit the requisition as necessary and select Send
Please Note: It is possible for a user at an Issuing site – with the relevant access – to send and approve a requisition. However, it is best practice for a user at the receiving site to do so. The Issuing Site can instead use the ‘Issued’ status.

Fig.5 – Editing a Re-Opened Requisition
Issued Status
A user in an Issuing Site may use the ‘Issued’ status to indicate that stock on a requisition has been issued to the requesting site.
- To do so, select Re-Open on the required requisition

Fig.6 – Re-Open & Issued Buttons
- Select the Issued button
Once selected, the ‘Issued’ button is no longer visible and the status is updated to Issued.
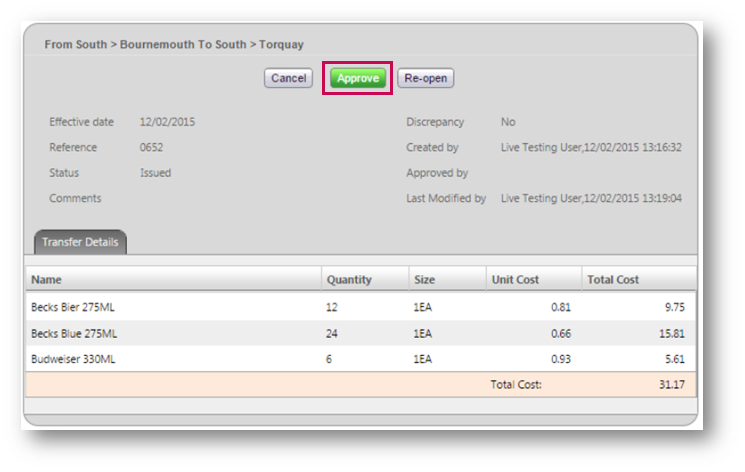
- Once the stock is correct, a user at the receiving site needs to select the Approve button to approve the items into stock

Fig.7 – Approve Button

Comments
Please sign in to leave a comment.