
Location rotation can be set up to use a custom rotation rather than a basic alphabetical or numerical rotation. These custom rotations can be set up by users on the site. To learn more about applying a rotation to a schedule, go here.
Follow these steps to set up a custom rotation:
- Log into Hotschedules and go to the settings tab. Select the option that says Rotation.
- This will bring you to the page where you can edit, delete, and create custom rotations.
- To create a custom rotation, click New Rotation.
- This will open a menu where you can input the name, schedule, and shift for your custom rotation. To save your new customer rotation, click Create.
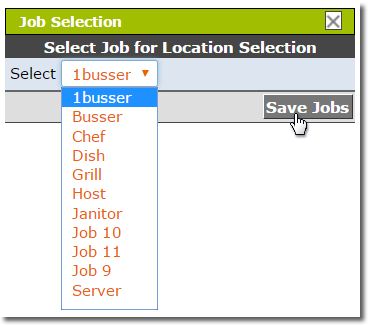
- After this, another pop up will appear asking you to specify the job code the rotation will be for. It is important you pick the correct job here, as the locations associated with that job will be the ones available to rotate.
- After finding the job you would like to use, click Save Jobs.
- After selecting a job, you will be brought to a page where you can begin setting up your custom rotation.
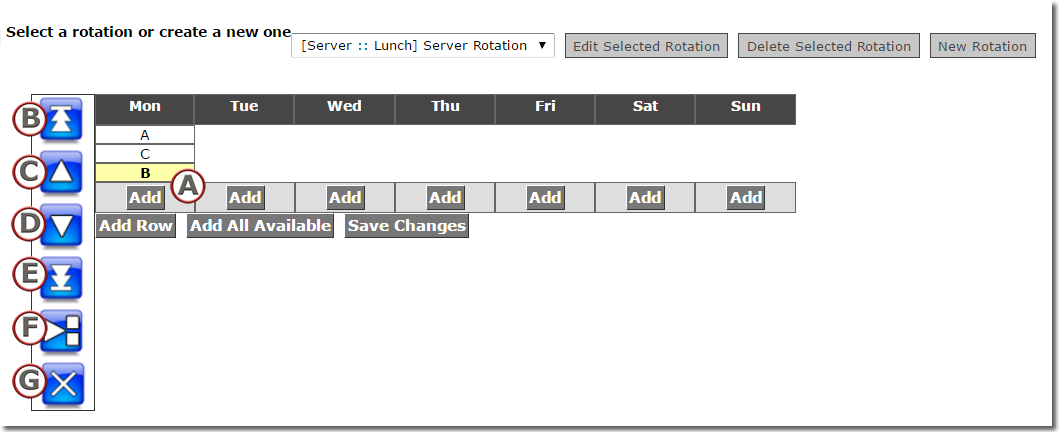
A - Add allows you to add the locations that you would like to use for that particular day. Selecting Add Row allows you to add a location for each day. Add All Available will fill every day with locations used by your site. Save Changes will save any edits made to your Custom Rotation.
B - Moves the selected location to the top of its respective column.
C - Moves the selected location up one row.
D - Moves the selected location down one row.
E - Moves the selected location to the bottom of its respective column.
F - Adds a row above the selected cell.
G - Removes the selected the location from the custom rotation.
To learn more about applying a rotation, go here.
Comments
Please sign in to leave a comment.