Overview
When creating Batches, it is important to future proof them in order to be able to easily edit them for transfer and yield when required.
Future proofing products includes ensuring that a fixed process is in place, and business standards are decided and maintained.
This article outlines the best practice method for creating and maintaining Batches.
Before Creating a Batch
To check if the Batch is already on the system:
- Go to Recipes > Search field > enter the name (or a few letters) of the batch
If the Batch exists, the system will display it in the ‘Results’ field.

Fig.1 - Searching for a Batch
Creating a New Batch
- Select Create a new recipe

Fig.2 - Create New Recipe Link
Please Note: Whilst entering information against the product, the tabs can be moved between without saving, but the information must be saved before exiting the screen.
Inputting Details
- Enter the Recipe Name, this will be the name that sites will see when transferring stock or counting the Batch
Please Note: It is advised to include ‘Batch’ in the Recipe Name, or a business defined key e.g. BS1234 to ease stock counting.
- Choose Batch from the drop-down menu in the Product Type field. The Product Type field cannot be edited once saved
An extra field titled Stock Count Type will display once this is chosen
- Enter the Stock Count Type
‘Count by Size’ means counting against the entire Batch size, whilst ‘Count by Serving’ is per one serving of the Batch, e.g. 100ml.

Fig.3 - Details Tab
Adding Ingredients
- Select the click here to add ingredients to your recipe link
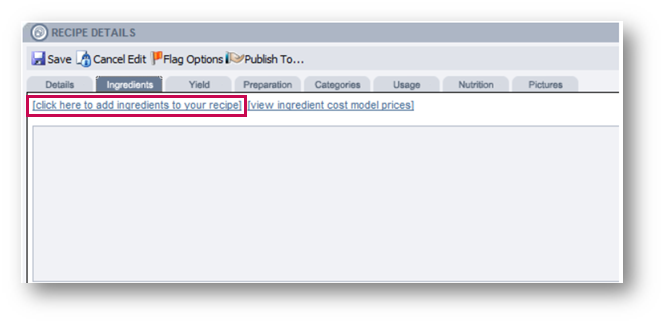
Fig.4 - Ingredients Tab
A pop-up will display with a Search field for Products and/or other Batches.
- Select to search for Ingredients or Batches in the Available drop-down menu
- Enter the name of the item in the Search field

Fig.5 - Ingredients Pop-up Window
A list of relevant items will be presented.
- Select the relevant item from the Available items box
The item will move across to the ‘Selected Items’ area.
- Continue to add the required items for the Batch
- The order in which the items appear on the Recipe tab can also be customised by using the grey and white up and down arrows
Please Note: The Carrot icon indicates that the item is a product, the yellow Chef’s Hat icon indicates that it is a Batch whilst the White Chef’s Hat icon indicates that it is another Recipe being added to the current Recipe.
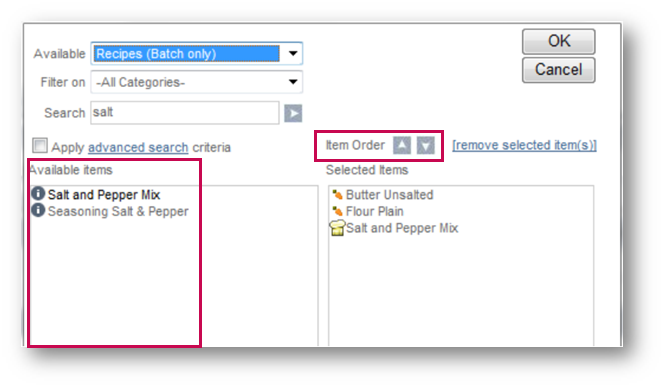
Fig.6 – Selecting Items
- To remove an item added in error, select the item and select Remove Selected Item
- Once the Batch Recipe has all the required items, select OK

Fig.7 - Selected Ingredient to Be Removed
The added items will now be seen on the Ingredients tab with open fields for ‘Qty’ and ‘Unit’.
- Enter the Quantity required for the Batch Recipe
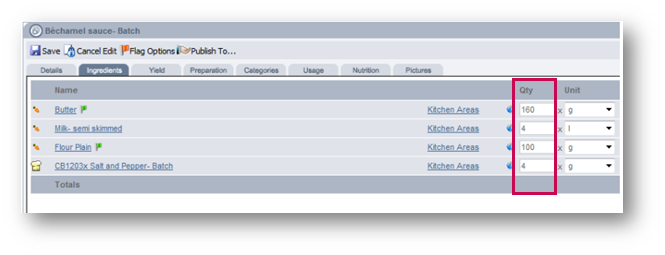
Fig.8 - Add Quantities to the Ingredients
Once the Quantity of the items is defined, the system calculates the cost of the Batch, displayed in the ‘Cost and Portion Cost’ column. The system uses the preferred Supplier to calculate this.
The system defaults to assume the entire Batch is 1 serving.
- If this is not the case, enter the actual amount of servings in the Servings box
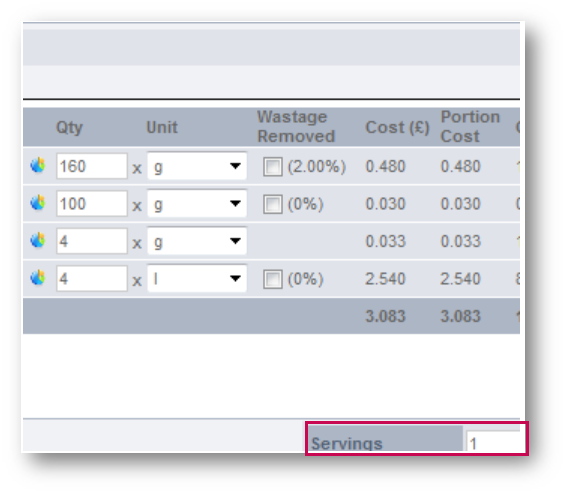
Fig.9 - Cost of Ingredients
- Select [recalculate] when any changes are made to the ‘Ingredients’ tab

Fig.10 - 'recalculate' Link
The system will refresh and display the new Cost Per Serving.
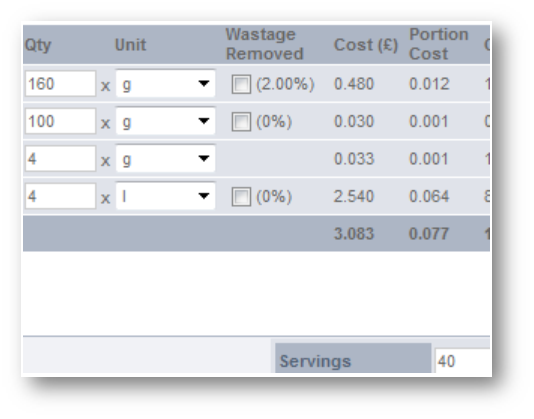
Fig.11 - Recalculated Cost Prices
Ingredient Cost Model

Fig.12 - ‘view ingredient cost model prices’ Link
- Select [view ingredient cost model prices] to view the cost in alternative cost models for the Batch
The pop-up displayed in Fig.13 will show and display the various costs against the items included in the Batch.
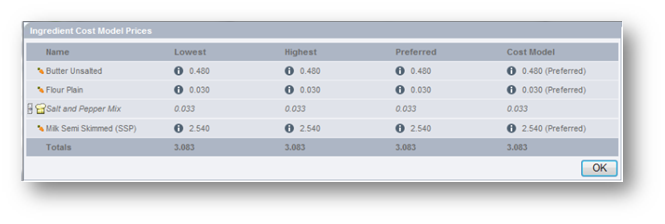
Fig.13 - Ingredient Cost Model Pop-up Window
If there are other Batches included in the Batch recipe, these can be expanded to view the products within this Batch.
- Select OK to close the pop-up
Please Note: The Cost Model pop-up is for information purposes only. It is not possible to change the Cost Models here.
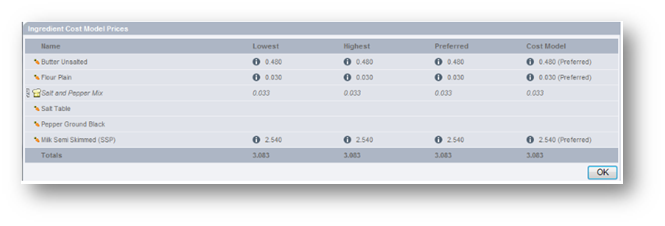
Fig.14 - Ingredient cost model
Inputting Yields
Define the Batch Size in the ‘Yield’ tab.
- Enter the Raw Weight of the items in the Batch
The Raw Weight is the weight of the items in the batch before they have been prepared or cooked.
- Enter the Cooked Weight of the items in the Batch
The Cooked Weight is the weight of the batch once it is completed. It doesn’t have to be physically cooked, as it could be the weight once all the ingredients have been mixed together. E.g. The cooked weight of dough is 1.2kg after proving.
- Enter the Portion Size
The Portion Size is the cooked weight divided by the number if servings.
Please Note: Any changes on this page to Raw Weight or Cooked Weight require the ‘Recalculate’ link to be selected.
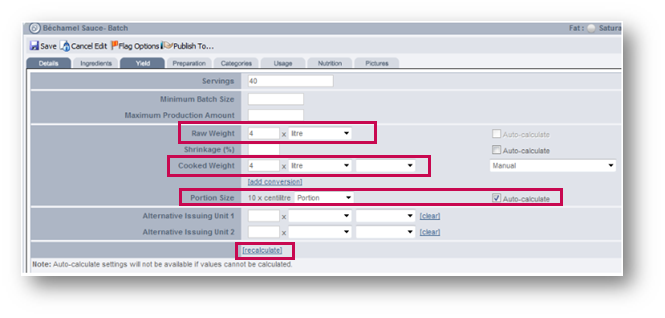
Fig.15 - Yield Tab
Adding Categories
A Batch will need to be added to a Cost Center category so that it can be exported to the Stock System.
- Select the Categories tab and then add new category

Fig.16 - Categories Tab
A pop-up box will display with the list of available Cost Center Categories.
- Choose from the Category Type drop-down menu and select the correct category from the Available Categories area
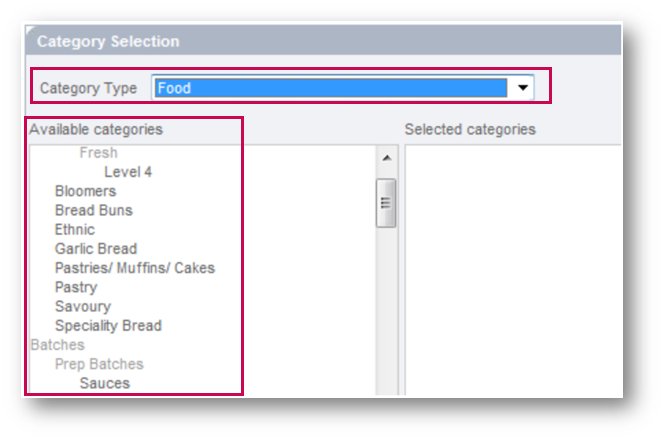
Fig.17 - Searching for Categories
Once selected, the Category will move across to the Selected Categories area.
- Select Done to finish
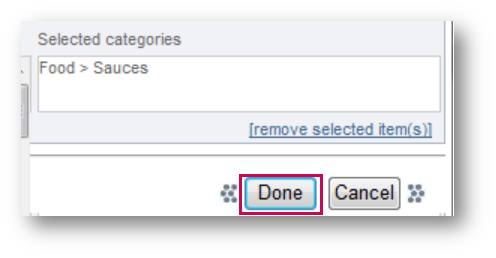
Fig.18 - Adding a Category
The Cost Center category is now added to the Batch.
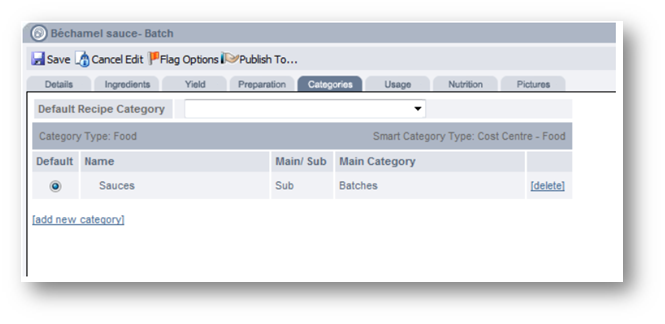
Fig.19 - Category Added to Batch
Also See

Comments
Please sign in to leave a comment.