
Overview
Vendor Documents need to be added and configured in order to complete the setup of a Vendor in Purchasing and Inventory. This article describes the process of assigning, adding and configuring Vendor Documentation, along with explanations of the fields required to be filled out in the Document setup.
Assigning Documents to Vendors
-
To assign documents to Vendors, right-click on the Vendor and select Documents
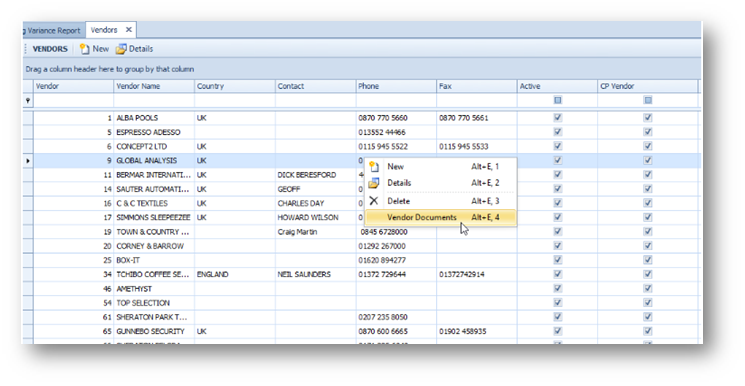
Fig.1 - Opening Vendor Documents
With the Vendor Documents screen open, documents can be viewed and new ones added.
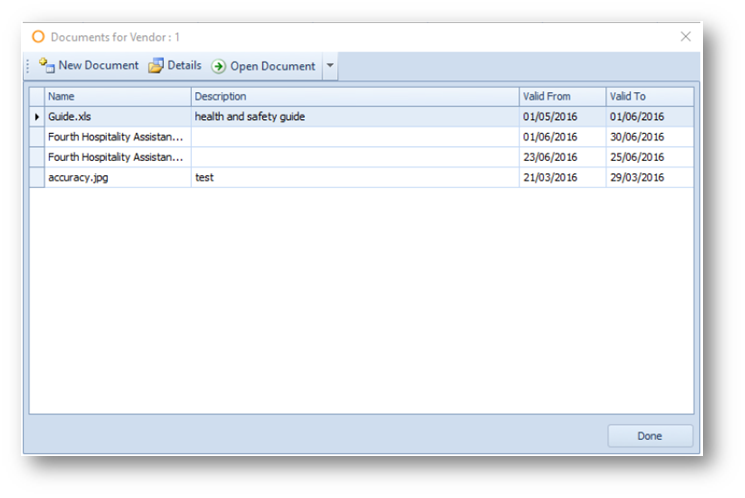
Fig.2 - Vendor Documents
|
New Document |
Opens the Vendor Document Details screen (Fig.3) to create a new document. |
|
Details |
Opens the Vendor Document Details screen for the document selected. |
|
Open Document |
Opens the document selected. |
Adding a new Vendor Document

Fig.3 - Vendor Document Details Screen
|
Browse |
Upload address for document (alternatively press |
|
File Name |
Name of file uploaded. |
|
File Description |
Description of file. |
|
Document Type |
Type of document as configured in Property > Set-Up > Vendor Performance > Document Type. |
|
Valid From |
Date document starts. |
|
Issuer |
Name of Company/Person issuing the document. |
|
Valid To |
Date document expires. |
|
Expiry Notification Sent |
Visual confirmation that the expiry notification has been sent. Expiry notifications require the setup of a Scheduled Job, |
 which will open the Open screen).
Configuring Vendor Documentation
-
To configure the Vendor Documentation, go to Property > Set-up > Vendor Performance > Document Type

Fig.4 - Vendor Document Types
-
When the document type has been chosen, either select Details or double-click on the Document type
This will open the Document Type Details page (Fig.5).
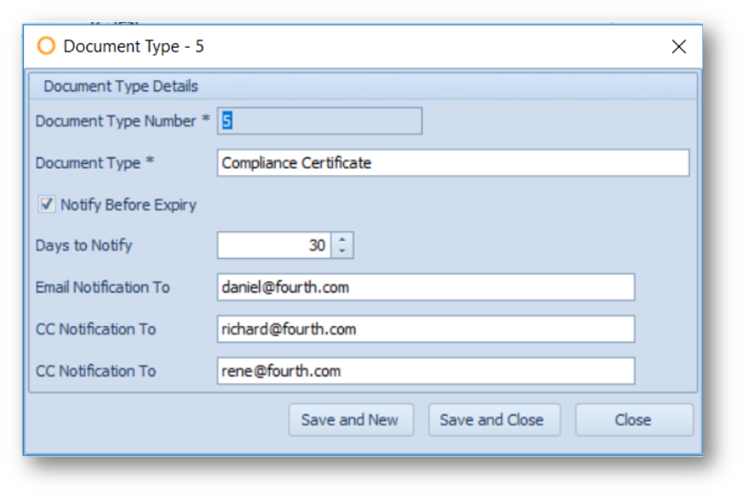
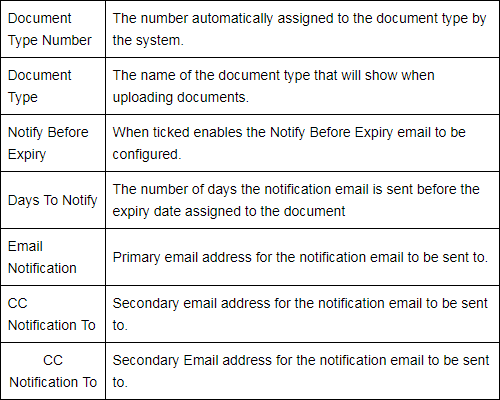
Fig.5 - Document Type Details
Comments
Please sign in to leave a comment.