
Overview
This article describes the process of creating and maintaining Budgets in Purchasing & Inventory (formerly known as Adaco).
Budget Setup
Firstly, Budget Codes must be created.
-
Go to Property > Setup > Accounting > Budget Codes as per Fig.1.
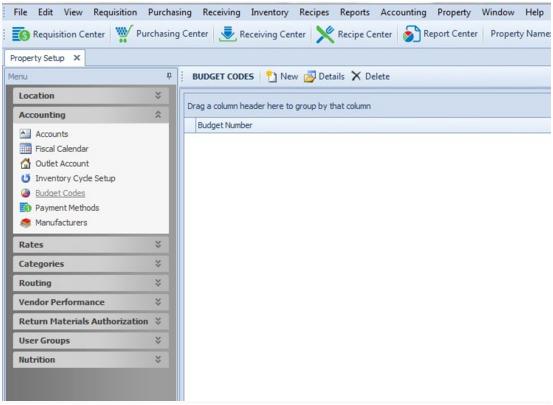
Fig.1 - Budget Code Screen
Creating a New Budget Code
- Select New
- Enter a unique Budget Number and Name
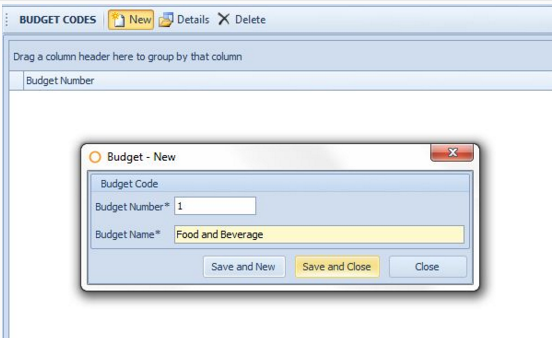
Fig 2 - New Budget Creation Screen
Associate Accounts with Budget Codes
A budget needs to be associated with at least one account. This would be the account that purchases are typically charged to for a department or outlet.
- To associate a Budget Code with an account, go to Property > Setup > Accounting > Accounts.
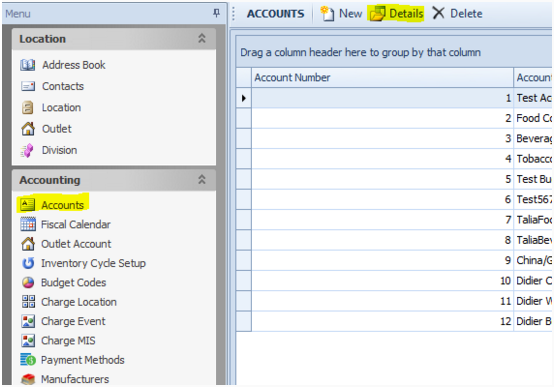
Fig.3 - The Accounts screen in Property>Setup
- Double-click an Account to open the details screen and in the Budget Code drop-down list, choose the Budget Code needed
- Save
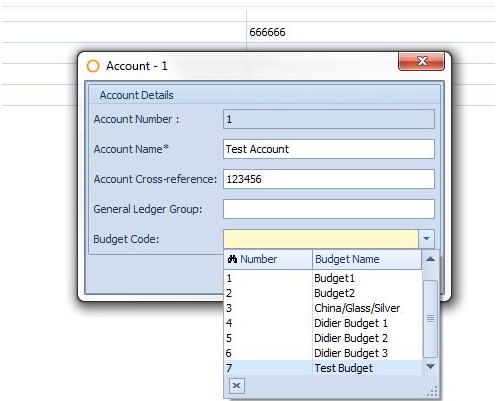
Fig.4 - Assigning a Budget Code to an Account
Outlet or Division
At this point, the budget is ready to be created. There are a few points to consider though.
First is: Outlet vs. Division. A budget can be assigned to either an Outlet or a Division.
A Division is basically a group of outlets. If, for instance, there are several food and beverage outlets under different departments or locations, a budget could be assigned to all of those outlets as part of a division. Another scenario is if the property wanted to group all of a particular departments outlets together - even if the outlets are for different items (such as all Housekeeping or Engineering outlets), they can be grouped into a division and given a budget code.
- To view and create Divisions go to Property > Setup > Location > Division as per Fig.5
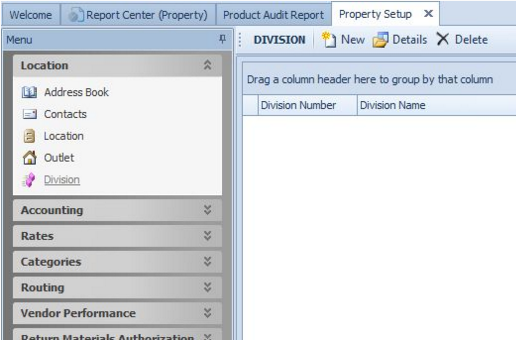
- Select New to add a new Division
- Enter a unique Division Number and Name
- Check the box(s) next to the Outlets to add to the Division
- Save and Close when done
Budget Types
It is now possible to manage three types of budgets in Purchasing & Inventory:
- Budgets – What is hoped to be achieved
- Forecast – What is expected to be achieved
- Plan – What could be achieved
The Checkbook Accounting report will show committed spend against all three budget types as well as variance against each Budget type.
When submitting a Purchase Requisition, the value of the PR will be checked against both the Budget and Forecast values and where either value is exceeded, the user will receive a warning stating that the PR will exceed the budget for the period.
The user can select to view the Budget Review Report which will show the committed spend against the Budget and Forecast. Plan budgets are not shown in the Budget Review Report.
Creating a Budget
There are two ways to create a Budget. One is to use Checkbook Maintenance and the other is the import Budget feature.
-
To create a budget with Checkbook Maintenance, go to Accounting > Budgets > Checkbook Maintenance
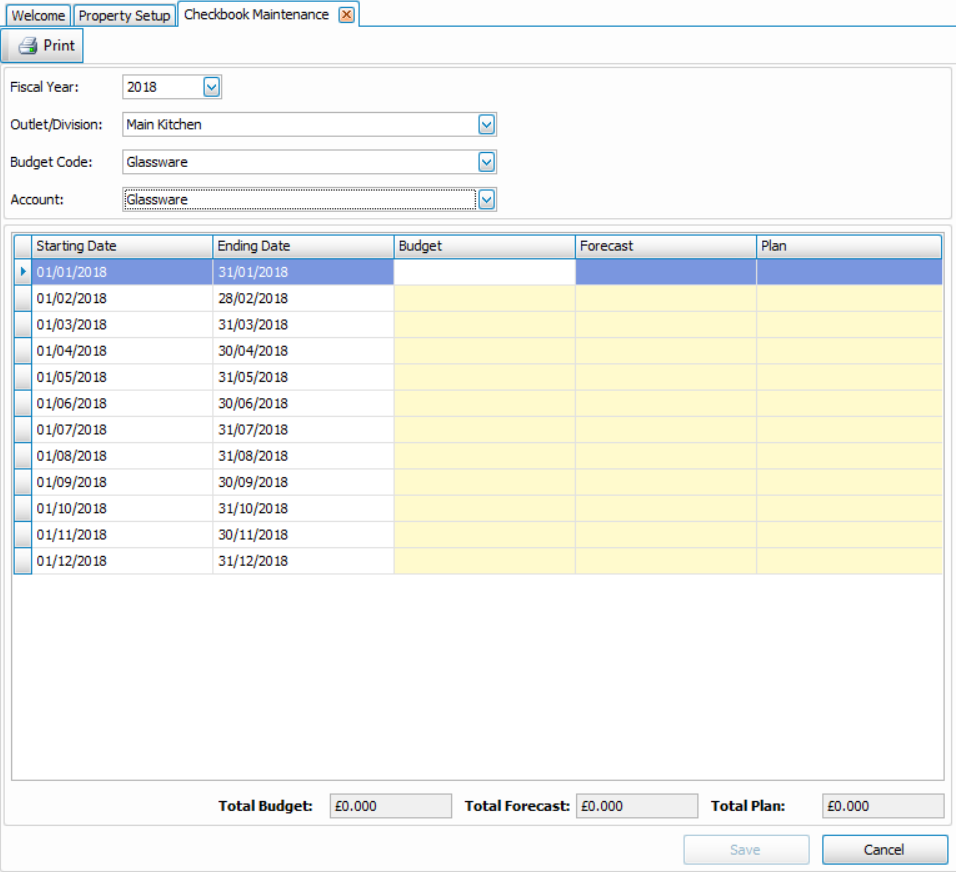
Fig.7 - The Checkbook Maintenance screen
- Select the Fiscal Year for which the budget will apply to
- Select the Outlet/Division, Budget Code, and Account
- In the Budget field, enter the budget amount for each period. The Total Budget is calculated automatically at the bottom of the window
- In the Forecast field, enter the forecast amount for each period. The Total Forecast is calculated automatically at the bottom of the window
- In the Plan field, enter the plan amount for each period. The Total Plan is calculated automatically at the bottom of the window
- Save when done
Importing a Budget
A budget file is a Comma Delimited (.CSV) file that is imported into Adaco to populate the budget information. This file can be created in Notepad or MS Excel, but will need to be saved as a CSV file.
The same file format should be used to upload Budgets, Forecast and Plan.
In the CSV file, the fields are in order as follows:
| Outlet number or Division number. |
Account Cross-Reference If the Account Cross-Reference doesn't exist in Adaco, then Check the Account Number. If the Account Cross-Reference check returns more than one matching account, the value will be loaded against the first one in the file. |
The 3rd to 14th (12-month), 15th (13-period), or other (custom) fields are the budget amounts for each period. |
Please Note: Do Not include any symbols - just use numbers as per Fig.8 and Fig 9.
Fig.8 shows an example of a CSV file in Notepad.
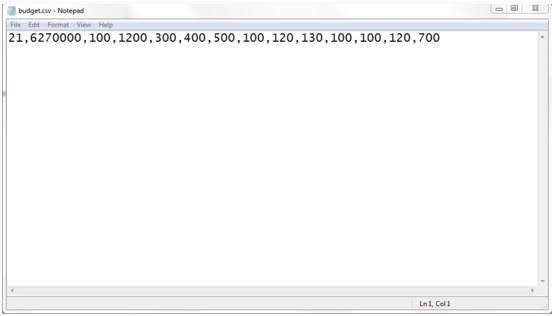
Fig.8 - A budget CSV file in Notepad
Fig.9 shows an example of a CSV file in MS Excel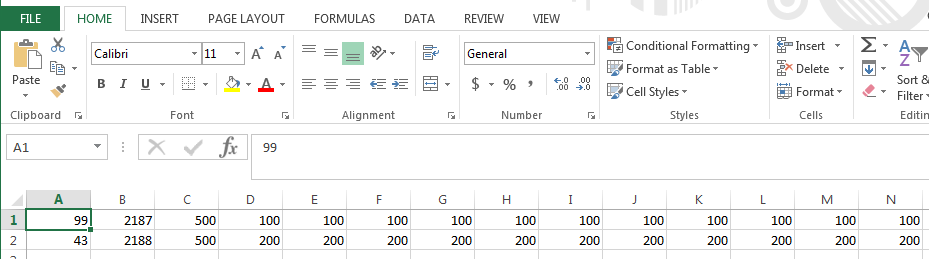
- To import the file, go to Accounting > Budgets > Import Budgets
- Use the ... button next to Select File, search for the CSV file on the computer, and Open
- Select if you are uploading Budget, Forecast or Plan
- Select Import. This will list the details below
- All cells in the CSV file must be in the 'General' format. Any other format will result in the data not being imported
Please Note: Actual Period amounts are not included on this screen. To see these, open the budget in Checkbook Maintenance after loading the budget.
- Select the correct Fiscal Year and select Load as per Fig.10
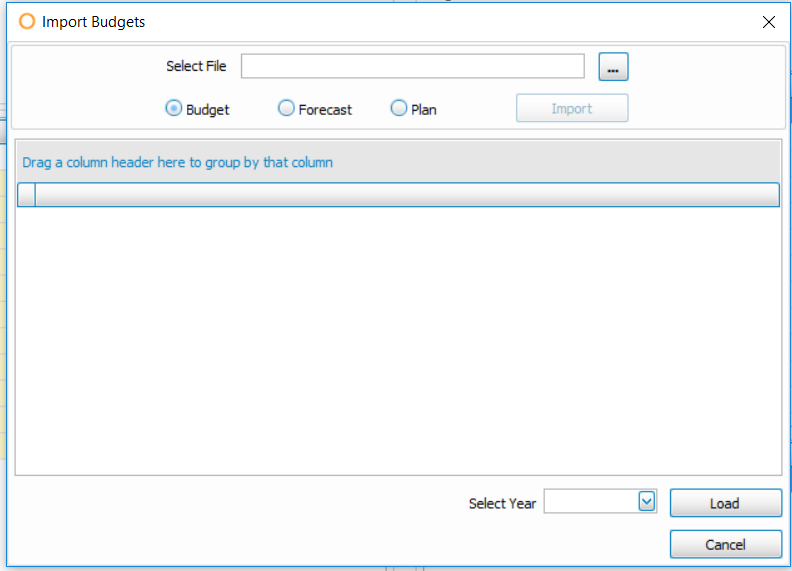
Fig.10 - Importing the budget file
Comments
Please sign in to leave a comment.