The System is designed to help those in the hospitality industry manage their purchasing, stock control and time.
A time saving feature of the system is the ability to input, reconcile and export invoices.
This document explains how to reconcile invoices, both paper and electronic (EDI), against their respective delivery notes.
For a shorter guide on reconciling EDI invoices only, please see Inventory Restaurants: Quick Guide to Reconciling EDI Invoices
Reconciling Invoices with No Variances
- Non-electronic suppliers (non EDI suppliers) will send a paper invoice for goods delivered. Prior to inputting this information in the system, the good received note (GRN) needs to have been approved.

Fig 1 - Approved GRN Showing Invoice Status
- Search for the approved delivery as in Fig 1 above and note that ‘Invoice Status’ column which indicates whether an invoice has been created (see section Invoice Status for details on invoice statuses).

Fig 2 - Grey Create Invoice Button
- After clicking the GRN in question click the grey ‘Create Invoice’ button.
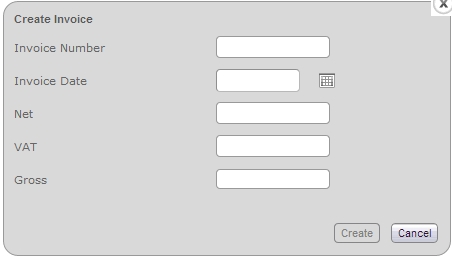
Fig 3 - Invoice Header Pop-Up Form
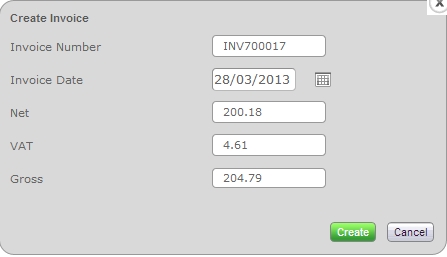
Fig 4 - Completed Invoice Header Pop-Up Form
- A pop-up form appears as in Fig 3, fill in the relevant text and pick boxes with the corresponding information off the paper invoice and press the green ‘Create’ button.
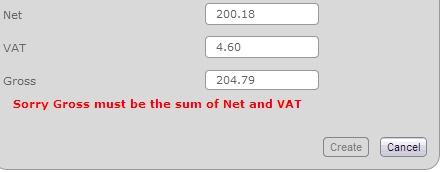
Fig 5 - Input Error
- Fig 5 shows the error message that is shown if the entered Net, VAT and Gross information does not tally. The ‘Create’ button is also disabled as a result.
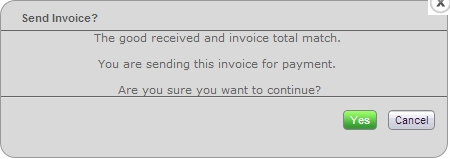
Fig 6 - Mark Invoice Prompt
- Should the inputted total Net, VAT & Gross match the totals on the GRN, a prompt is shown asking whether the invoice should be marked for export.
- Clicking the green ‘Yes’ button changes the status of the invoice to ‘Marked for Export’ as in Fig 7. If the grey ‘Cancel’ button in clicked, the invoice will have a status of ‘Pending’.

Fig 7 - Invoice with a 'Marked For Export' Status
Reconciling Invoices with Variances on Quantities
- In this example, an order was created for 10 bottles of orange juice. The GRN was approved with the ordered quantity of 10; however the supplier sent the paper invoice indicating that 11 will be charged for.

Fig 8 - GRN Totals
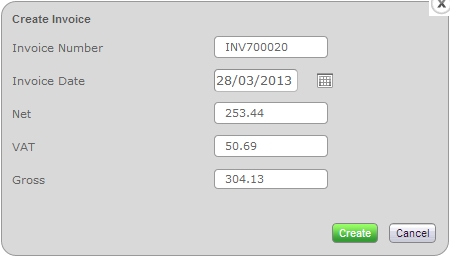
Fig 9 - Completed Invoice Header Form with Differing Totals
- Fill in the Invoice Header information as per the paper invoice.
- Fig 9 was completed with totals that are different to the GRN. Click the green ‘Create’ button.

Fig 10 - Invoice Reconciliation Page
- The system will navigate to the ‘Invoice Reconciliation’ page which shows the reason(s) why the invoice could not be immediately marked.
- The differences are reconciled on this page.

Fig 11 - Invoice Line After Clicking The Edit Icon
- Clicking the edit icon [
 ] will allow users to:
- Edit invoice quantities.
- Edit the invoice cost price.
- Change the VAT rate of a line item.

Fig 12 - Updated Invoice Line
- Using the example outlined at the beginning of this section, the quantity has been updated to 11.
- After the update note the Invoice & Line totals now match within any pre-defined tolerance, this automatically enables the green ‘Save’ button in Fig 13.

Fig 13 - Invoice Reconciliation ‘Save’ Options
- Click the green ‘Save’ button.
- The grey ‘Delete Invoice’ button deletes the invoice that had been created, however it will not delete the corresponding GRN.
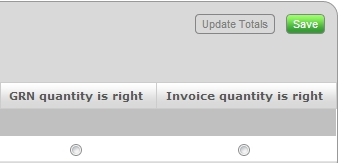
Fig 14 - Invoice & GRN Validation Page
- The System then navigates to the ‘Invoice & GRN Validation’ page.
- For each change made to lines on the Invoice Reconciliation page the document with the correct information must be selected.
- Depending on which option is chosen, the system will attempt to either; create a credit request if ‘GRN quantity is right’ option is selected or amend the GRN quantities if the ‘Invoice quantity is right’ option is selected.
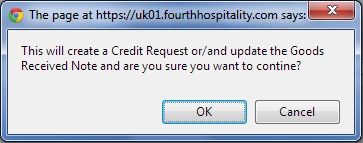
Fig 15 Changes Validated Prompt
- In the running example the option ‘Invoice quantity is right’ is selected.
- Click the grey ‘Update Totals’ button and the system will give the prompt above.
- Click the grey ‘OK’ button and the system will update the GRN in the running example.

Fig 16 - Amended Quantity on GRN
- Fig 16 shows the quantity on the GRN after it was updated by the system. This will save time based on the fact the GRN does not need to be re-opened and amended separately. The red flag [ ] indicates that the actual quantity was changed.
Reconciling Invoices with Variances on Values
- In this example, an order was created for 10 bottles of orange juice at £23.04 per bottle. The GRN was approved with the ordered quantity of 10 and cost of £230.40, however the supplier sent the paper invoice with a higher cost of £24.00 per bottle.

Fig 17 - Original GRN Totals
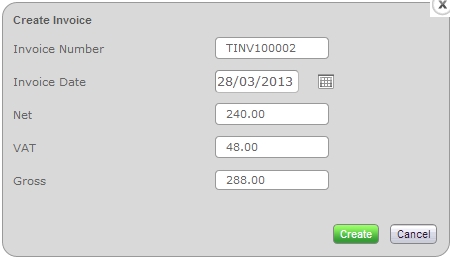
Fig 18 - Completed Invoice Totals
- Fill in the Invoice Header information as per the paper invoice.
- Fig 18 was completed with totals that are different to the GRN. Click the green ‘Create’ button.

Fig 19 - Invoice Reconciliation Page
- The system will navigate to the ‘Invoice Reconciliation’ page which shows the reason(s) why the invoice could not be immediately marked.
- The differences are reconciled on this page.

Fig 20 - Invoice Line After Clicking The Edit Icon
- Clicking the edit icon [
 ] will allow users to:
- Edit invoice quantities.
- Edit the invoice cost price.
- Change the VAT rate of a line item.

Fig 21 - Updated Invoice Cost Price
- Using the original example explained at the beginning of this section, the unit cost has been charged at £24.00.
- After the update note the Invoice & Line totals now match within any pre-defined tolerance, this automatically enables the green ‘Save’ button in Fig 13.
- Click the green ‘Save’ button.

Fig 22 - Validate Invoice Against GRN Page
- The System then navigates to the ‘Invoice & GRN Validation’ page.
- For each change made to lines on the Invoice Reconciliation page the document with the correct information must be selected.
- Depending on which option is chosen, the system will attempt to either; create a credit request if ‘GRN price is right’ option is selected or amend the GRN cost prices if the ‘Invoice price is right’ option is selected.
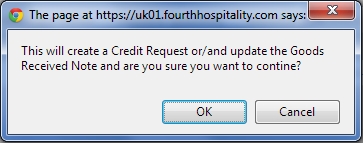
Fig 23 - Changes Validated Prompt
- In the running example the option ‘Invoice price is right’ is selected.
- Click the grey ‘Update Totals’ button and the system will give the prompt above.
- Click the grey ‘OK’ button and the system will update the GRN in the running example.

Fig 24 - Amended GRN
- Fig 24 shows the value on the GRN after it was updated by the system. This will save time based on the fact the GRN does not need to be re-opened and amended separately.
Invoice Status
Invoices may have one of 5 statuses:
- New – This only applies to invoices sent by EDI suppliers. ‘New’ means that the document is matched to a GRN however it has reconciled.
- Pending – Indicates that the invoice has is matched or manually created and is not yet completely reconciled, or has been reconciled against the GRN but not marked for export. This will need to be manually approved by a user with sufficient access.
- Awaiting Credit – Indicates that there is was a discrepancy between the invoice and GRN, however the figure on the GRN is the correct one. The invoice cannot be marked for export until the credit note is received, reconciled and marked for export.
- Approved – Indicates that an invoice that with a variance greater than the tolerance has been approved.
- Marked For Export – Indicates that the invoice has been reconciled against the GRN and is marked and ready to be exported to an accounting package.

Comments
Please sign in to leave a comment.