Overview
This article shows how to set up and run an Interim Inventory in Adaco (formerly Purchasing & Inventory).
Configuring Adaco to Allow Interim Inventory
Interim Inventory may not immediately available at a property, as it first needs to be enabled.
To do this:
- Go to Property > Administration > Property Preferences > Inventory
- Tick the Allow Interim Inventory box - see Fig.1
- Select Save

Create an Interim Inventory Cycle
The next step is to create an Interim Inventory Cycle to be used for the Interim Inventory.
- Go to Property > Setup > Accounting > Inventory Cycle Setup > New
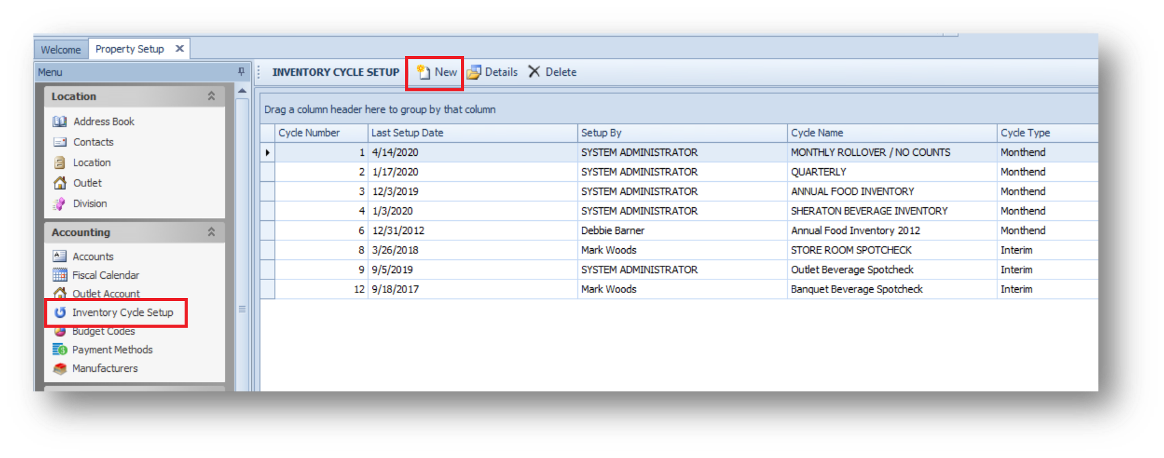
Fig.2 – Inventory Cycle Setup
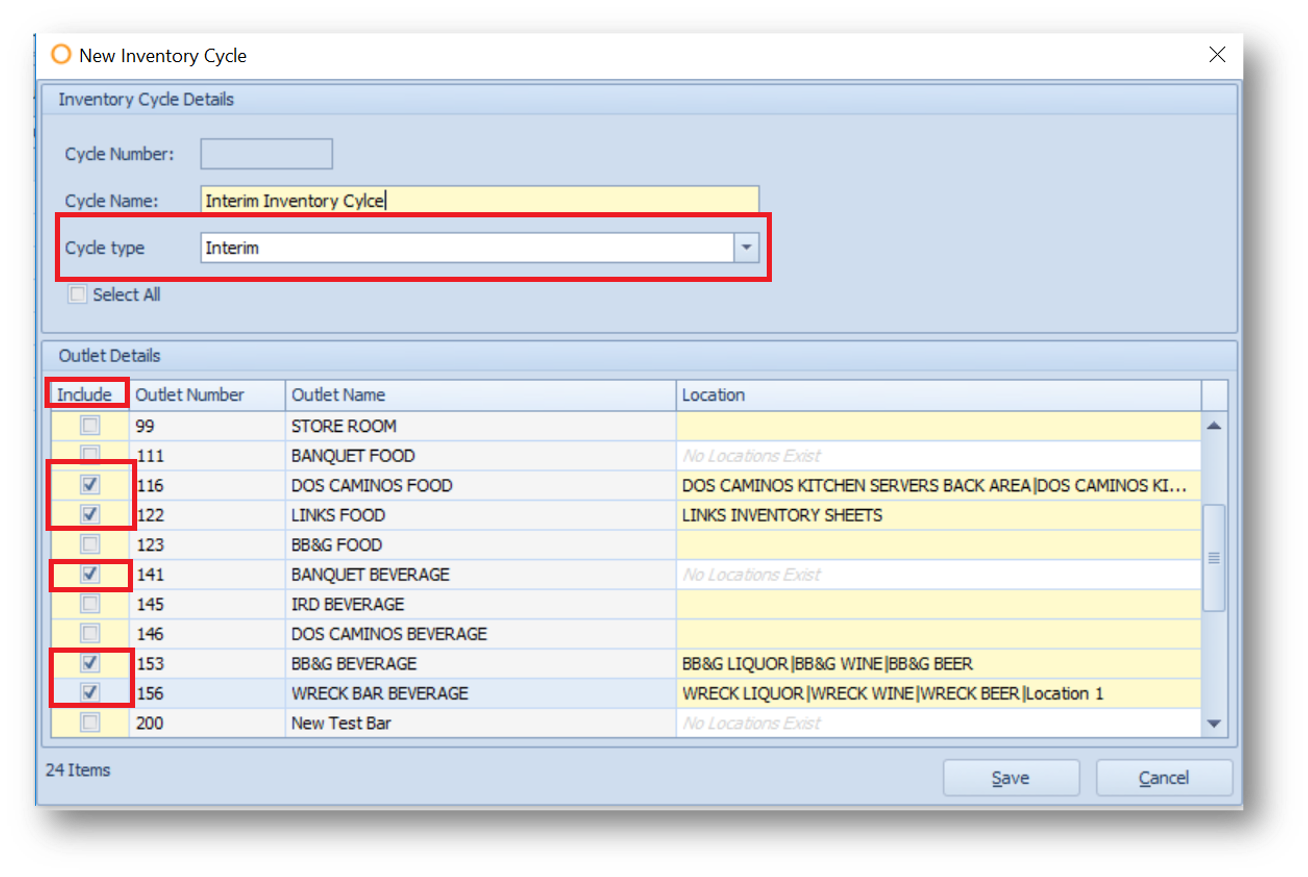
- When creating a new Interim Inventory Cycle, change the Cycle Type to Interim
- The Outlets (locations if available) need to be marked as Included to be part of the Interim Inventory Cycle (see Fig.3)
- Select Save
Starting Interim Inventory
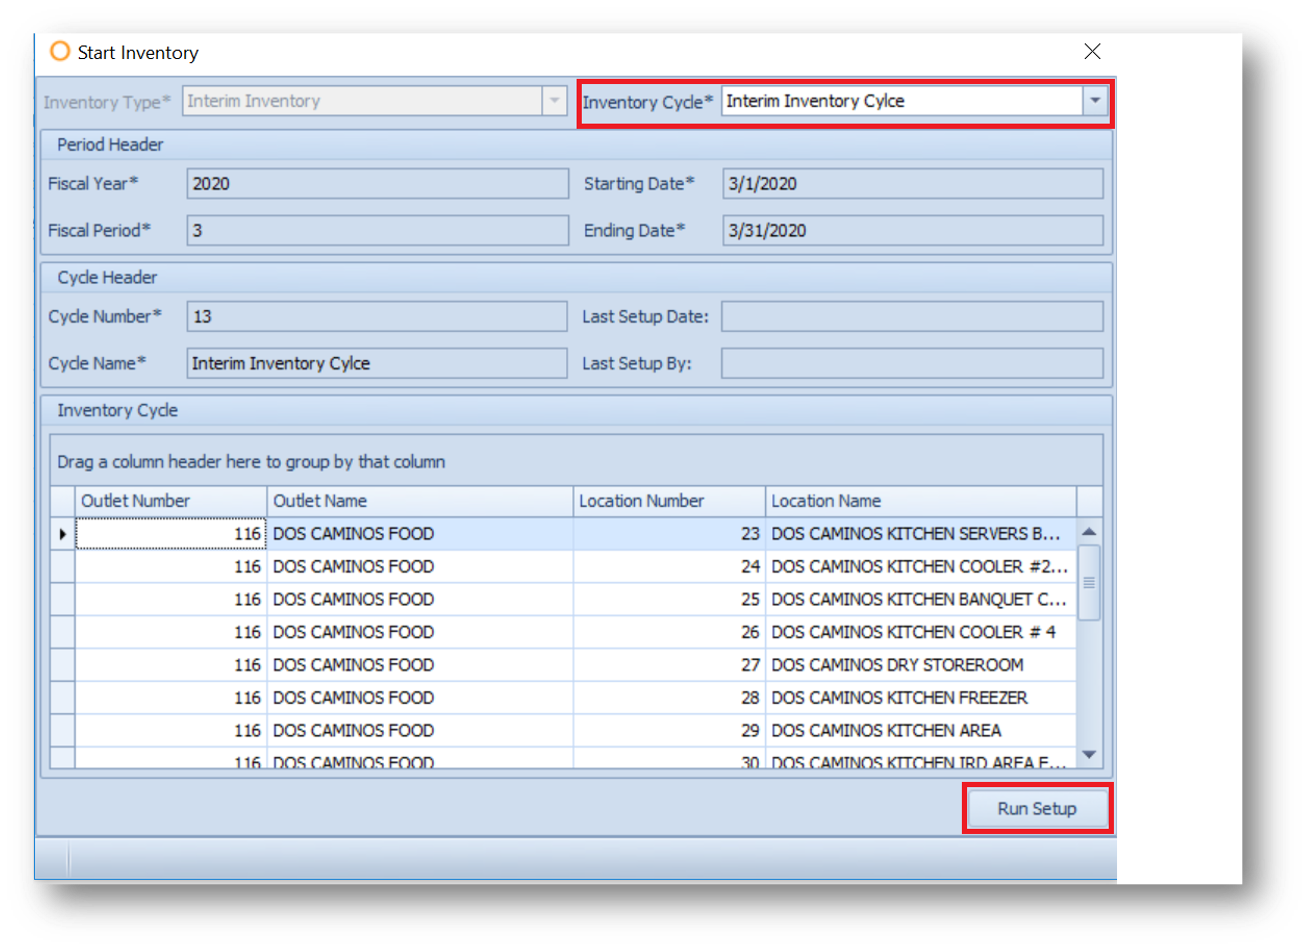
- Go to Inventory > Start Interim Inventory
- From the Inventory Cycle drop-down, select the correct Interim Inventory Cycle
- Select Run Setup
Entering Interim Inventory Counts
Entering the Interim Inventory Counts is similar to entering counts for a Month End Inventory.
- To enter the counts, go to Inventory > Physical Inventory Count
- Select the Outlet to have inventory entered in, and then Details
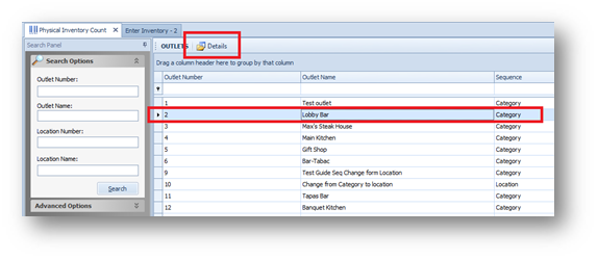
Fig.5 – Outlet Selected and Details
- Select the Location or Category as needed
- Enter Counts
- Select Save

Fig.6 – Enter Inventory
To run the Interim Valuation Report once the counts have been entered, go to:
- Report Center > Inventory Reports > Interim Inventory Valuation (Current)
- See the following article for more information about the Interim Inventory Valuation Report: Purchasing & Inventory - Interim Inventory Valuation (Current Period) Report
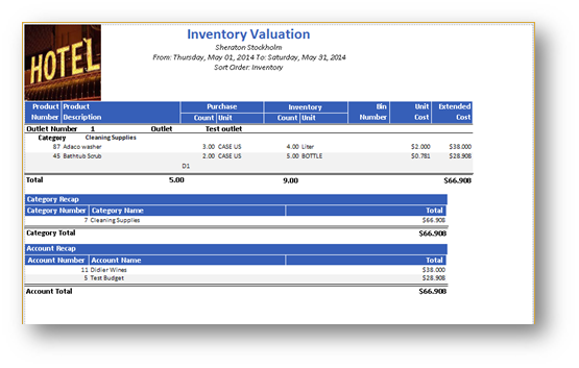
Fig.7 – Inventory Valuation Report
Closing Interim Inventory
- Once all counts have been entered and the Interim Inventory Valuation has been run, the Interim Inventory can then be closed by going to Inventory > Close Interim Inventory
When closing an interim inventory, any variances between the calculated system on-hand and the physical inventory count will generate an Inventory Adjustment, which will be posted to align the system on-hand count with the physical inventory count.
It is possible to post these inventory adjustments to a date prior to the date on which the interim inventory is being closed. For example, if a physical inventory count is taken on Sunday evening but the interim inventory is not closed until Monday morning, it is possible to post the inventory adjustments on Sunday.
Please note: It is not possible to post interim inventory variance adjustments on a future date or within a previously closed period (either full or interim).
- Use the 'Post Variances on:' drop-down as required
- Select Close Period
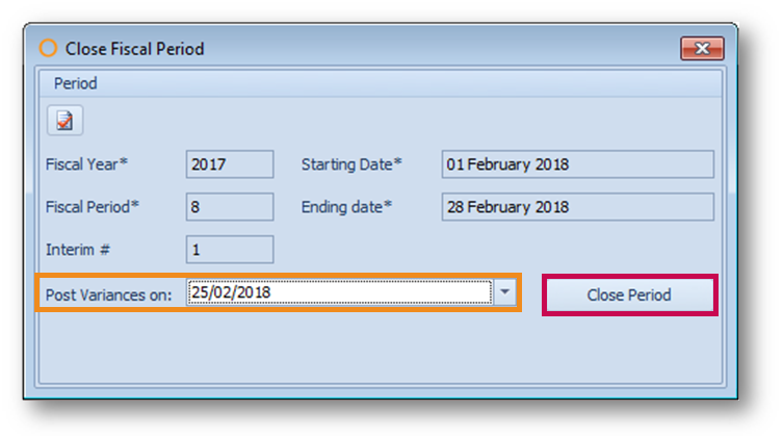
Fig.8 – Close Fiscal Period
A message will appear, asking to confirm closing the Interim Inventory.
- Select Yes if desired
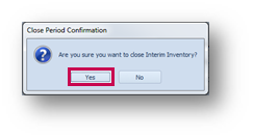
Fig.9 – Close Period Confirmation
Once the interim is closed, the Outlet's on-hand counts will be updated to reflect the counts entered for the Interim.
When the actual month-end inventory is closed, those month-end numbers will overwrite the counts entered for the interim and will be the valid on-hand counts.

Comments
Please sign in to leave a comment.