Overview
Keeping track of wastage within a Property is important. It can help to differentiate between theoretical vs actual stock loss, and to identify areas where savings can be made.This article explains how to record the cost of wastage within a business.
Process
The process of wastage transfers can be recorded in two different methods depending on the business needs.
These are:
- Transfer to Wastage Outlet (preferred option)
- Inventory Adjustment
Method 1- Transfer to Wastage Outlet (Preferred Option)
This method records wastage by transferring wasted products/recipes to a wastage Outlet. Based on business practice a wastage Account may need to be created, in which case the Account configuration will also need to be added to the Outlet.
Please note: A wastage Outlet and potentially a wastage Account will need to be created in the system prior to use - see Purchasing & Inventory - Property Setup on how to do this. This article provides generic instructions but of course in this instance, the new Outlet/Account must be set up to be wastage-specific.
- To transfer wastage to a wastage outlet go to Requisition > Transfer Center > New Transfer > Transfer

Fig.1 - Creating a New Transfer
- Complete all mandatory fields (marked with an asterisk), listed below and seen in Fig.2
| Mandatory Fields | Description |
|---|---|
| From Outlet | The Outlet where the product moved from |
| To Outlet | The Outlet where the product moved to |
| Posting Period | Automatically populates upon the creation of a new transfer |
| Transfer Date | The date when the product is moved |
- Use the Add Item/Item Search buttons and select the required Product(s) or Recipe(s)

Fig.2 - Mandatory fields and Add Item/Item Search buttons
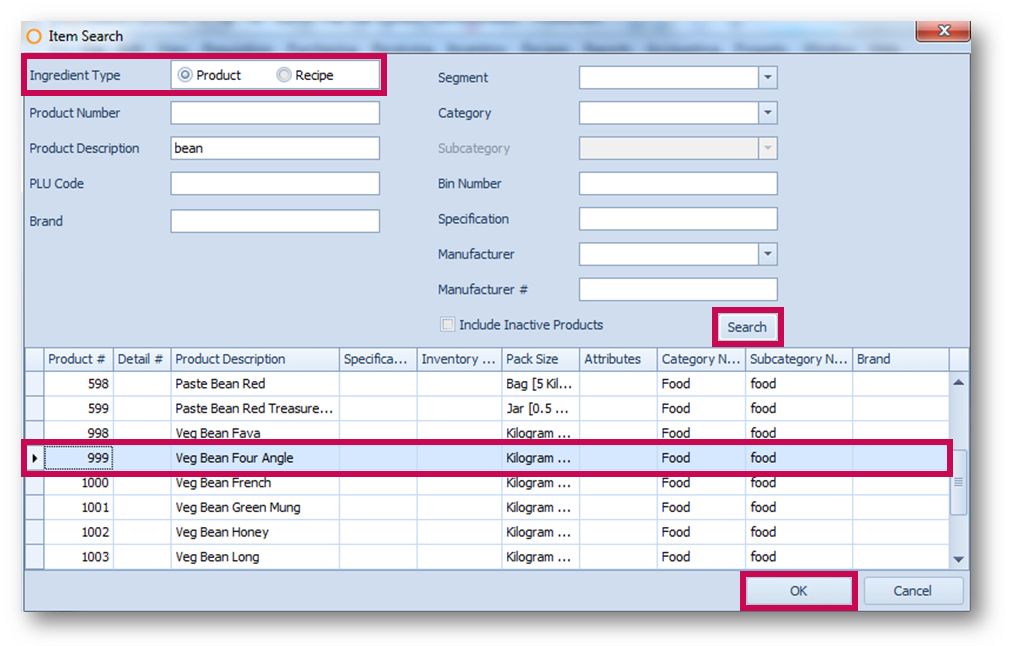
Fig.3 - Searching for and selecting a Product
- Once added to the Transfer, enter a Quantity for each product
- Select Post Transfer once complete
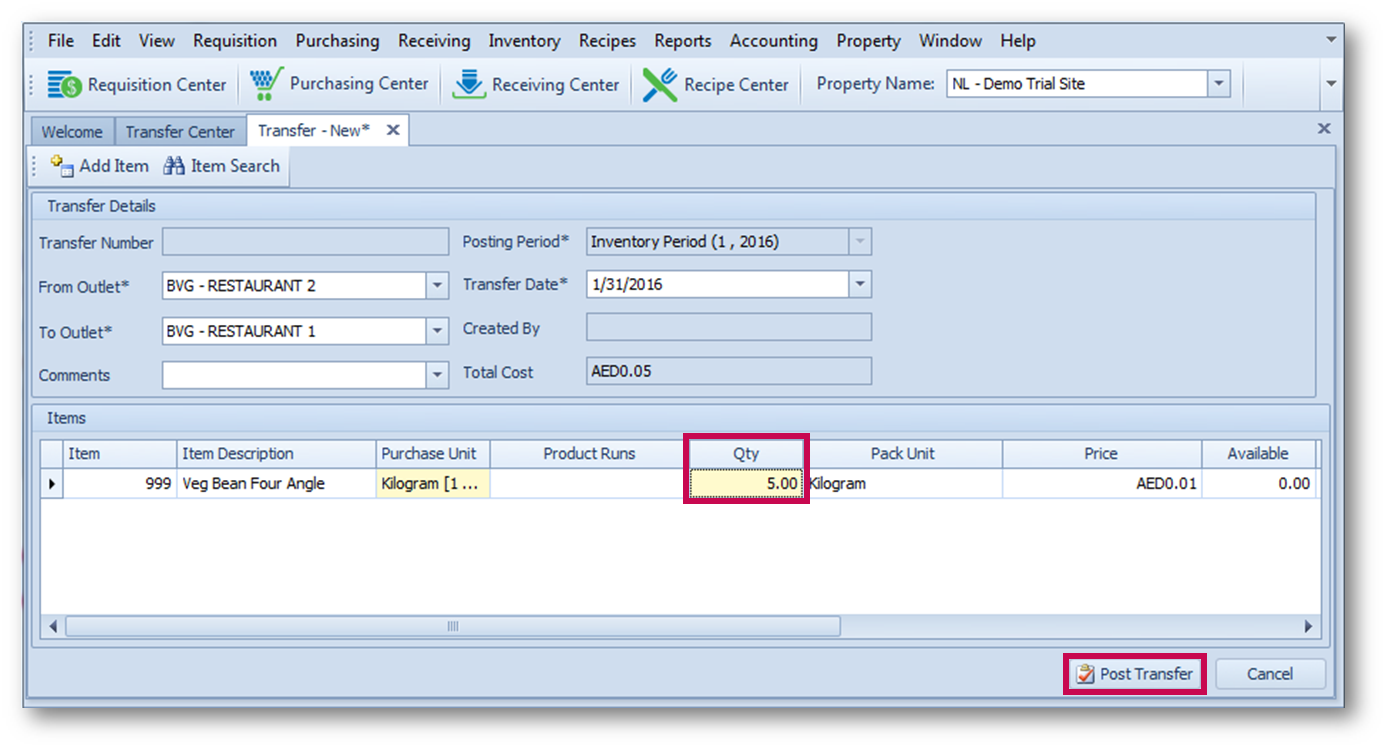
Fig.4 - Entering a Quantity and posting the Transfer
The inventory quantity (the cost of the product) is then transferred to the wastage Outlet and Account.
Method 2 - Inventory Adjustment
An alternative way to record wastage is to add an 'Inventory Adjustment' to decrease wastage products/recipes. Please note: this can only be reported on via Adjustments.
- Go to Inventory > Inventory Adjustment and populate the mandatory fields using the drop-down options
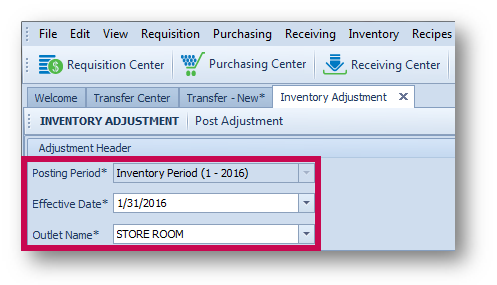
Fig.5 - Creating a new Inventory Adjustment
- Use the Add Product button
- Search for and select the required product(s)/recipe(s) and select OK to add them to the Adjustment
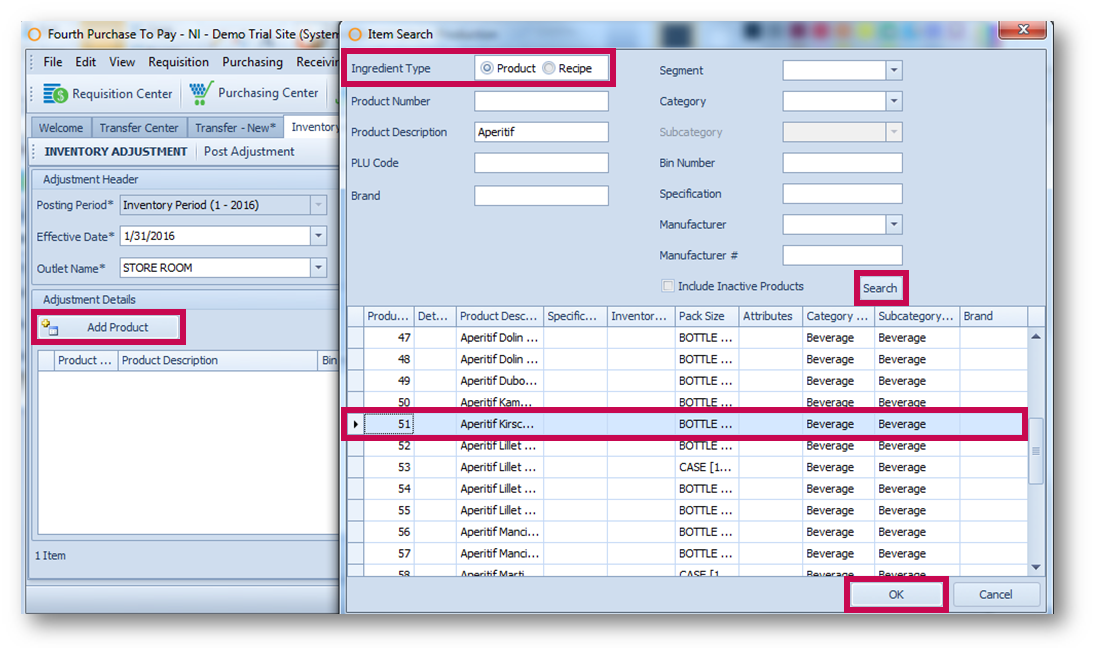
Fig.6 - Adding a Product (Wastage)
- Update the Adj Quantity field for each line and also add any required Comments
- Select Post Adjustment to finish
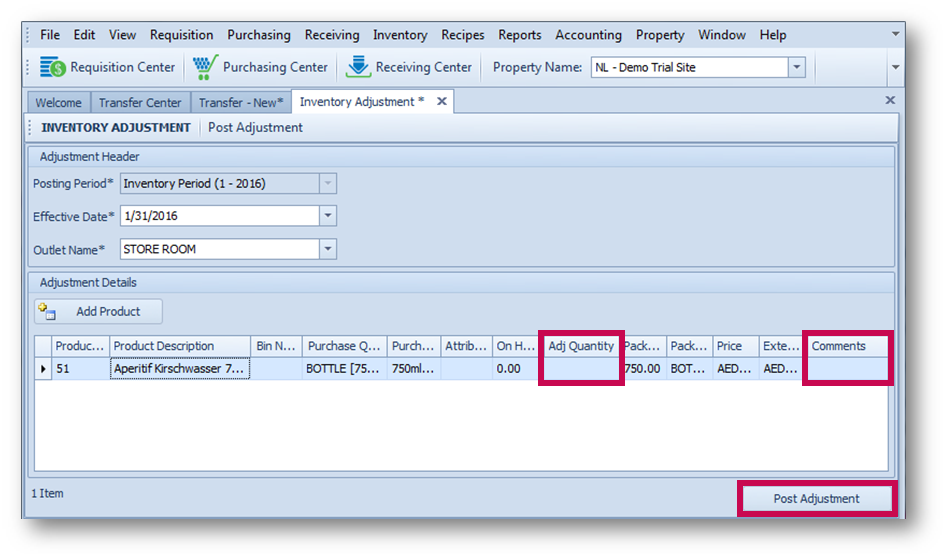
Fig.7 - Adj Quantity and Comments fields, and Post Adjustment button
The inventory quantities and costs are then removed from the theoretical stock on hand.
Viewing all Inventory Adjustments
- Go to Reports > Inventory Reports and select Inventory Adjustment Report
- Populate all fields and make sure Manual Adjustment is selected for Display Options
- Select Generate to run the report
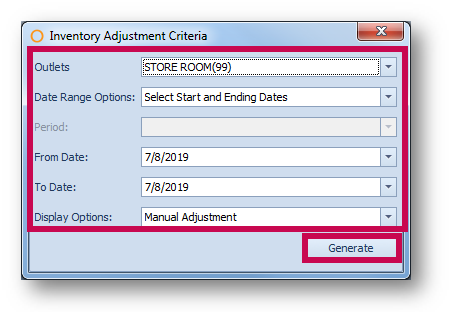
Fig.8 - Generating an Inventory Adjustment Report
The report will display as per Fig.9.
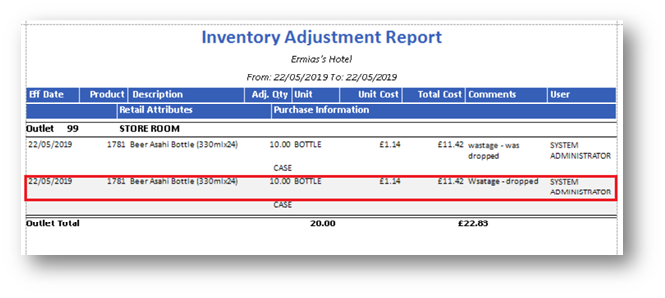
Fig.9 - Inventory Adjustment Report
Please refer to the following article for more detail on Inventory Adjustments - Purchasing & Inventory - Making an Inventory Adjustment

Comments
Please sign in to leave a comment.