Note: This article is just for Essentials and Plus clients. If you need to add a store and you are not an Essentials or Plus client, you will need to contact our sales team.
We are happy to hear you want to add a store to your account. This article will guide you in the process of adding a store. But before you start, this is only available for the Administrator of your account.
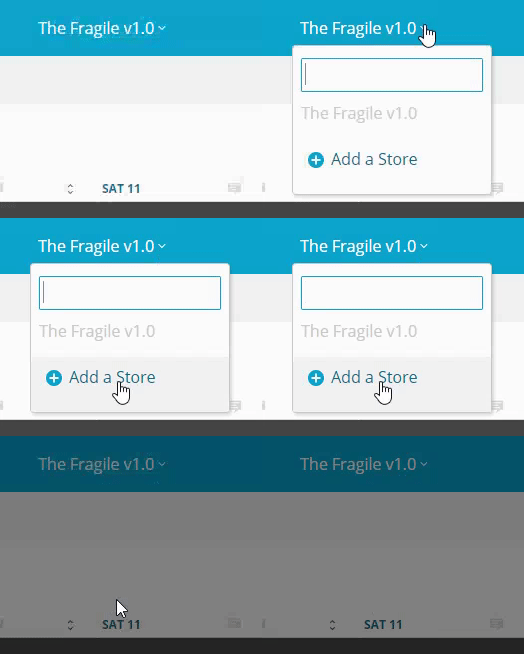
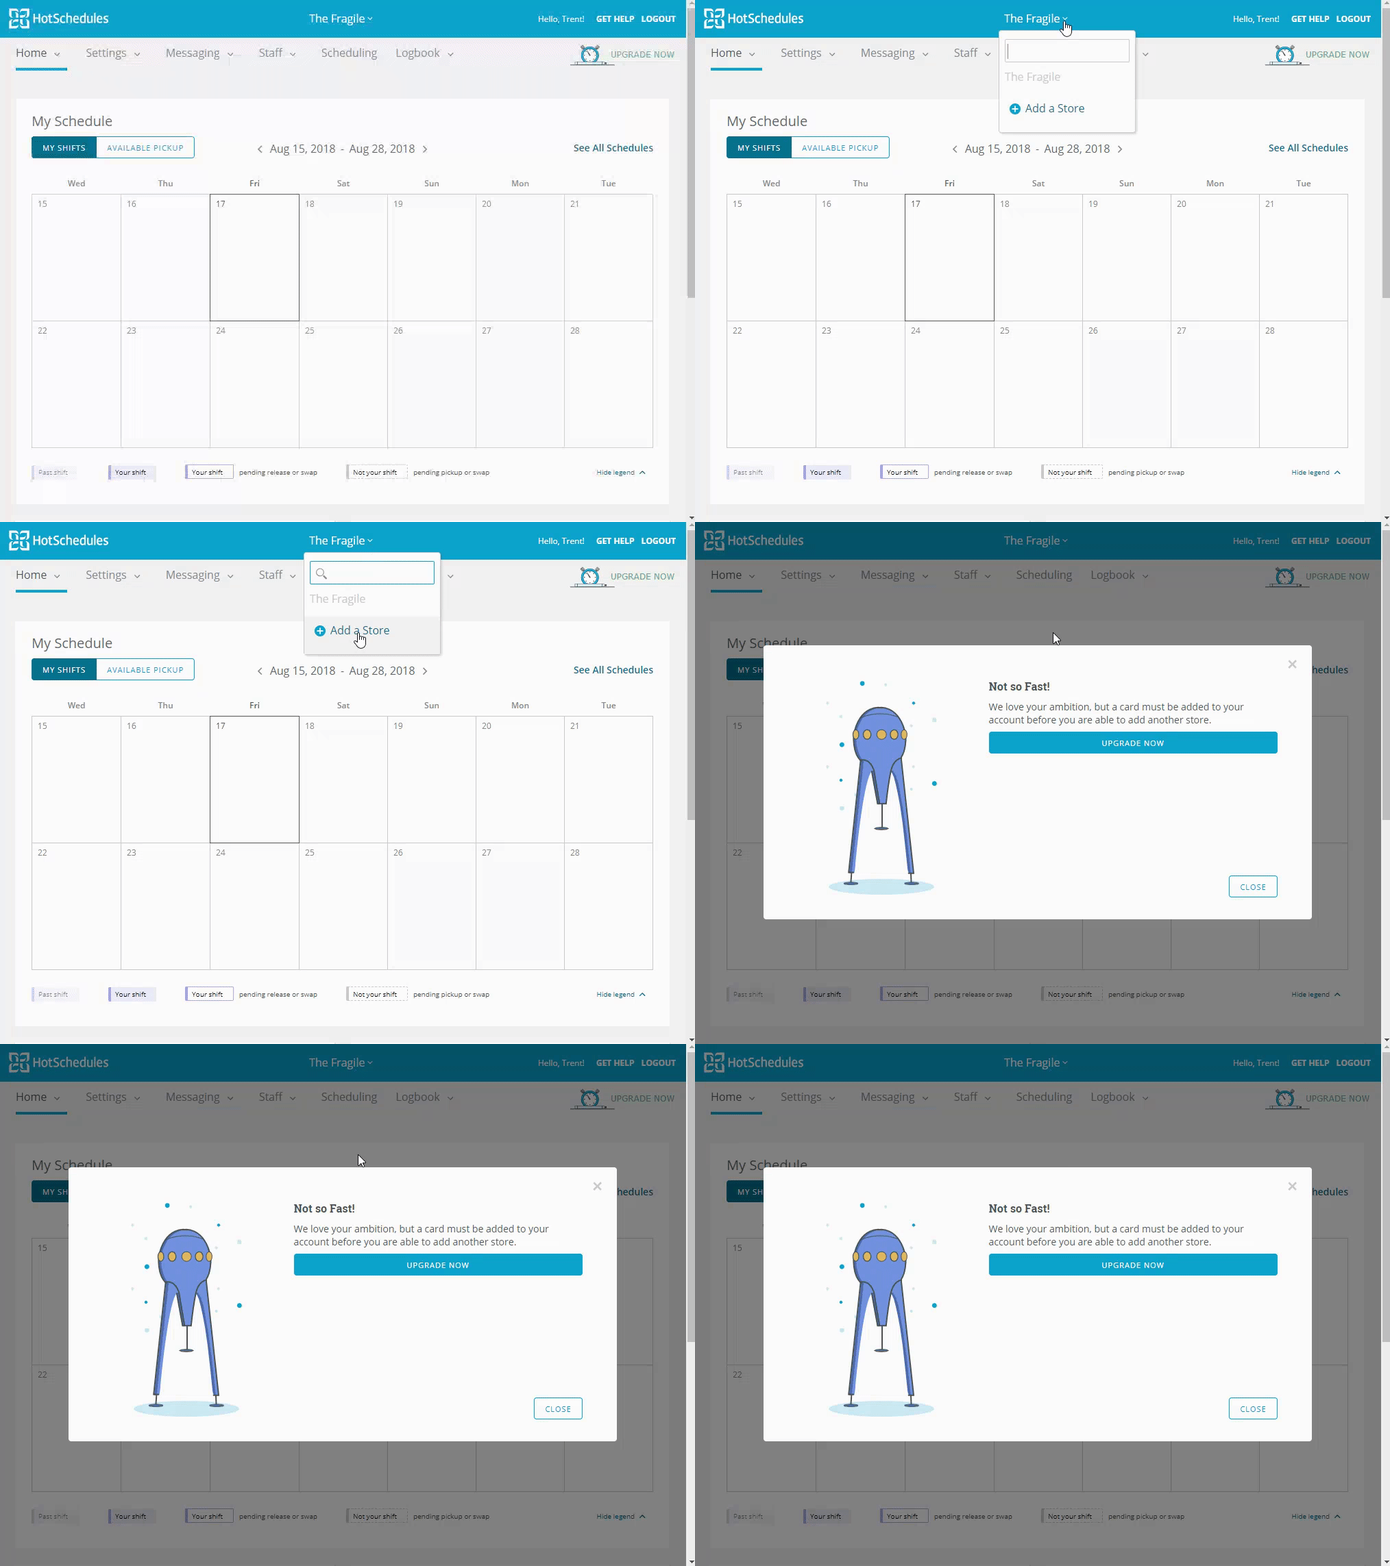
Let's start. Once you log in to your HotSchedules account, you will need to navigate to the top blue banner and click on the name of your store. That will open a menu with the '+ Add a Store' option. Go ahead and select '+ Add a Store.'
 |
Note: if you are still in trial mode, you will need to upgrade your original store first. You will receive the following message if you don't have a credit card on file. Follow this article to upgrade.
 |
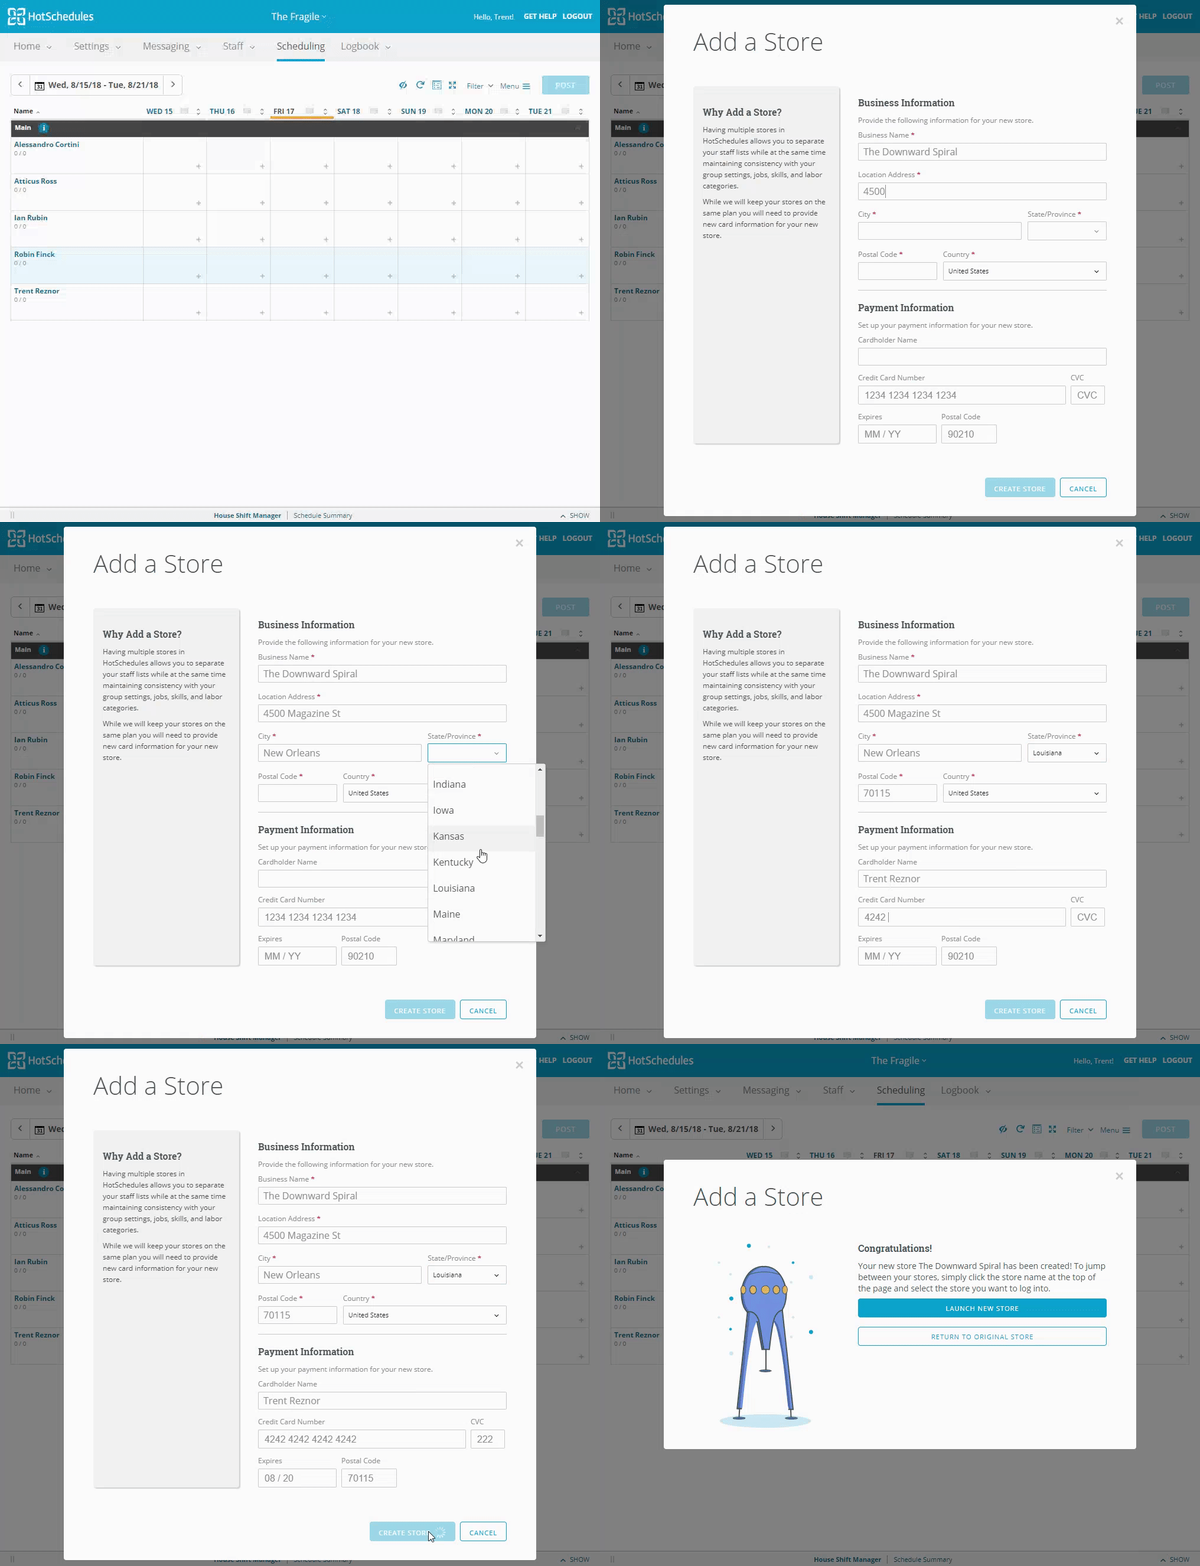
If you already upgraded or did it from the previous step you can continue adding your store. Repeat the first step and select '+ Add a Store' again. You will get the following form.
In this form, you will need to provide the new store information, as well as payment information. You can use the same credit card from your original store or enter a new credit card.
 |
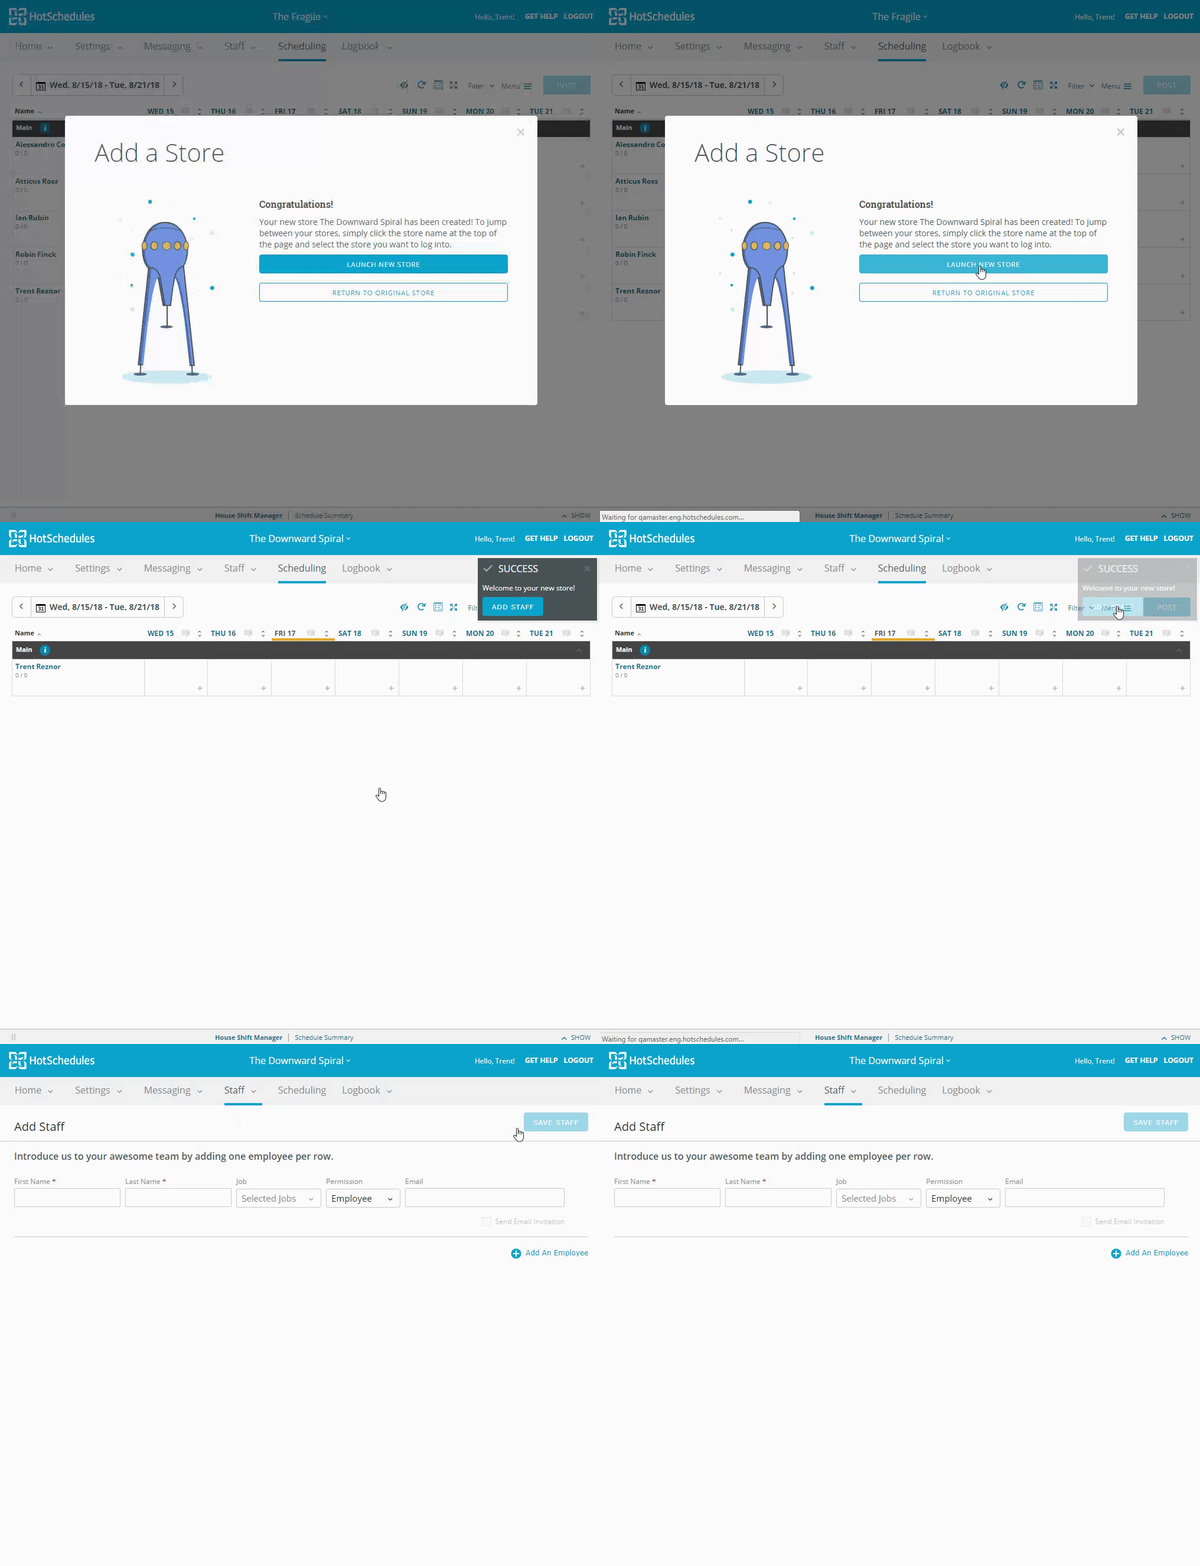
After a few seconds, the store will be created. You will receive the option to launch the new store or stay in the original store. If you select launch new store, you will then land in the Scheduling tab and a message to add your staff will pop-up on the top right corner.
 |
The new store will have the same configuration as your original store. This means, work week, schedules, jobs, locations and labor categories.

Comments
Please sign in to leave a comment.