
Overview
Sometimes it is necessary for employees to work a 'Passive' shift, during which they are not required to perform their usual duties - training, meetings, travel, etc. By using passive shifts in Scheduling, managers can keep track and make sure that 'working not working' team members are covered.
To categorise and keep track of passive shift types in the system, reason codes can be recorded against each different one. There is also a Passive Shift Reason Report that can be run.
User Permission
To create passive shifts, users first must have the Can make shift passive permission enabled.
An admin user will:
- Go to Settings > User Configuration > User Levels
- Select Edit against the required user level
- Tick the box against Can make shift passive
- Scroll down and Save
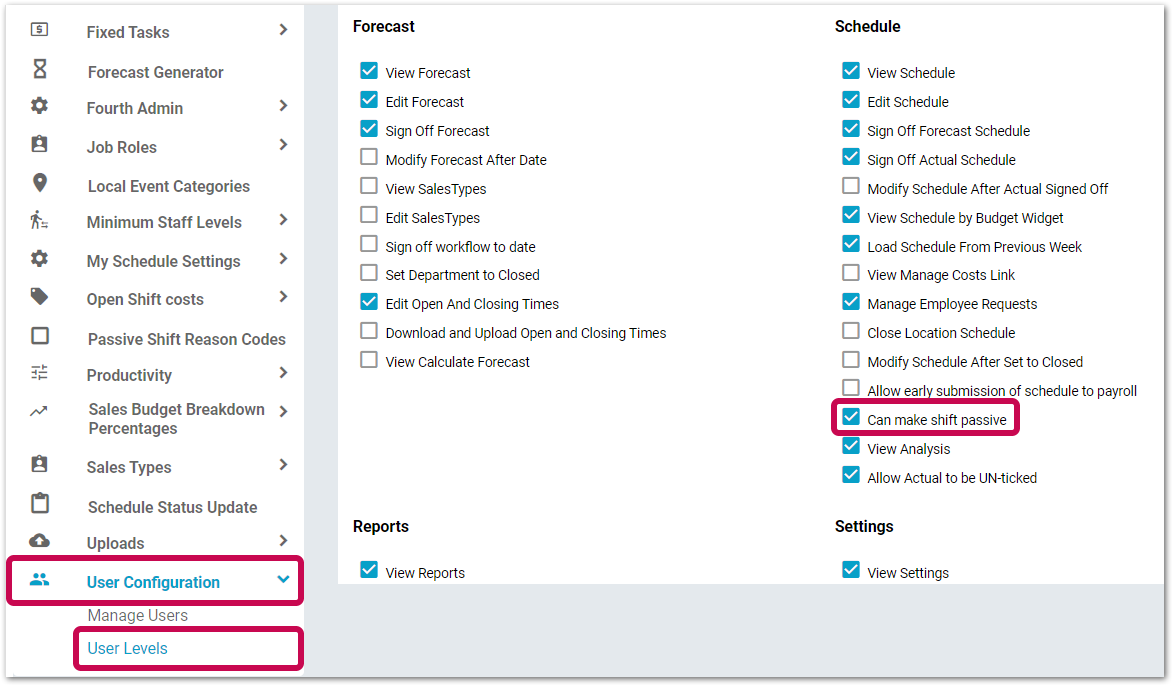
Fig.1 - User-level permission
Creating Passive Shifts
- Go to the Schedule page and create a shift in the normal way
- Select/tap Passive shift
- Select a Reason (if available - see passive shift reasons)
- Add all other required information and then Save
Fig.2 – Creating a passive shift
![]() The passive shift will have no impact on demand planning or the Scheduling graph.
The passive shift will have no impact on demand planning or the Scheduling graph.
Wage costs will still be incurred and the passive shift will appear on the table (as other shifts also will). It will have no colour and be outlined in black - see Fig.3.
Fig.3 – A passive shift is displayed with a dashed line surrounding the shift icon.
Passive roles will function as normal. All shifts created under a passive role will default to passive, with no option to deselect the Passive Shift switch.
Passive Shift Reasons
The 'reasons' for passive shifts, (see Fig.2) can be configured in the system by admin users. The ability to do this must be enabled via a global setting.
![]() Please liaise with your Fourth contact to have this done.
Please liaise with your Fourth contact to have this done.
User Permission
Once the global setting is enabled, a user-level permission then needs to be applied.
- Go to Settings > User Configuration > User Levels
- Select Edit against the required user level
- Tick the box against View/Edit Passive Shift Reason Codes
- Scroll down and Save
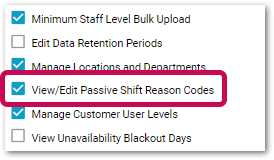
Fig.4 - User-level permission
Passive Shift Reason Codes
A user with the correct permissions can then do the following:
- Go to Settings > Passive Shift Reason Codes
Any existing passive shift reasons will be listed onscreen.
- To create a new passive shift reason, select Create New
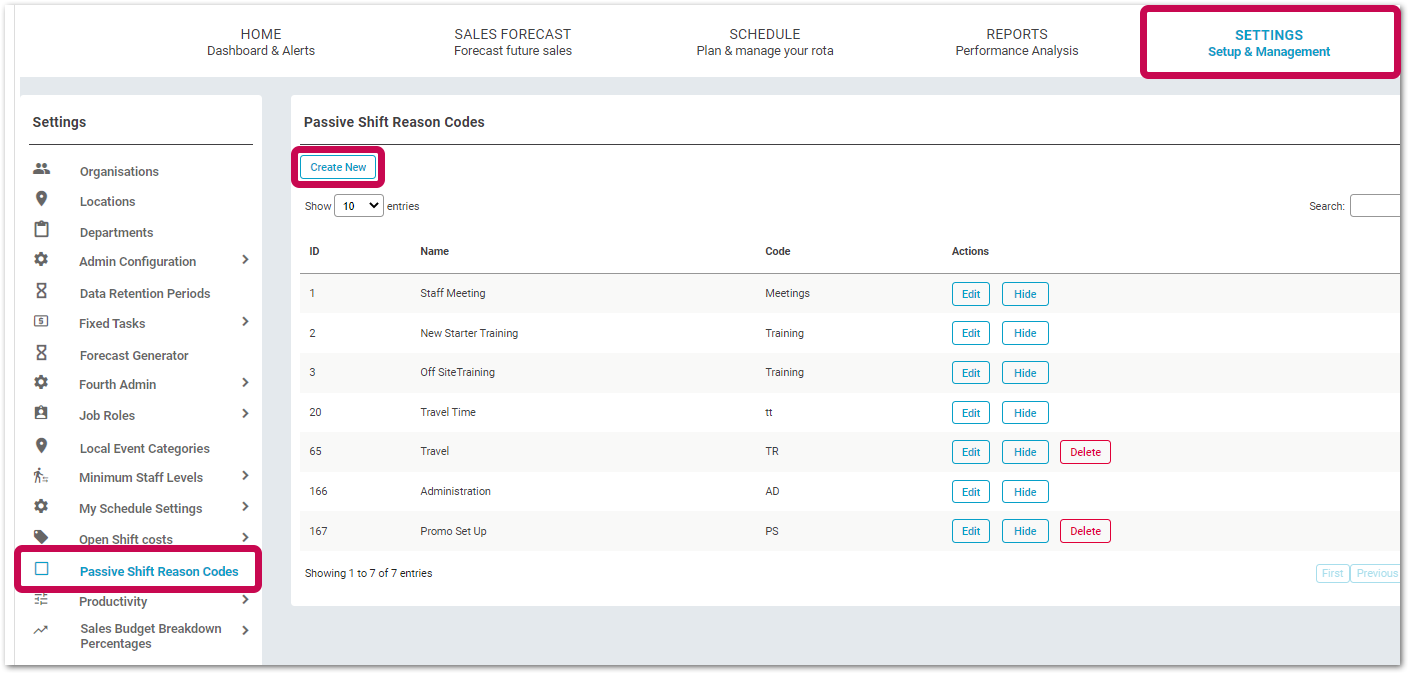
Fig.5 – Passive Shift Reason Codes page
- Type a Name for the passive shift reason - this will be the name displayed in the Select reason drop-down and on the Passive Shift Reason Report
- Enter a Code - this will be used for further reporting capabilities
- Ticking the Hide box will hide the reason from the Select reason drop-down
- Select Save once complete

Fig.6 - Creating a new passive shift reason
![]() Passive shift codes can only be deleted if the reason code has not been assigned to any shifts
Passive shift codes can only be deleted if the reason code has not been assigned to any shifts
![]() If a Job Role is configured as ‘Passive’, a default passive reason will be assigned by default when the role is scheduled. This can be changed for another reason if required
If a Job Role is configured as ‘Passive’, a default passive reason will be assigned by default when the role is scheduled. This can be changed for another reason if required
![]() Existing templates - Any templates which have active shifts set to passive will need to be resaved with a passive reason code assigned to these shifts. The templates will load but if the shifts are edited or amended then they will require a passive reason to be selected. If they are not edited and the template is loaded then these hours will be recorded as 'passive' on all reporting.
Existing templates - Any templates which have active shifts set to passive will need to be resaved with a passive reason code assigned to these shifts. The templates will load but if the shifts are edited or amended then they will require a passive reason to be selected. If they are not edited and the template is loaded then these hours will be recorded as 'passive' on all reporting.
![]() Loading a previous week’s schedule - If a schedule from a previous week is loaded (a template) that contains active shifts set to passive, if these shifts are edited or amended then they will require a passive reason to be selected. If they are not edited and the template is loaded then these hours will be recorded as 'passive' on all reporting.
Loading a previous week’s schedule - If a schedule from a previous week is loaded (a template) that contains active shifts set to passive, if these shifts are edited or amended then they will require a passive reason to be selected. If they are not edited and the template is loaded then these hours will be recorded as 'passive' on all reporting.
Passive Shift Reason Report
To run this report, users must have the user-level permission Passive Shift Reason Report enabled.
- Go to Settings > User Configuration > User Levels
- Select Edit against the required user level
- Tick the box against Passive Shift Reason Report
- Scroll down and Save
With the user-level permission applied, a user will then:
- Go to Reports and select Passive Shift Reason Report
- Choose a start date and select Load
The report will display the following information:
-
- Location Code – Location code from the HR system
- Location Name – Location name from the HR system
- Department – if the Location is scheduled as one department this will be blank
- Passive Shift Reason Name – this will only be displayed if passive shifts have been created against this reason for the week the report is being run
-
Total Number of Hours – total number of passive hours against that reason code for the week the report is being run
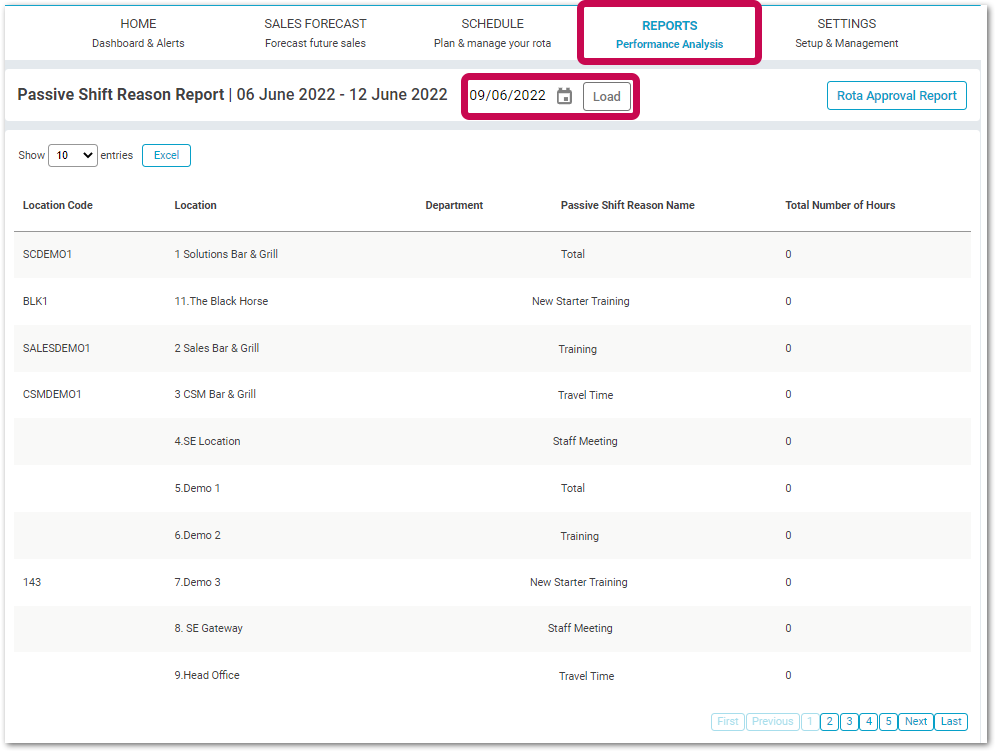
Fig.7 - Passive Shift Reason Report
 New Functionality - Passive Hours Report - Scheduling Page
All users can view the Passive Hours reporting but only users with access to view costs on the schedule will be able to view the Passive Hours costs. Users without permission to view costs will be able to view passive hours by reason code only.
- Go to Scheduling > Actions > Passive Hours
Fig.8- Accessing the Passive Hours Report
The report will be displayed.
- To see the days of the scheduling week, expand the Department drop-down (see Fig.9)
Fig 9. Passive Hours Report
- To drill down into more granular data (per day), expand a specific day of the week
The report will then show Passive Hours by Passive Shift Reason Code (see Fig.10).
Fig 10. Passive Hours Report Day Expanded
Fig 11. Passive Hours Report Reason Code Expanded
Please note: Passive costs are calculated on basic pay only. The system will calculate an hourly rate per employee and multiply this by the number of passive hours.
Comments
Please sign in to leave a comment.