Overview
Administrators and Managers can create tasks to assign duties to Team Members when creating schedules.
To create a task:
- Click WorkSpaces.
- Under your organization's name, click Administrator.
- The Administrator WorkSpace or HOME tab will appear. Click Tasks.
- Click Add New.

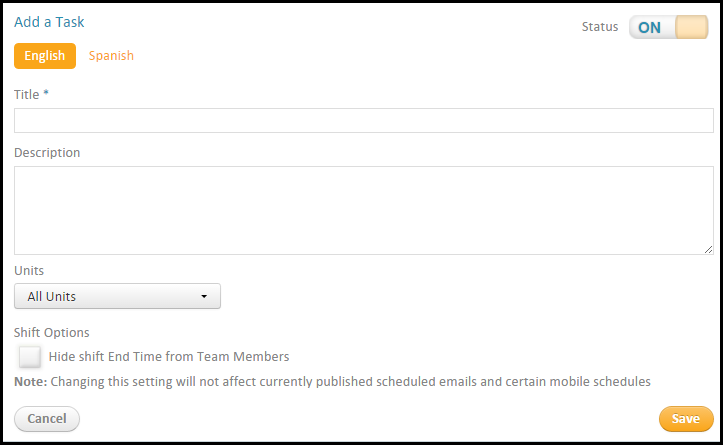
- A form will appear on the right. Complete the following fields:
- Status - Ensure the status is set to On.
- Title is required.
- Description is not required, but you can enter one if you like.
- Units - Assign the units where the task will be applicable. Choose from All Units or Customize to select specific units. Note, if a Manager selects All Units, the tasks will only apply to all units that the Manager has access to.
- Shift Options - There is a checkbox called "Hide shift End Time from Team Members." This means that the Team Member will be scheduled for something like a Closing Task which may not have a finite end point. The Shift End time would display as To Be Determined on the schedule.
- Notice that you can create a Spanish version of the task by clicking the Spanish button.
- When finished, click Save.

Notes:
The new task will appear on list of tasks available on the Tasks page. From here, you can take the following actions:
- You can edit a task by clicking on the name of the task to make any changes using the sections outlined above.
- You cannot delete a task; you can make a task Inactive.
- Administrators can also create tasks from Settings > Select your organization > SCHEDULE > Tasks. If an Administrator chooses All Units when creating a task, the task will apply across the entire organization.

Comments
Please sign in to leave a comment.