Overview
Contracts define the rules with regards to an employee’s Company Sick Pay (CSP), overtime and lieu hours. Different Contracts can be set up for different employees within a business where the benefits differ. For example, a manager may be entitled to CSP but not lieu time. An employee might only be entitled to SSP & Lieu time but not CSP.
This article shows how to create, manage, and assign Contracts.
Creating Contracts
- To create a new Contract, go to Company Admin > Contracts and select Create Contract from the top-right corner
- Enter a Contract Description to identify it
- Enter a Contract Code for reporting purposes
- To enable a Contract to be assigned, the status should be Active. Any Contracts no longer required should be changed to Inactive
- Assign the Payroll Company from the drop-down menu
- Select Save
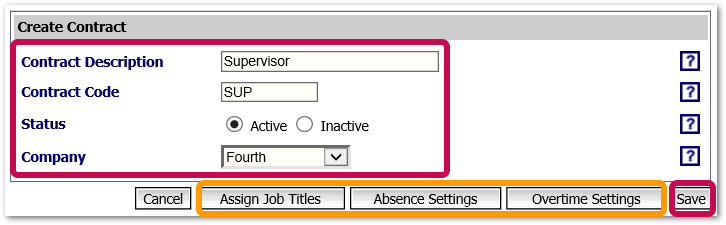
Fig.1 – Creating a new Contract
Assigning Job Titles
- Select Assign Job Titles and move the Job Titles that require the Contract, using the arrows (see Fig.2.)
- Save the changes
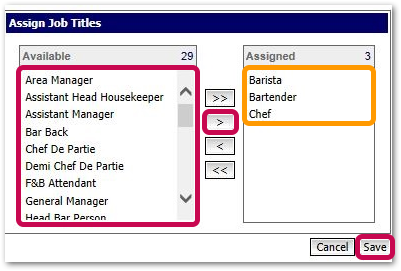
Fig.2 – Assigning Job Titles
Absence Settings/Company Sick Pay
- To configure Company Sick Pay (CSP) select Absence Settings
- If the employee is entitled to CSP during probation, tick Is CSP paid during probation period? and enter the number of Months the employee must be employed before they are eligible for CSP
- Use the Absent waiting Day to start paying CSP drop-down and chose the number of absent waiting days
- From the Absence Period Based On drop-down select the date/pattern on which the annual entitlement starts, or select Rolling Absence Period
- If the entitlement is over a Rolling Absence Period, enter the number of weeks, typically 52
- Tick if entitlement is based on length of service or not. If so, enter the entitlement in full or half days
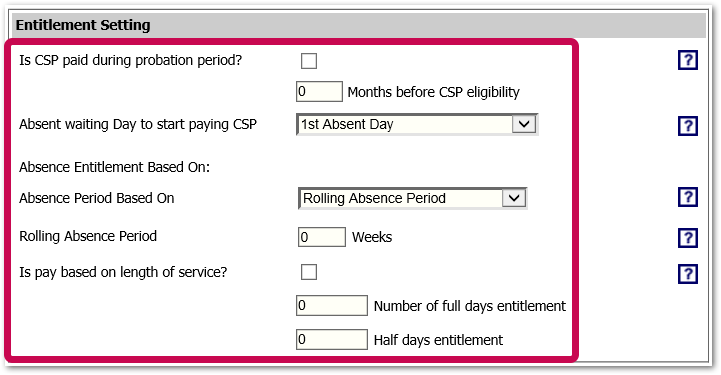
Fig.3 – CSP/Absence settings
If CSP is based on length of service, the number of days must be completed for each period.
- As shown below in Fig.4 the total number of days must be entered for each year of service even if the entitlement remains the same as the previous year.
 Leaving it as 0 will reduce the entitlement to 0 days
 - Select Save from the bottom of the page
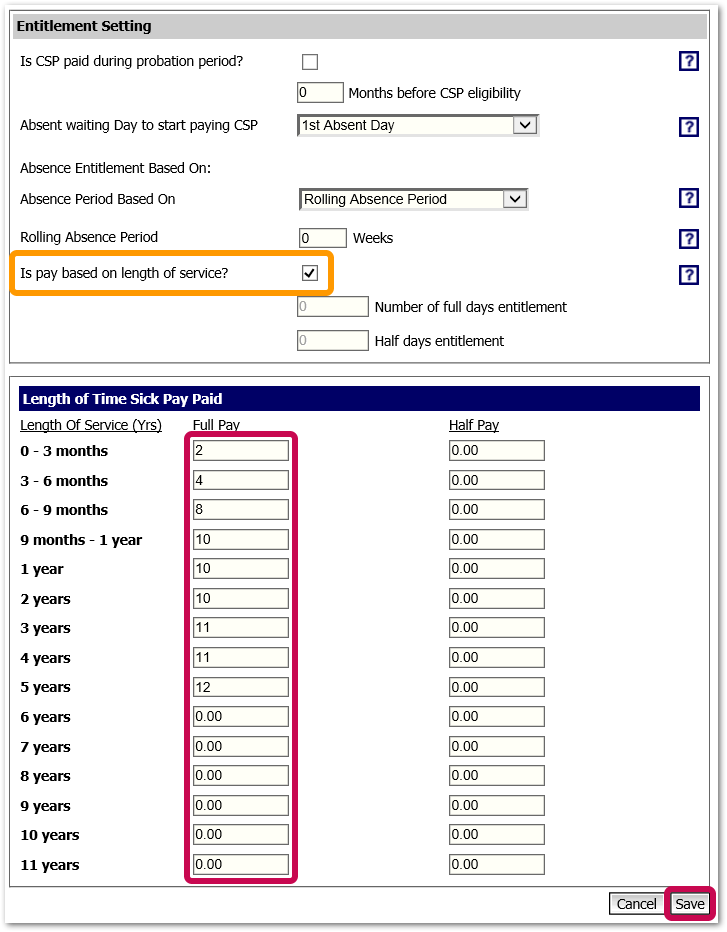
Fig.4 – Number of days CSP based on length of service
Overtime Settings
- To configure overtime for this Contract, select Overtime Settings and then Create Overtime
Different types of overtime can be set up for different reasons. For example, once an employee has worked the prescribed number of hours they can either be paid, accrue lieu hours, or both.
- Enter a Description for this overtime
- Use the Start Band drop-down to select the point from which the overtime will start - either Contracted Hours or FTE
FTE is set in Job Title configuration (Edit Default Holidays), or for part-time employees, on their Employment Details page against Override FTE.
- If an employee does not have any Contract hours, enter the Default Start Band If No Contracted Hours that the overtime will start from
- The Overtime Payment can either be a multiple of the employees’ salary (Pay Rate * Factor) or a set amount per hour
- Ignore Contracted Hours - select if the overtime applies to all hours worked
- Ireland Overtime Calculation - select if the overtime hours are calculated based on a fortnightly period. If selected, the Ignore Contracted Hours will also be ticked
- Overtime Frequency - select if the overtime should be calculated over 1,2, or 4 weeks. Choosing 2 or 4 weeks will result in adjustments being made to the overtime payment in Payroll when a rota is submitted
- Select if Negative Lieu Hours are to be created if the employee does not work their contracted hours. Lieu Hours is not standard functionality but can be turned on and configured on request
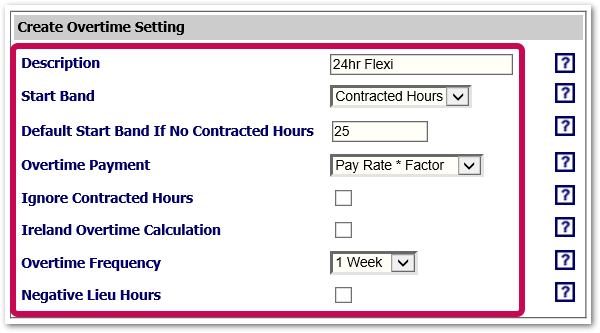
Fig.5 – Overtime settings
Bands can be set up to pay overtime or create lieu hours when a specific number of hours have been reached. The bands in Fig.6 below show that the overtime Contract will pay at the employees' pay rate for all hours worked between 25 and 40 hours. For hours worked above 40 hours, lieu hours will be created.
For more information please see the Lieu Hours functionality article: WFM HR: Configuring Lieu Hours Functionality.
- To create or delete bands, use the plus and minus buttons
- As with Contracts, Assign Job Titles can be used as required
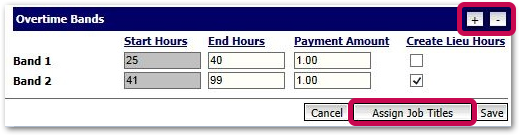
Fig.6 – Overtime Bands
Assigning Multiple Overtime Rules
It is possible to assign more than one overtime setting to a Contract. For example, a 24hr Flexi Contract may have different overtime rules for different Job Titles.
- Once a Contract has been created, select Overtime Settings and create additional overtime settings
- When all the required overtime settings have been created, select Assign Job Titles
- All available Job Titles (those that belong to the Contract) can be assigned as required
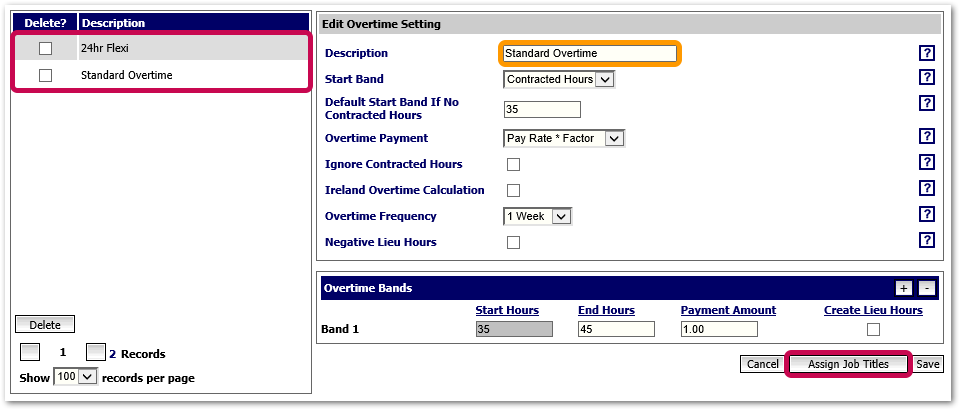
Fig 7 – Multiple Overtime Settings
![]() It is not possible to assign more than one Job Title to an overtime session.
It is not possible to assign more than one Job Title to an overtime session.
Assigning Contracts to Employees
The option to select a Contract for an employee is on their Employment Details page.
- Go to HR ˃ Employees ˃ Employee List ˃ search for and select Employee
- Select Employee Info ˃ Employment Details
- Select the appropriate Contract for the employee from the drop-down
Only Contracts assigned to the employee's Job Title will be available to use. If a new Job Title has been created, ensure that a Contract has been assigned.
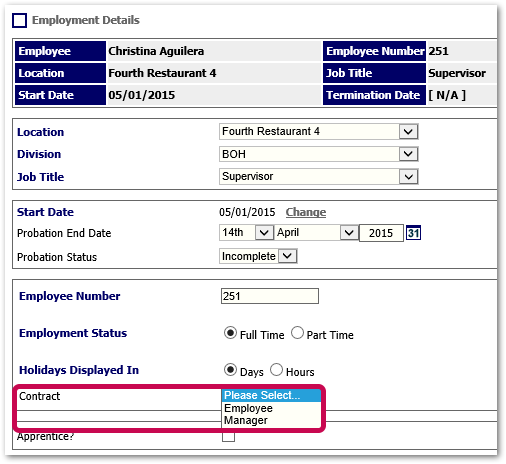
Fig.8 – Employment Details page
Contract and Contracted Hours Change Based on an Effective Date
When a user changes the Contract or contracted hours within an employee’s Employment Details page it is possible to select an effective date for the change to take effect.
- To locate this page, go to HR > Employees > search for and select an Employee
- Go to Employee Info > Employment Details
- Make any required changes to the Contract and/or Contracted Hours fields
- Save
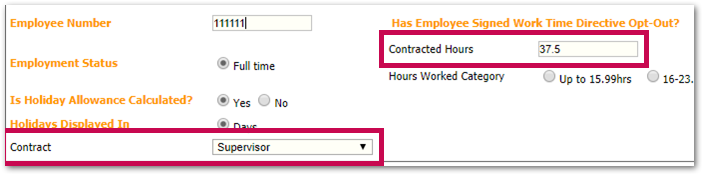
Fig.9 - Employment Details page
A pop-up box will display where an effective date can be selected.
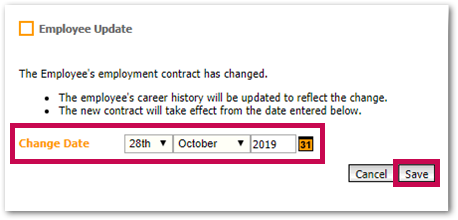
Fig.10 - Contract Change Effective Date pop-up box
- Use the Change Date field to set an effective date and then Save
The changes will then be recorded in the Employee History Page.
- To locate this page, go to HR > Employees > search for and select an Employee
- Then go to Employee Info > Employee History

Fig.11 – Employee History page
A future date can be entered as an effective date, which will then update automatically on that chosen date.

Fig.12 - Employee History page with future date
Future dated changes will also appear on the Employee History page.
- These can be viewed or deleted by selecting View/Delete Future changes from the Employee History page
- Future-dated changes can be deleted using the Delete All option within the View/Delete Future Changes page
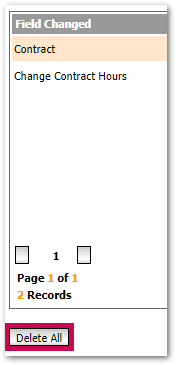
Fig.13 - Deleting future-dated changes
Contract Global Settings
There are three areas that can be configured in regards to Contract settings.
- Go to HR > Administration > Global Settings > Edit Default Employee Settings
- Validate Contracted Hours
- This ensures all employees have valid contracted hours entered within the employee record. This should not be used if the user employs anyone on a 0 hours contract
- Display Contracted Hours
- This setting has multiple options that drive the Employment Details page. Hide removes the contracted hours from view. Optional allows the user the choice to complete the field or not. Mandatory ensures the user completes the Contracted Hours field
- Make Contract Field Mandatory
- This setting if enabled will ensure a contract is selected when creating or editing an employee record
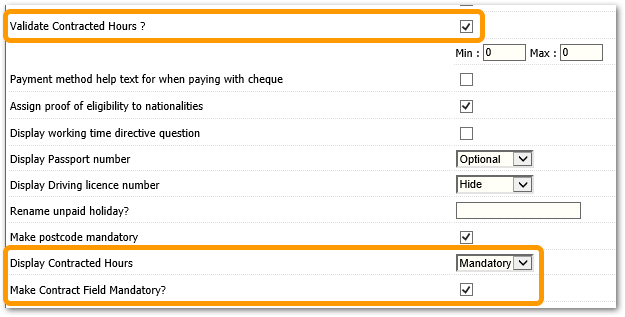
Fig.14 - Contract Global Settings
Updating Contracts and Contracted Hours
This task can be done manually by entering the employee record and updating the Contract and Contracted Hours. Alternatively, Fourth offers a data load - for more information see WFM UK HR: Data Uploads: Contracts and Contracted Hours.
Comments
Please sign in to leave a comment.