Overview
Terminating an employee from HotSchedules will completely remove them from your staff list. They will no longer be able to access their personal HotSchedules account, and you will not be able to schedule them. You will be able to pull historical information related to their account for reporting.
For example: You will be able to run a Schedule Report from the Reporting tab to generate their past schedules.
An alternative to termination would be to inactivate an account. This can be used if an employee is going on a temporary leave of absence. They will remain on your staff list, but they will be unable to log into their account or be scheduled.
Please note: This article is only for clients using the non-integrated version of HotSchedules. This means that HotSchedules is not integrated with your location's POS system. If HotSchedules is integrated with your system, terminations must originate in your POS system.
Terminate an Employee
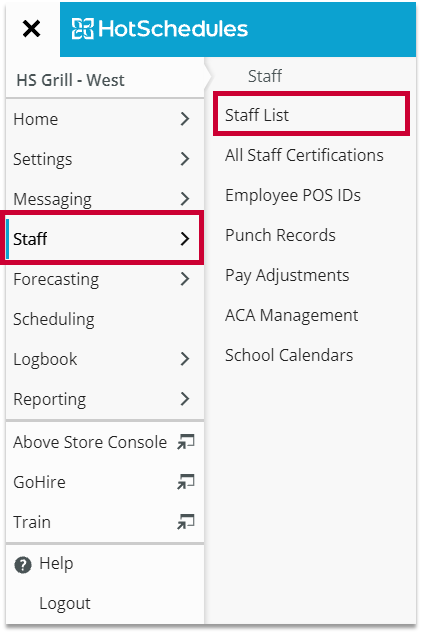
- Navigate to the Staff tab, select Staff List

Fig.1 - Navigation
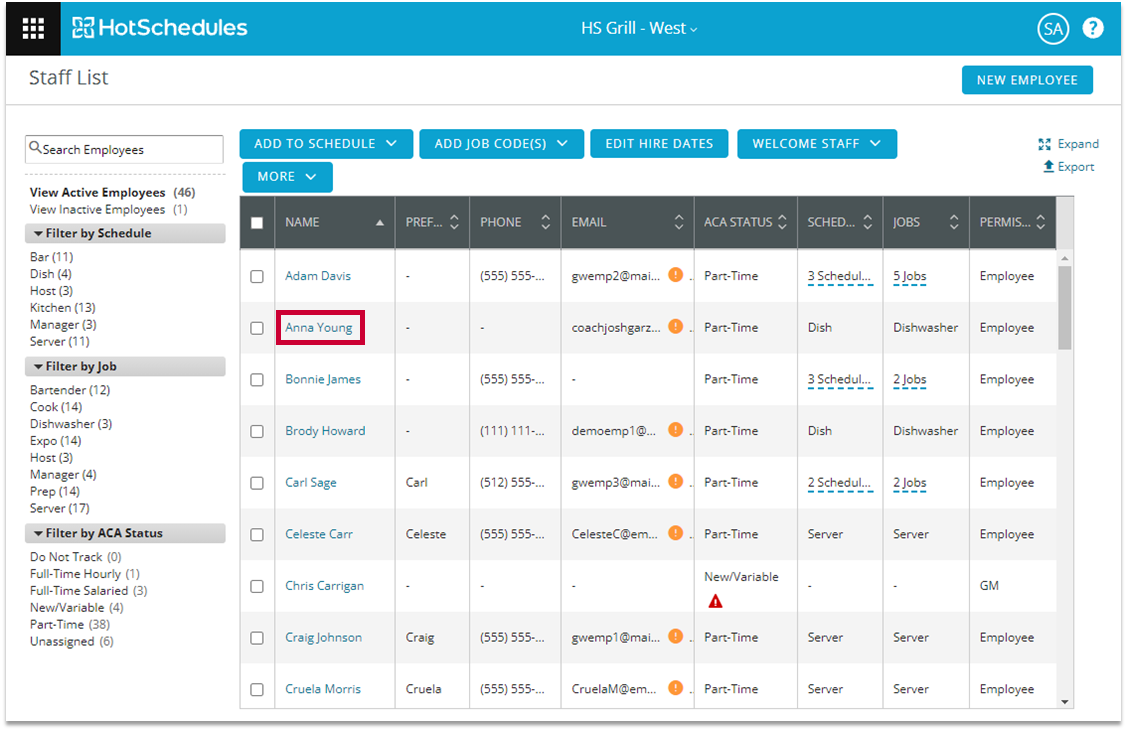
- Select the name of the employee you wish to terminate
Fig.2 - Select employee [select image to enlarge]
This will take you to the Details page for that employee.
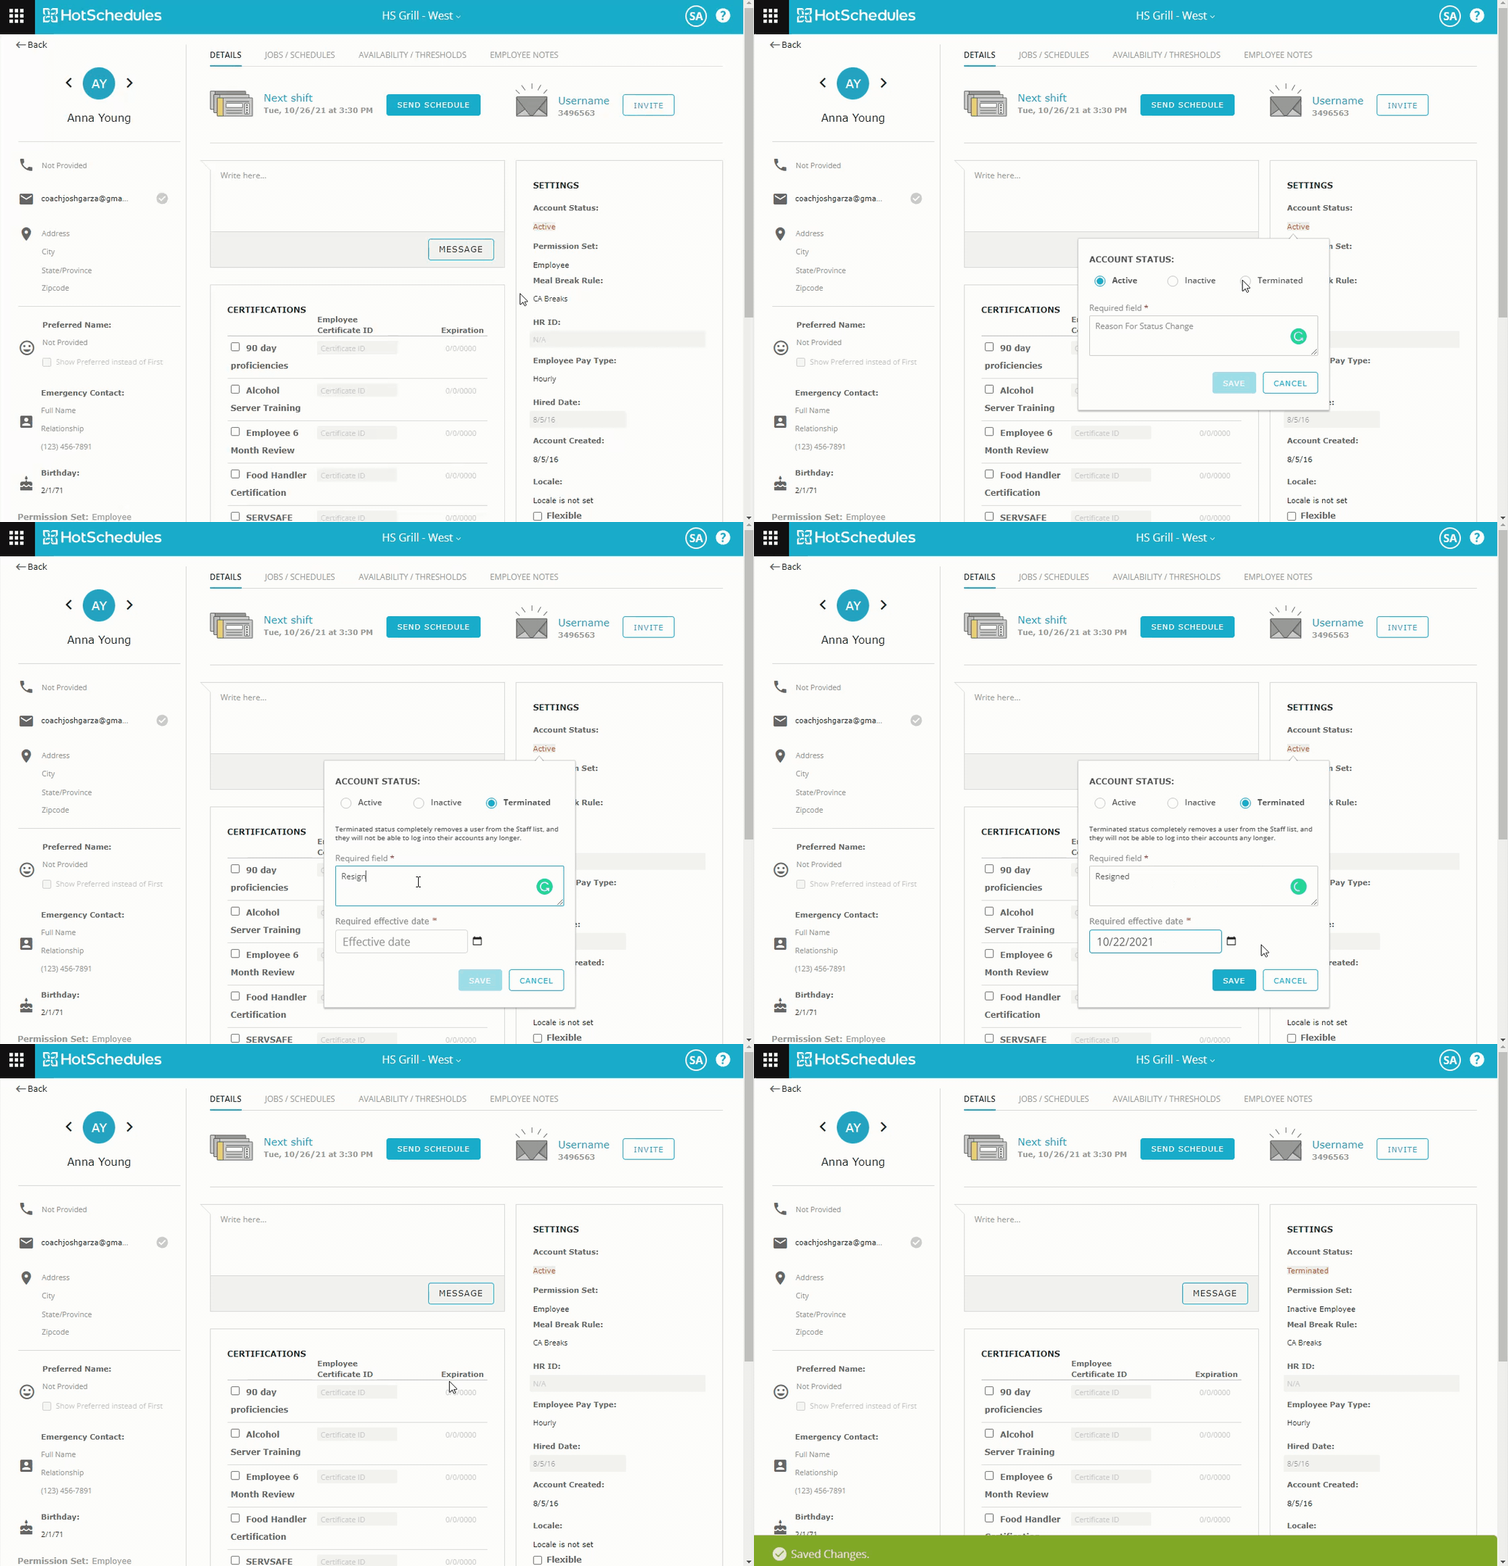
- Locate the Account Status and select it
- Select Terminated
- Enter the Reason for termination
- Enter the Effective Date
- Select SAVE
- Select CONFIRM
 |
Fig.3 - Terminate an employee [select image to enlarge]


Comments
Please sign in to leave a comment.