A preload is a great way to mass communicate updates to team members. Above Store Console users are able to post preload messages for their staff to view when they log into their HotSchedules accounts.
At the store level, users will be required to select a Continue button to acknowledge that they have seen the preload message before they are able to access their account.
To post a preload, Above Store Console users will need to start by creating the image to display. Save the image as a .jpg or .png file.
- You can upload an image of an advertisement image or even a snapshot of a word document announcement.
Follow these steps to create a new preload:
- Log into a HotSchedules account with Above Store Console access.
- Hover the mouse over the Communication tab at the top of the page and select Preloads
- Select the blue Add Preload button

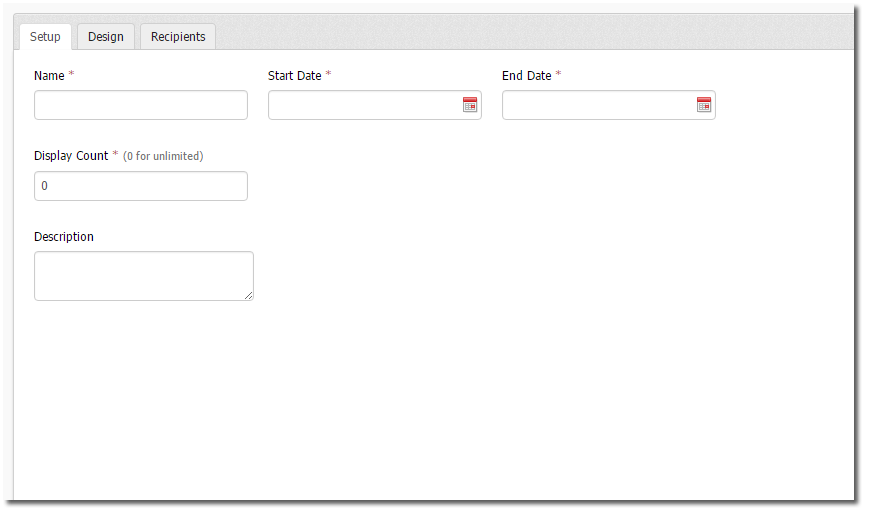
This will take you to a page with 3 sub tabs, Setup, Design, and Recipients.
- The Setup tab is where you can add the name, start date, end date, display count, and description for the preload you are adding.
- Name will be the name you are giving to the preload. Try and be specific so that it is easier to find records on it in the future.
- Start Date will be the day you want the preload to be posted for, while End Date will be the last day you would like the preload to run for.
- The display count will be responsible for setting up the total number of times a preload will display for a user when they log into their account. For example, putting a two will display the preload twice over the span of two logins for employees while putting a 0 will display the preload an unlimited amount of times. Please note that preloads will only appear once for mobile users regardless of what is entered here.
- Description is where you can put information regarding the intent or content of your preload. This description can be seen by anyone who has access to preloads in your company.

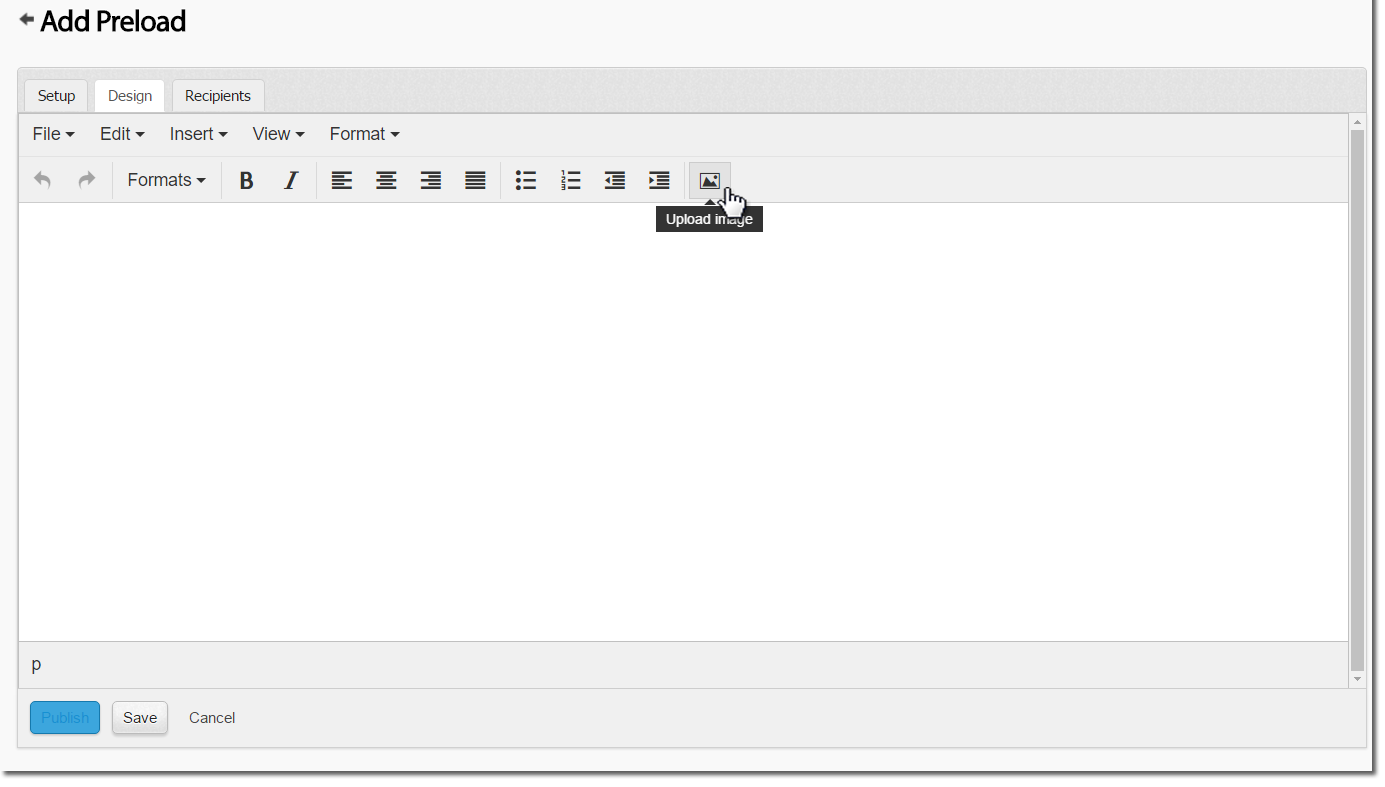
- The Design tab will be where you can begin creating the preload you would like to publish. This page allows you to both create a preload from scratch or upload a file from your computer to use as a preload.
- If you would like to upload an image directly, you can select the Upload Image option.
- You can also insert a link directly into your preload by clicking Insert/edit link to the right of upload image.
- You can also use the options available in the preload creator to build your own. Think of it as like Microsoft Word, where you have different fonts, options, and alignments that you can use when building your preload.

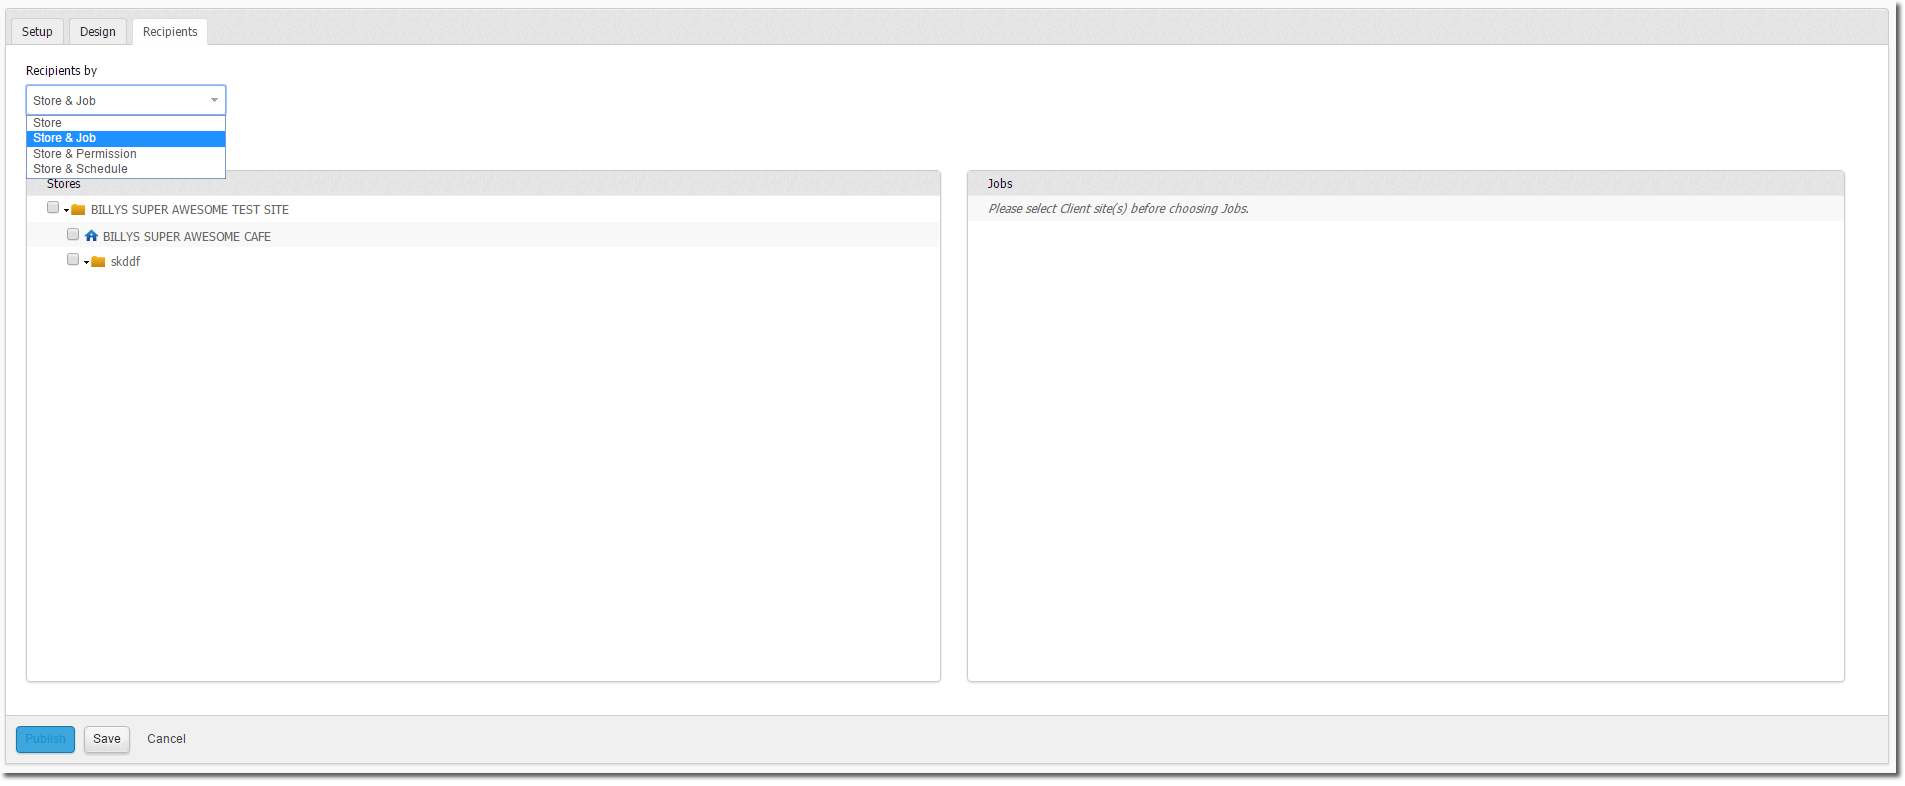
- The Recipients tab allows you to specify who you want this particular preload to appear for. Your options include:
Entire Restaurants
New Team Members
By Job Code
By Schedule
By Permission set
Once all the details have been selected, you will have to either Save or Publish your preload. Saving a preload will cause it to not appear for employees. Allowing you to go back to the preload and make any changes before publishing it. Selecting Publish will push the preload to appear for users on the site. Once a preload has been published it can no longer be edited.
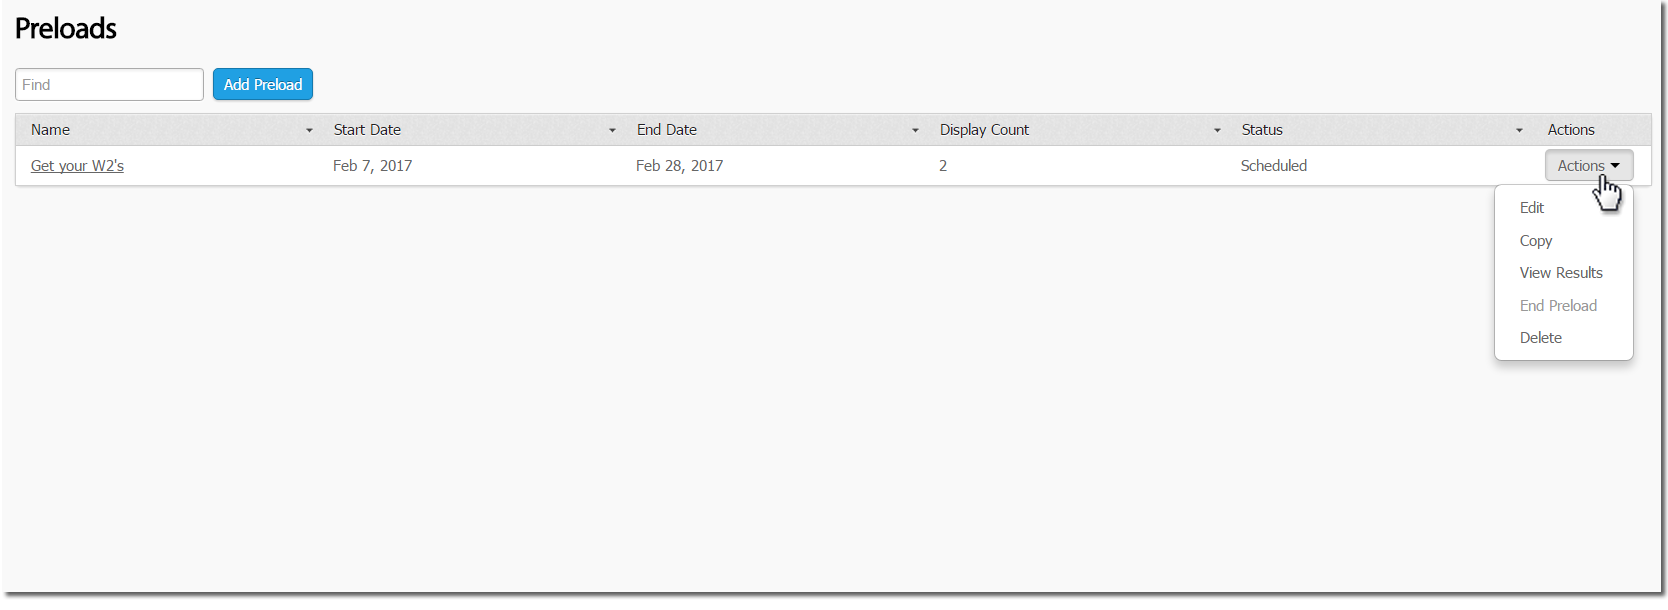
- If you would like to disable a preload before it's end date, go to the preload list and click the Actions menu to the right of the preload name. An option will appear here that says End Preload. If you would like to remove the preload from the list entirely, you can select Delete.

Additional Resources
Self-Guided Walk Through - Please make sure you are already logged into your Above Store Console account in this browser.
Comments
Please sign in to leave a comment.