
Transferring Stock Between Sites in Different Units
When transferring or requisitioning stock between sites in different units, it is not possible to use the Create New Site Transfer or Create New Requisition functionality.
Instead, the Transfer to Accounts function must be used.
Sending Site

Fig.1 - The Transfer to Accounts button

Fig.2 - Selecting a Date, 'From' and To' accounts, and adding a Comment

Fig.3 - Adding lines to the Transfer
The transferred stock will then be depleted from the sending site's stock holding. The transfer will appear in the Approved section of Stock Management. Fig.4 shows an example transfer after approving.
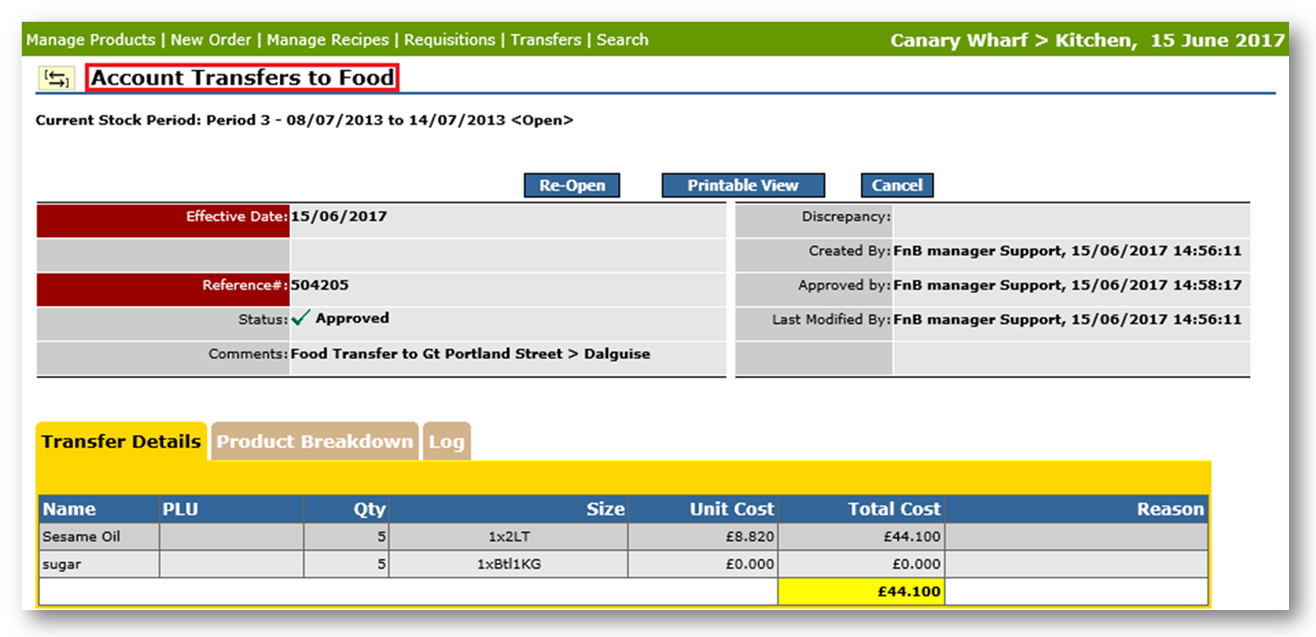
Fig.4 - Transfer details on the sending site after approving
Receiving Site
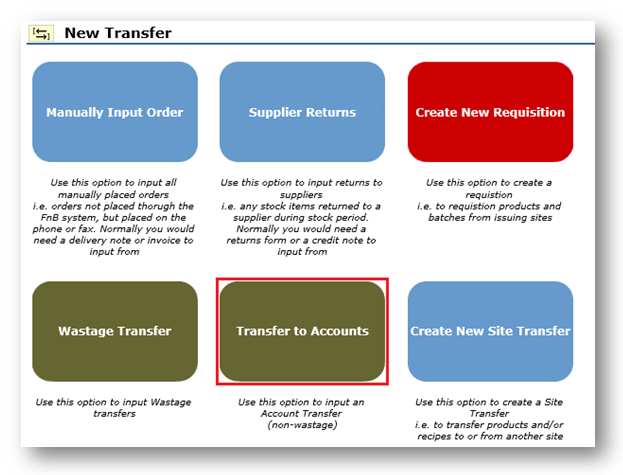
Fig.5 - The Transfer to Accounts button
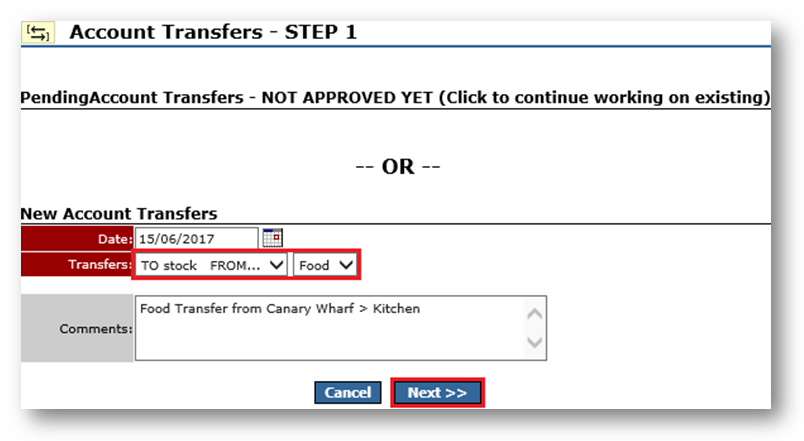
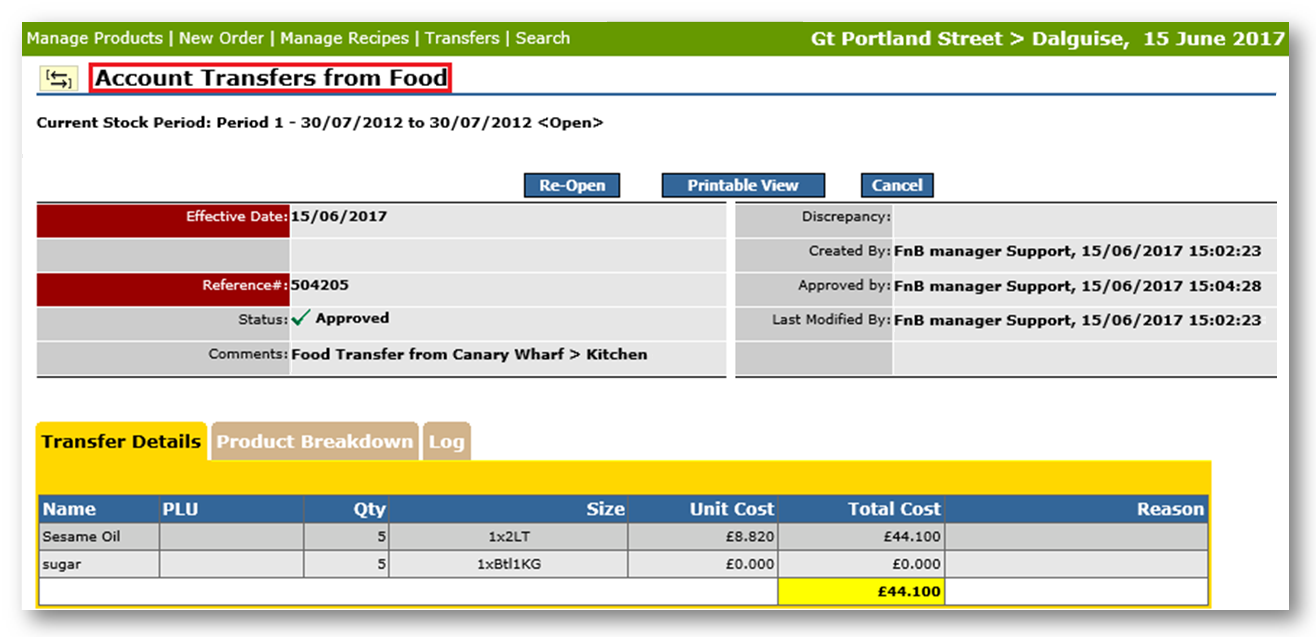
Fig.8 - Transfer details on the receiving site after approving
When transferring or requisitioning stock between sites in different units, it is not possible to use the Create New Site Transfer or Create New Requisition functionality.
Instead, the Transfer to Accounts function must be used.
- First, ensure that the Account to be used is assigned to each of the sites that stock will be transferred between. This can be managed from Enterprise level
Sending Site
- Log in to the sending site
- Select Transfers > Transfer to Accounts
Fig.1 - The Transfer to Accounts button
- Select the transfer Date
- Select the Site - "From" and Account - "To" to be used from the Transfers drop-downs
- Add a Comment if wished - can be helpful to name the site transferring stock to/from
- Select Next
Fig.2 - Selecting a Date, 'From' and To' accounts, and adding a Comment
- Choose which products are being transferred and add to the Items included in Transfer list
- Enter QTY, Size and Reason (if applicable), saving each line
- Once all products are added, select Approve
Fig.3 - Adding lines to the Transfer
The transferred stock will then be depleted from the sending site's stock holding. The transfer will appear in the Approved section of Stock Management. Fig.4 shows an example transfer after approving.
Fig.4 - Transfer details on the sending site after approving
Receiving Site
- Log in to receiving site
- Select Transfers > Transfer to Accounts
Fig.5 - The Transfer to Accounts button
- Select the transfer Date
- Select the Site - "To" and Account - "From" to be used from the Transfers drop-downs
- Add a Comment if wished
- Select Next
Fig.6 - Selecting a Date, 'To' and 'From' accounts, and adding a Comment
- Add the products being received in the transfer to the Items included in Transfer list
- Enter QTY, Size and Reason (if applicable), saving each line
- Once all products are added, select Approve
Fig.8 - Transfer details on the receiving site after approving
Comments
Please sign in to leave a comment.