
Overview
Overtime Functionality is for customers that pay an additional rate per hour for employees that pass their Overtime checks. The payment can be authorised or omitted when the rota is submitted to payroll at the end of the week.
Setting up Overtime Functionality
Contracts
The overtime rate is set up in Contracts within the HR Module.
- This can be accessed by logging into the system with the Admin login and through HR > Company Admin > Contracts.
- Using the link in the top right-hand corner, select Create Contract > input a Description and Contract Code > set the Contract as Active > select a Company > select Save
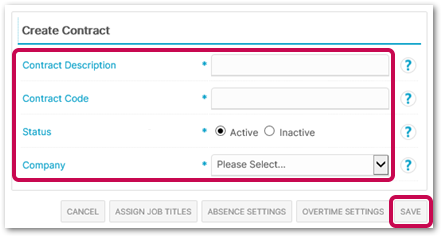
Fig.1 - Creating a Contract
- Once the Contract(s) has been created, go back into it
- Select Assign Job Titles
- Select the Available job titles to be assigned to the contract (an example is shown in Fig.2)
- Move these to Assigned and then select Save
Please note: If a new job title is created after the contracts are set up, it will need to be assigned after creation.
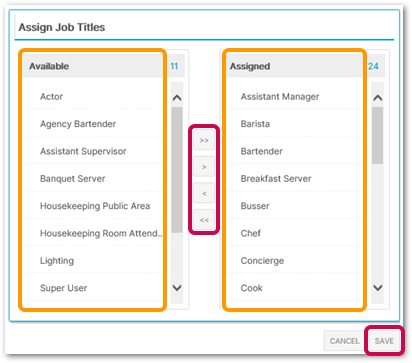
Fig.2 - Assigning Job Titles to the Contract
The next step is to create Overtime Settings.
- Select Overtime Settings, then Create Overtime
- Fill in the Description and set the Start Band
- For Overtime Payment, choose either Pay Rate + Amount or Pay Rate * Factor from the drop-down options
- At the bottom of the page, fill in the End Hours with the maximum amount of hours the overtime will apply to, and fill in the Payment Amount with the amount per hour you wish to pay the overtime at
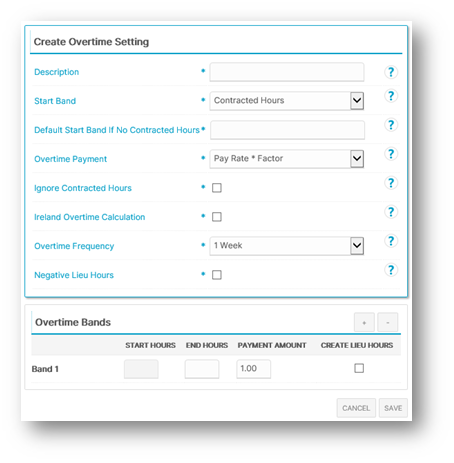
Fig.3 - Creating the Overtime Setting
- The next step is to Assign Job Titles to the overtime and Save
Assigning Contracts
Within the employee's Employment Details page there is a field called Contract. The contracts created and assigned to that job title will appear in the drop-down menu
- Select the Contract and Save the page. This will apply the overtime rate to that employee
Rota Settings
- To set up overtime within the Rotas Module, go to Rotas > Administration > Global Settings > Rota Settings > Edit > Tick Overtime > Save
Rota Submission
When submitting the rota through to Payroll, there is an Additional Payments screen that will allow authorising or omitting the overtime calculation. This will show the hours worked by the employees, their overtime amount, and the potential overtime payment based upon the rate in the contract.
- Tick Authorised if the payment is to be paid to the employee, or tick Omit if the payment is not to be paid. When Omitting the overtime, the Pay Amount will revert to zero and will not be paid
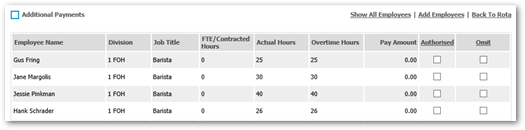
Fig.4 - Additional Payment Screen
To submit to Payroll, all of the employees on the page need to have their payment authorised or omitted.
- When ready to submit, select the Submit to Payroll button at the bottom of the page
Payroll
The overtime payment will appear on the employee's payslip as an additional payment type with the units, the rate, and the amount paid. When setting up overtime and using Fourth's Payroll Bureau services, please make your Payroll Specialist aware of the changes.
Comments
Please sign in to leave a comment.