
What's Changing?
New functionality for HR-integrated & standalone Labour Productivity customers that will provide the ability to use the Schedule Approval Process.
Release date: 18th July 2019
Reason for the Change
Allows for customers to manage an Approval Process for their schedules.
Release Notes
A new Organisation Setting will need to be applied. The setting is titled Schedule Status Approval Process.
By turning on this setting, the Approval drop-down menu will appear in the Schedule page for all Locations.
Please liaise with your Fourth contact to have this this setting applied.
Schedule Status Flow
The diagram below explains the Schedule Status process.
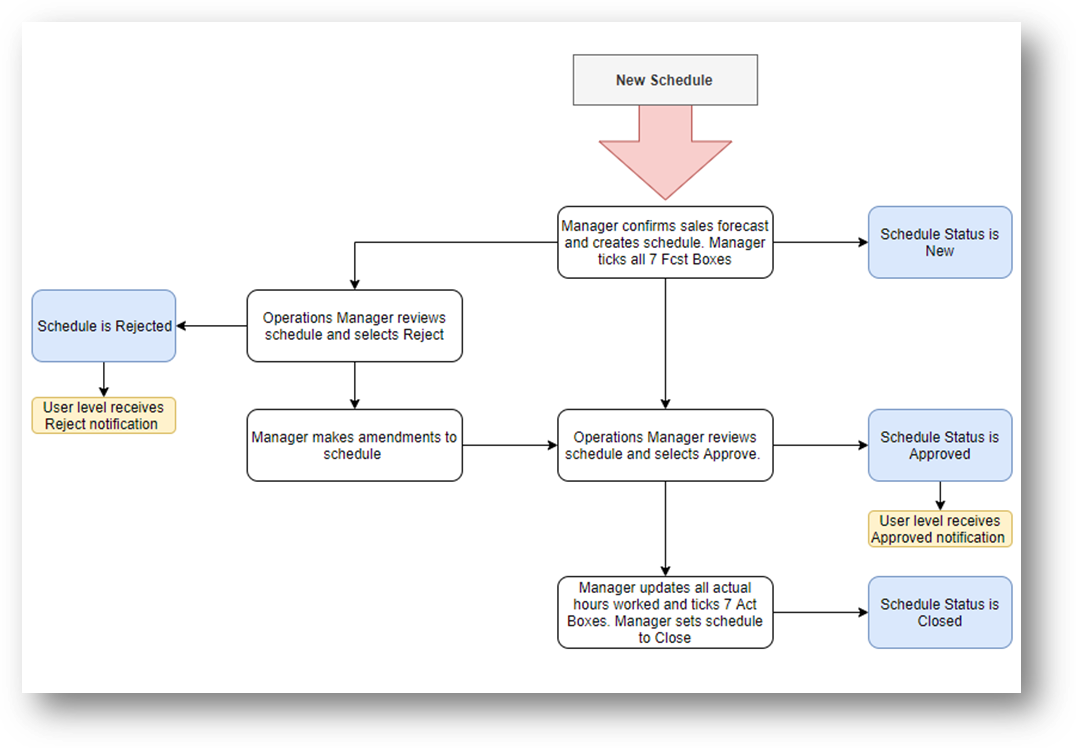 Fig.1 – Schedule Status Approval Flow
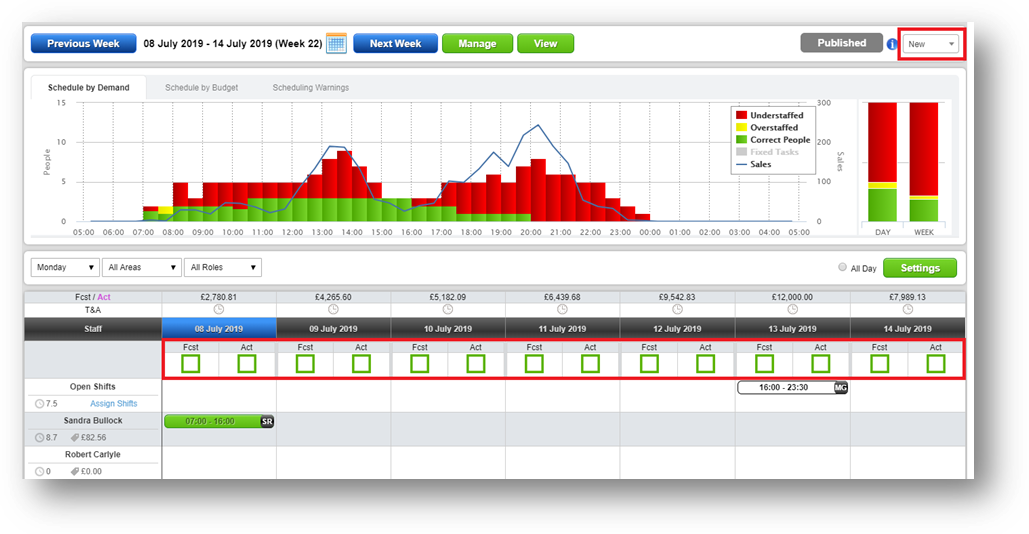
Fig.2 - Schedule Page with Schedule Status Approval Process – Enabled
A new drop-down box will be displayed in the ‘Schedule’ page. This will indicate the Schedule Status for that Location. The default status is ‘New’ for when a Schedule has not yet been approved or rejected.
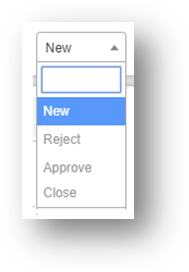
Fig.3 – Schedule Status drop-down
The table below lists the detail of each option in the drop-down menu.
| Schedule Status | Schedule Details |
| New | This is the default Schedule Status for all new schedules. |
| Reject | If the schedule is being rejected for further amendments. |
| Approve | If the schedule is being approved by an operations manager. |
| Close | If the schedule is complete and all days are actualised. |
Setting the Schedule to be Reviewed
- To set the Schedule to be reviewed, select all 7 Fcst boxes at the bottom of the screen
- The Reject / Approve option can now be selected from the New drop-down menu (see Fig.4) if the user has the specific User Level permission
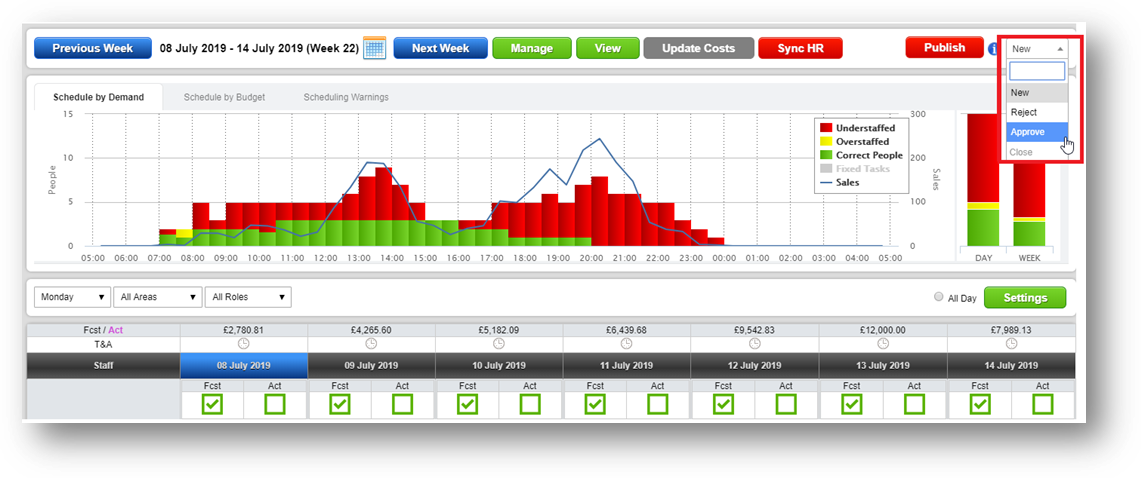 Fig.4 – Schedule ready to be reviewed
Any user with the User Level permission 'Approve Forecast' will be able to approve or reject the schedule.
The user’s System Administrator can enable this User Level Permission if they have the 'Customer Facing User Level' page permission.
To enable the 'Approve Forecast' permission:
- Go to Settings > User Levels > select the correct User Level > Edit > select the required User Level Permission > Save
For more detail on this process, see WFM Release Note - Labour Productivity: Managing User Levels
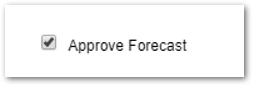
Fig.5 – User Level Permission to Approve / Reject Schedules
The schedule can also be approved or rejected through the ‘Rota Approval Report’.
- To access this, go to Reports > Schedule Approval Report
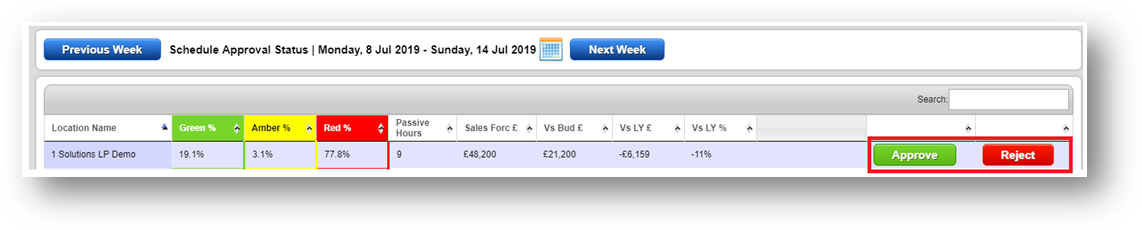 Fig.6 – Schedule Approval Report
If the schedule is being rejected through the Schedule Approval Report, the user rejecting it can enter some comments to explain why.
When approving the Schedules, the comments box is not visible.
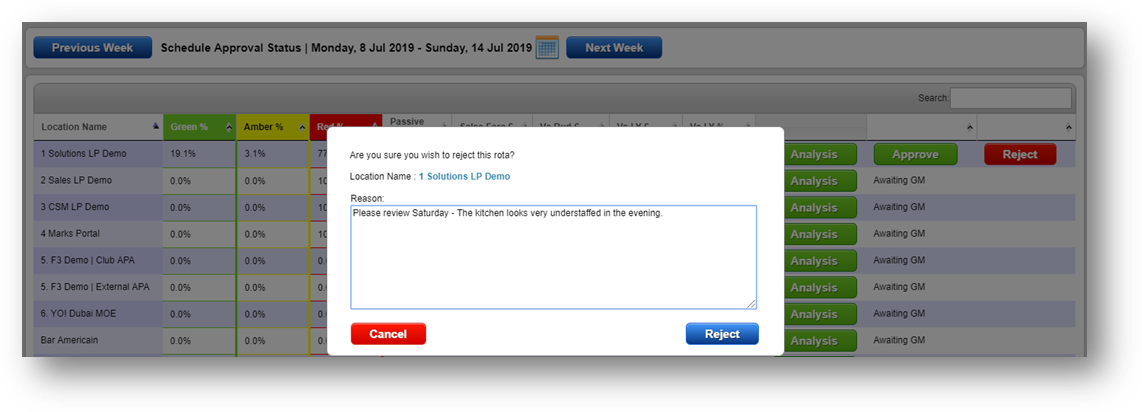 Fig.7 – Rejecting Schedule Through Schedule Approval Report
The user(s) set up to receive notifications will receive a notification and will be able to review the comments when they next log in to Labour Productivity.
Please liaise with your Fourth contact to configure which User Level is set to receive notifications.
- To view the notifications, select the Notification Envelope option, see Fig.8

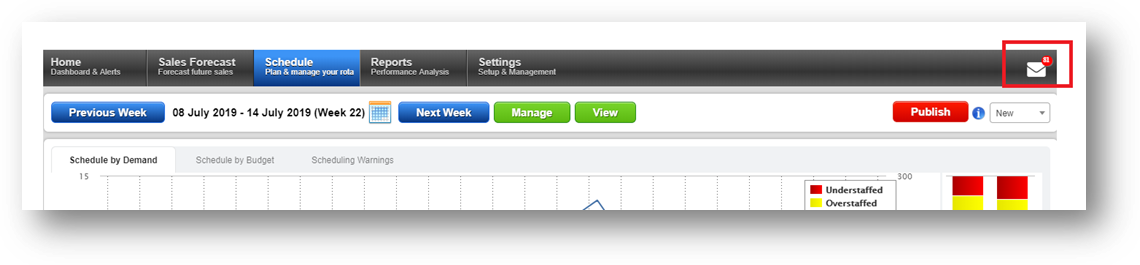 Fig.8 – User level ID for Approval Notifications and Notification Envelope
- The user can then select the notification and read the rejection message along with approved Schedule messages. The messages display who has approved/rejected the Schedule along with any comments if it has been rejected
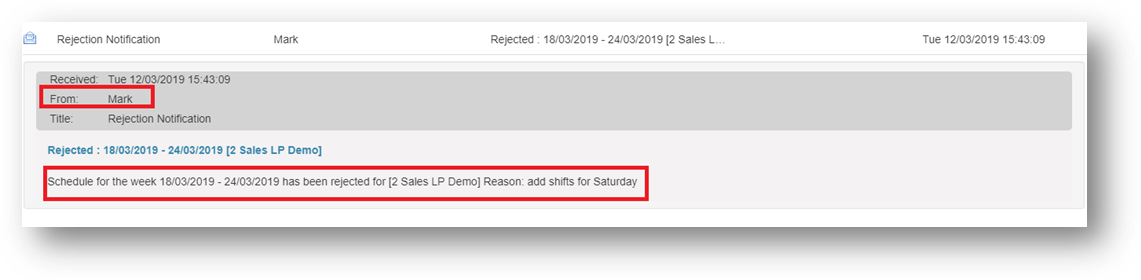 Fig.9 – Schedule Notifications
When the Schedule has been approved, the Schedule Status drop-down menu will update in the Schedule page
 Fig.10 – Approved Schedule
Please Note: If the Schedule has been set to Rejected, it can still be approved. Once approved, it cannot be unapproved.
The Schedule Status will reflect in the Schedule Status Report.
- If the user has permission to this report, access it through Reports > Schedule Status Report
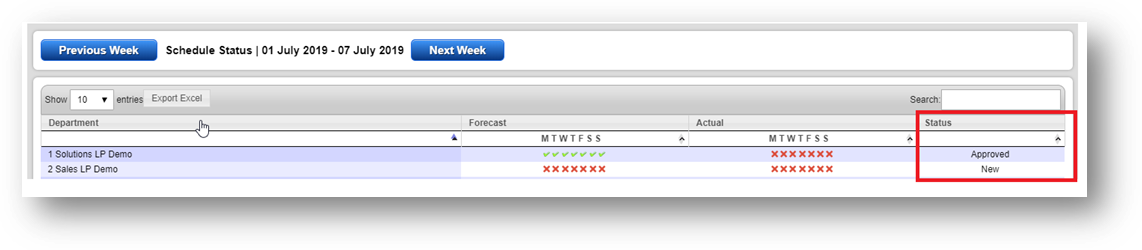
Fig.11 - Schedule Status Report
Setting the Schedule to Close
Once the Schedule is ready to be set to ‘Close’, the following processes need to be completed:
- All 7 Fcst boxes are ticked
- The Schedule needs to be Approved
- All 7 Act boxes are ticked
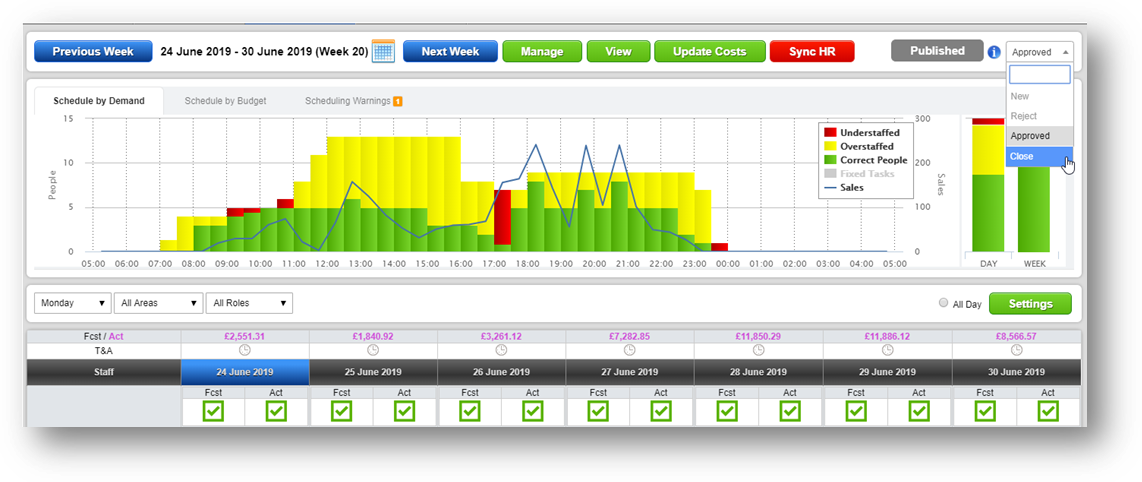
Fig.12 – Setting the schedule to Close
Once the schedule has been set to ‘Close’, the only users who will be able to amend the Schedule will be those who have the ‘Modify Schedule After Set to Closed’ User Level permission.
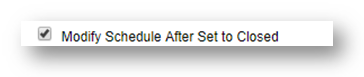
Fig.13 – User Level permission to set schedule to Close
The user’s System Administrator can enable this User Level Permission to the correct user level.
To enable this permission:
- Go to Labour Productivity > Settings > User Levels > select the correct User Level > Edit > select the required User Level Permission > Save
For more detail on this process, see WFM Release Note - Labour Productivity: Managing User Levels
Comments
Please sign in to leave a comment.