
Overview
Create New Rota
- Use the calendar link so that the correct day is selected. If there is more than one location available in the drop-down, choose the required one. ‘Copy Shifts’ may be selected but please be aware that it will copy shifts for every division if this is chosen. If ‘Copy Shifts’ is ticked it will now provide a list of the last 4 weeks rotas which can be copied into the new rota.
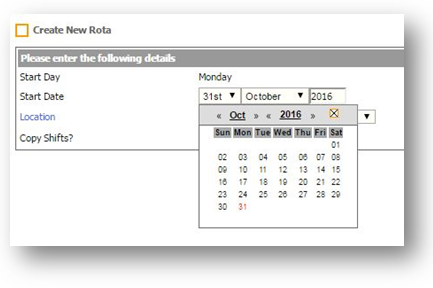
Fig. 1- Create New Rota
Use the Division Dropdown
- Each division must be completed separately in the rota module. To select a different division to the one that is displayed, use the ‘Division’ drop-down box on the left of the screen. It is also possible to drill down into specific job titles rather than selecting ‘All’ through the ‘Job Title’ drop down.
Job Title Drop-down and Hours
- Each employee will appear on a separate row. They will also be separated by job title. Hovering over the name of the employee will bring up their job title.
- If there have been any skills added to the employee, these can be viewed by selecting the employee’s name.
- Any other sites or job titles required for scheduling against that employee should have been set up prior to scheduling in the HR module.
- Select one employee at a time and add the schedule for the week by selecting the clipboard found on the right hand side of the screen. This should be done for each employee until the rota for the week has been created.
- It is also possible to structure the rota on a day-to-day view by selecting the daily shift chart. This can be found next to the day of the week on the rota screen. This view may be beneficial for ensuring the labour has been maximised for that day, as colour coding can be attributed to the shift codes. This provides a good visual tool to review the labour deployment.
- To update the rota with these amendments, select “save” at the bottom right of the screen.
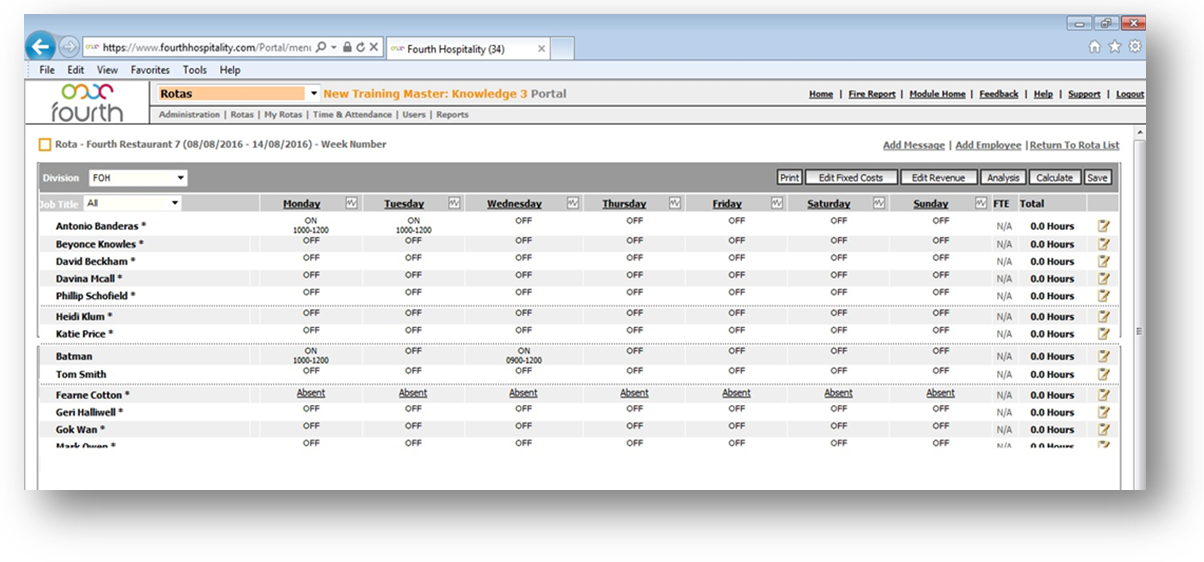
Fig.2- Shifts added at the primary site
Moving Employees on Split Shifts to Another Site
- When you are happy with the hours at site 1, close down the rota and return to the home screen.
- Select the relevant site in the division drop down.
- Select the employee to be added to the new rota.
- They should have a small blue icon next to their name, indicating that they are a multiple employee.
- Input the employee as before, ensuring the hours put in will match the split shift- i.e. Site 1- 10:00-12:00, Site 2- 17:00-23:00.
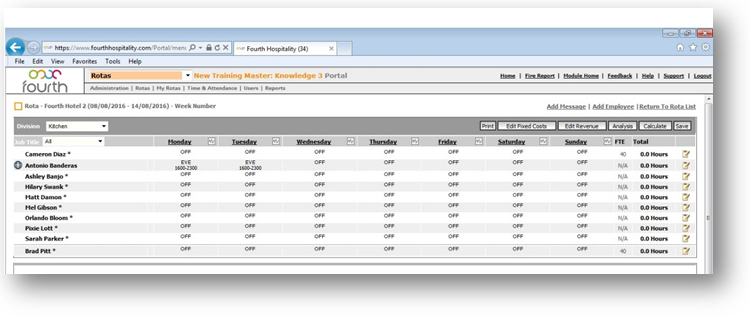
Fig.3 - Shows the same employee on site 2 for the split shift
Warning Messages
If set up, a pop-up may appear which will have information for all employees on the rota. For instance, it may highlight employees who are working over 48 hours, or those who have been scheduled on duplicate hours within different divisions. The rota can be saved in progress if the pop-up appears, however it will not be possible to submit the rota to payroll until the correct amendments have been made.
Comments
Please sign in to leave a comment.