Overview
An Employee can be transferred to another Location, Division and/or Job Title when required within the HR Module.
This article describes the process of transferring an Employee.
Transferring an Employee
- In the HR Module, select Employee List in Employees

Fig.1 – Employee List in Employees Drop-Down Menu
- Search for and select the Employee to be transferred

Fig.2 – Employee List
- Select Employment Details in the Employee Info drop-down menu
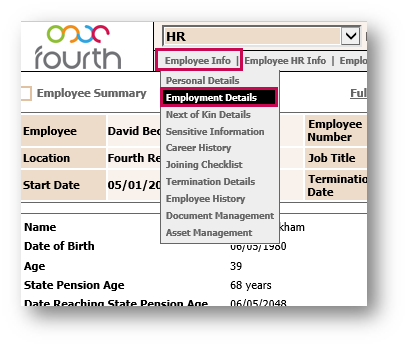
Fig.3 – Employment Details in Employee Info Drop-Down Menu
The ‘Employment Details’ screen will then display.
To transfer an Employee, their details need to be amended to match where they are going to be working and in what capacity.
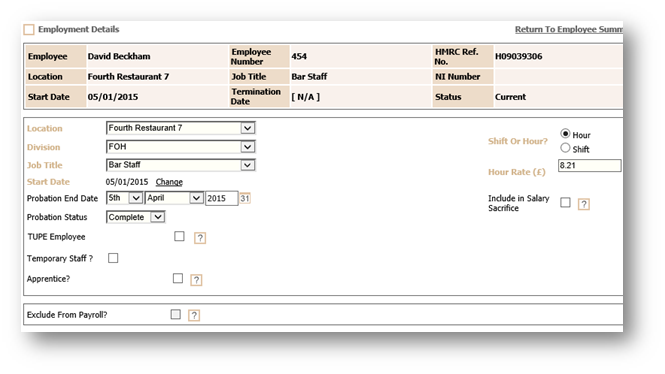
Fig.4 – Employment Details Page
- Select the Location which the employee is moving to in the ‘Location’ drop-down menu
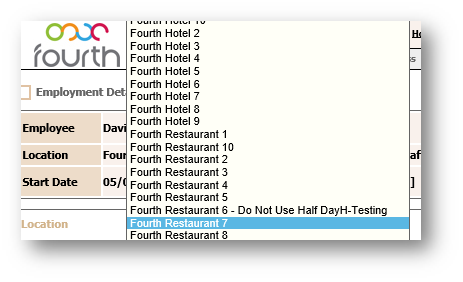
Fig.5 – Location Selection
- Select the Division which they will be working under in the new Location in the ‘Division’ drop-down menu
- Select the new Job Title
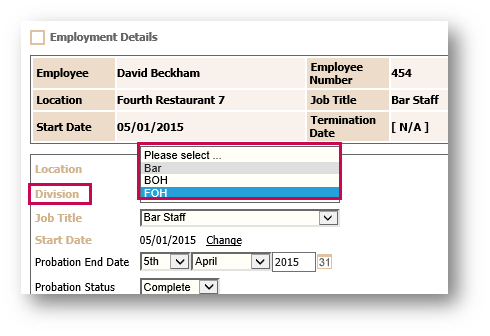
Fig.6 – Division Selection
- Amend any other details required in the following sections seen in Fig.7
- Do not change the Start Date yet as this will affect Continuous Service
- Select Save
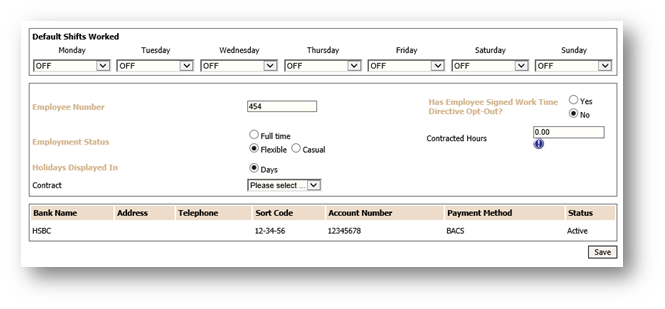
Fig.7 – Default Shifts Worked Details
A pop-up will display where the Start Date for the new Job Title/Location can be entered.
This automatically defaults to today’s date but can be amended by selecting the Calendar icon.
- Once amended, select Save
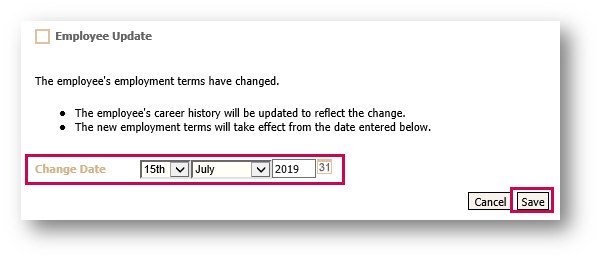
Fig.8 – Employee Update
Once the new Start Date applies, the Employee will be removed from the current Location and moved to the new one. The Employee will also be included on the new Location’s Rotas in the future.
Please Note: If the Site which the employee is being transferred to runs under a different PAYE number, they will need to be terminated under one Site and re-hired under the new one.

Comments
Please sign in to leave a comment.