- Select the HR Module

Fig.1 HR Module
-
Select either the ‘Employee List’ from the drop-down menu, or the ‘View all Employees’ Quick Link to find the relevant employee


Fig.2 Select Employee List or View All Employees
- From the employee list click on the employee that needs to have multiple employments set up
-
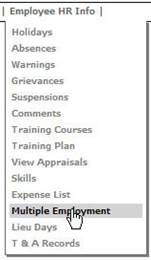
Once in the employee summary page, select Employee HR Info and then select Multiple Employment

Fig.3 Select Multiple Employment
- This area shows any multiple employments which are already set up for the employee. To create a new one select Create New Job

Fig.4 Create New Job
- First select the Location (employees can work between sites if necessary, their hours will be charged to that site), Division and Job title for the multiple employment from the drop-down menus. Leave ‘Auto Add to Rota’ ticked and this will automatically add them to the Rota for the site or division of the multiple employment.

Fig.5 Select location, division and job title
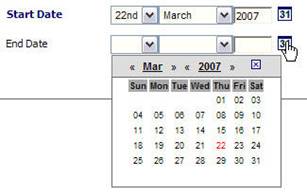
- The start date will default to today, if on loan permanently leave the end date empty which will leave them on the rota. If it is a temporary loan select the end date by using the calendar icon, which will only allow them to appear on the rota for that time period

Fig. 6 Calendar
- Complete the hourly or shift rate for the member of staff, which will filter through to their payroll. If the member of staff is salaried then this will not need to be completed

Fig.7 Hourly Rate
- If the employee is to work the multiple employment on specific days or work specific shifts then this can be set up under the default shift section, which will then filter through to the rota.

Fig.8 Default Shifts
- Once the form is filled out, click on ‘save’ to complete the set up of the multiple employment.
-
Each multiple employment set up will appear in the list for that individual employee. As many as required can be set up, they will show as current under the status

Fig.9 Multiple Employment Status
-
If the employee is no longer required to do this multiple employment then click on it and put in an end date, once that end date has passed the status will automatically change to past.

Comments
Please sign in to leave a comment.