
Overview
Vacancies can be opened within the Applicant Tracking System (ATS) at any time and can be pushed to other job boards if required and if an integration is set up. This article describes the process of creating, editing, and re-opening a vacancy within ATS.
Accessing the Vacancy Page
All current and closed vacancies can be reviewed and edited from the Vacancy page.
- To access the Vacancy page, select Vacancies in the ATS drop-down menu

Fig.1 – Vacancies in ATS Drop-Down Menu
Creating a Vacancy
- To create a vacancy, select the + icon on the Vacancy home page
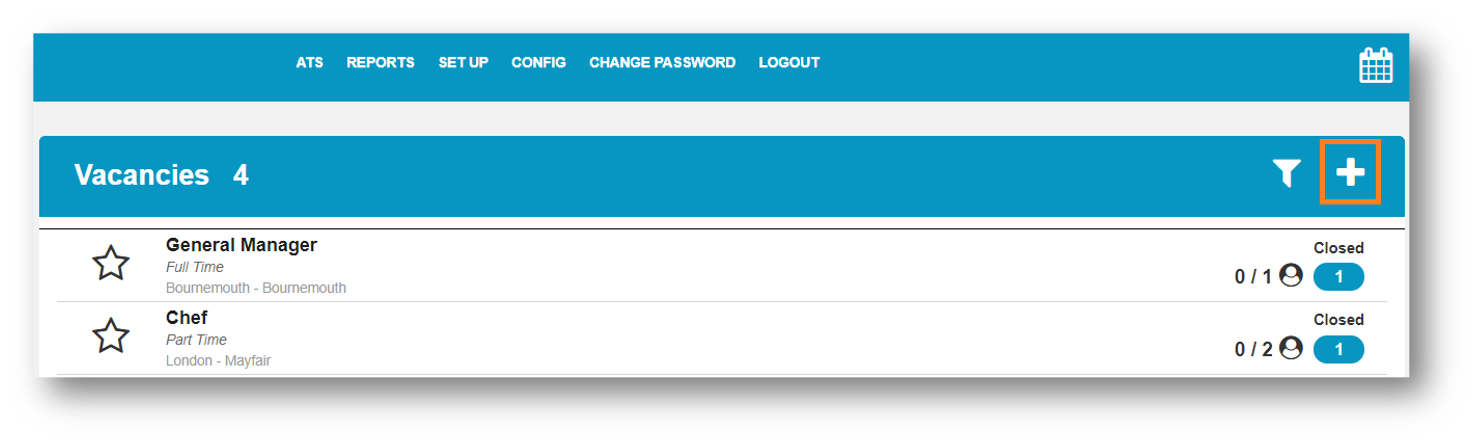
Fig.5 – Plus Icon
A new window opens where vacancy details can be confirmed.
Please Note: All fields with a red asterisk are mandatory.
- Location – Depending on user permissions, multiple locations may be available
- Role – Multiple vacancies for the same role cannot be opened
- For example, if a vacancy for a Chef is already open, the ‘Chef’ vacancy will not be available in the Role drop-down list and needs to be closed and all associated candidates need to be regretted first. Only then can a new vacancy for the Chef role be created
- The role selected will auto-populate the Job Advert in the Description field
- Vacancy title – Depending on user permissions, this can be edited if required
- Employment type – Employment types can include full time, part-time, casual, and flexible depending on the company setup
- Available spaces – This allows the manager to specify how many new recruits are needed for the selected vacancy. Available space will not stop the hiring manager from hiring more or fewer candidates for the selected vacancy it is a visual field to support the recruitment process
- Job live from – Select a date. It can be in the future if required but defaults to today’s date
-
Job live until – Select a date. Only dates 28 days into the future can be selected
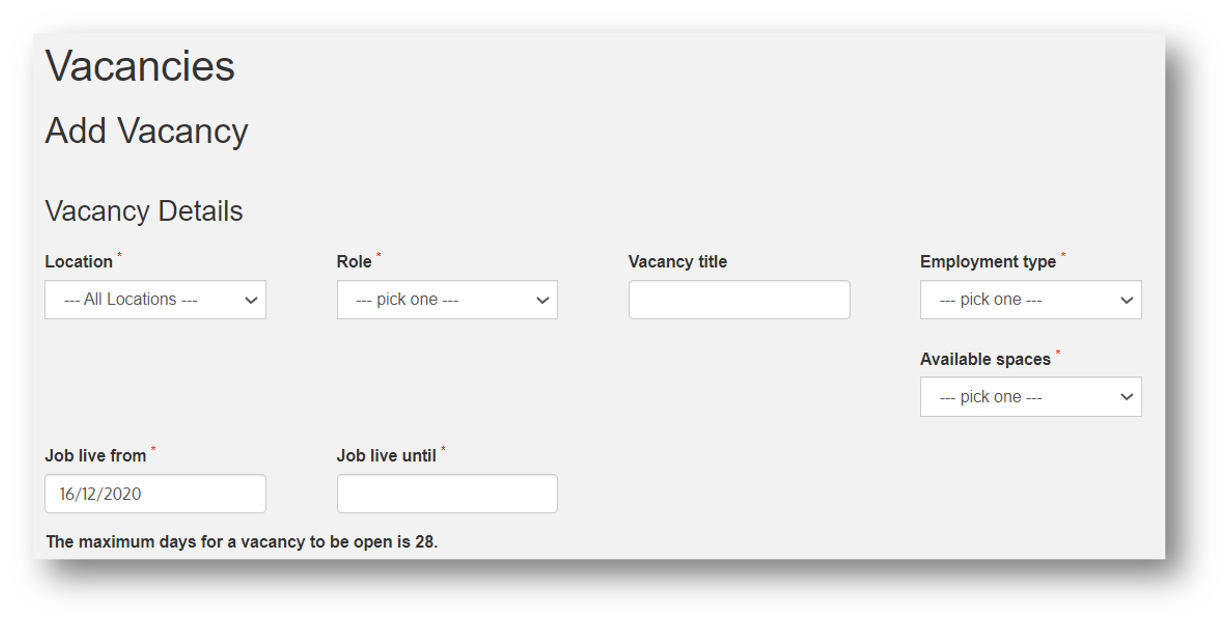 Fig.6 – Vacancy Details
Once a location and a role have been selected the job advert auto-populates. Depending on permissions, the Job Advert detail can be edited.
-
Salary details are auto-populated and can be edited depending on permissions. Multiple options are available: Competitive, Single Value, or Range
- The content of the Salary Depends On and Package Includes fields are company-specific and may or may not be selected
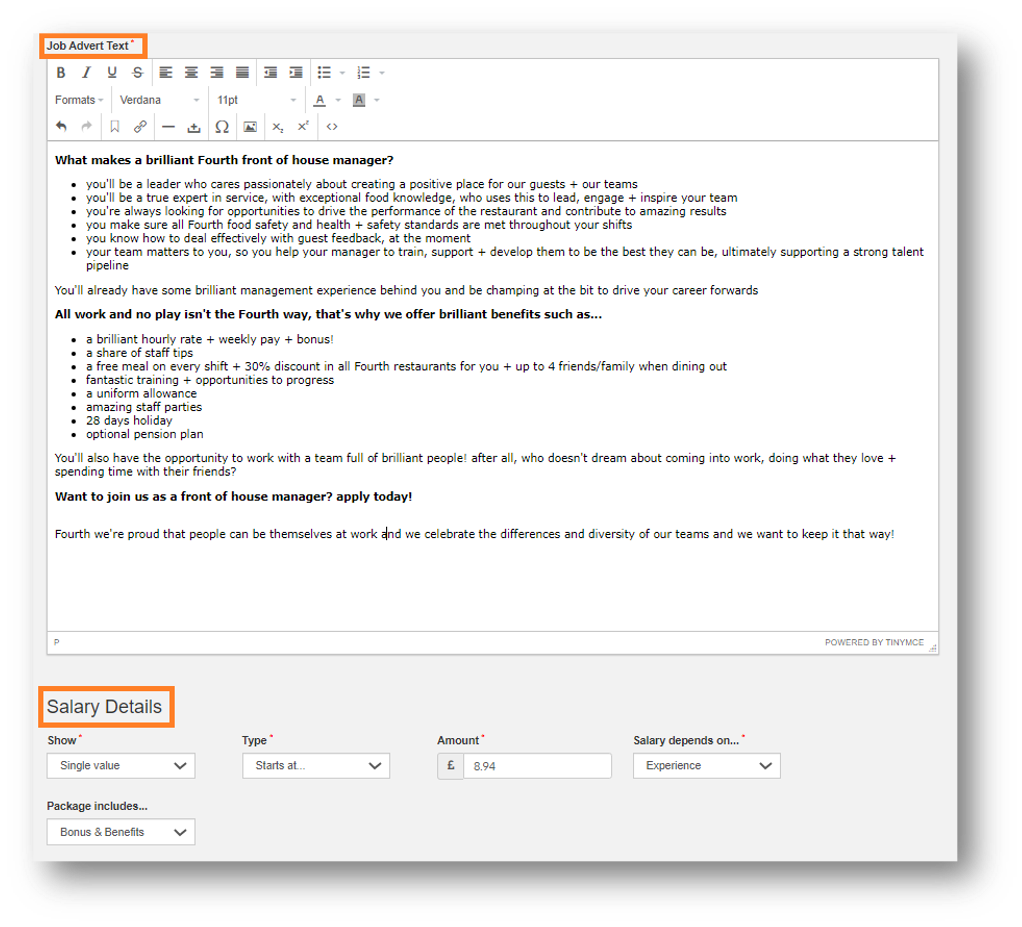 Fig.7 – Job Advert Details
Editing a Vacancy
- To edit vacancies, select the required Vacancy and then the Cog icon (see Fig.2)
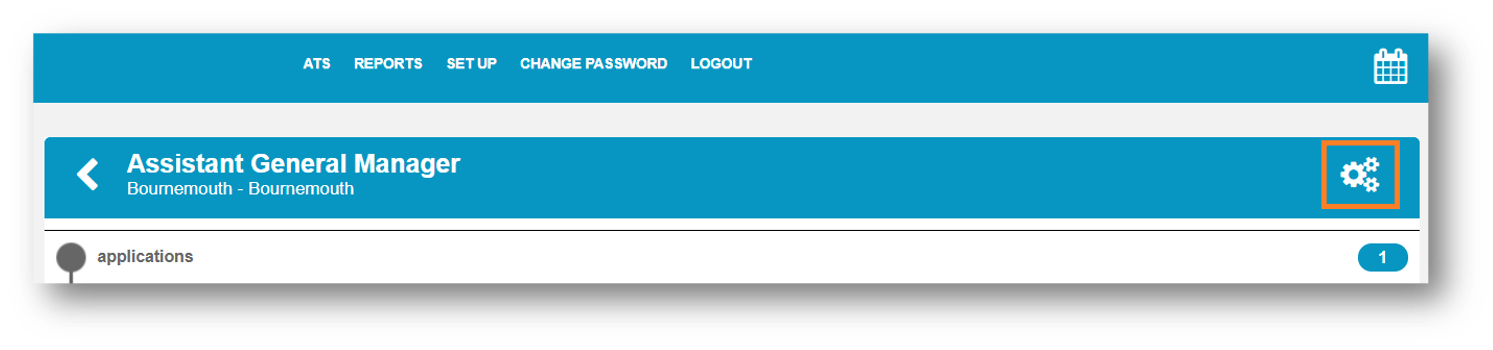
Fig.2 – Cog Icon
The ‘Vacancy Detail’ page will then display, changes can be made and saved within this page.
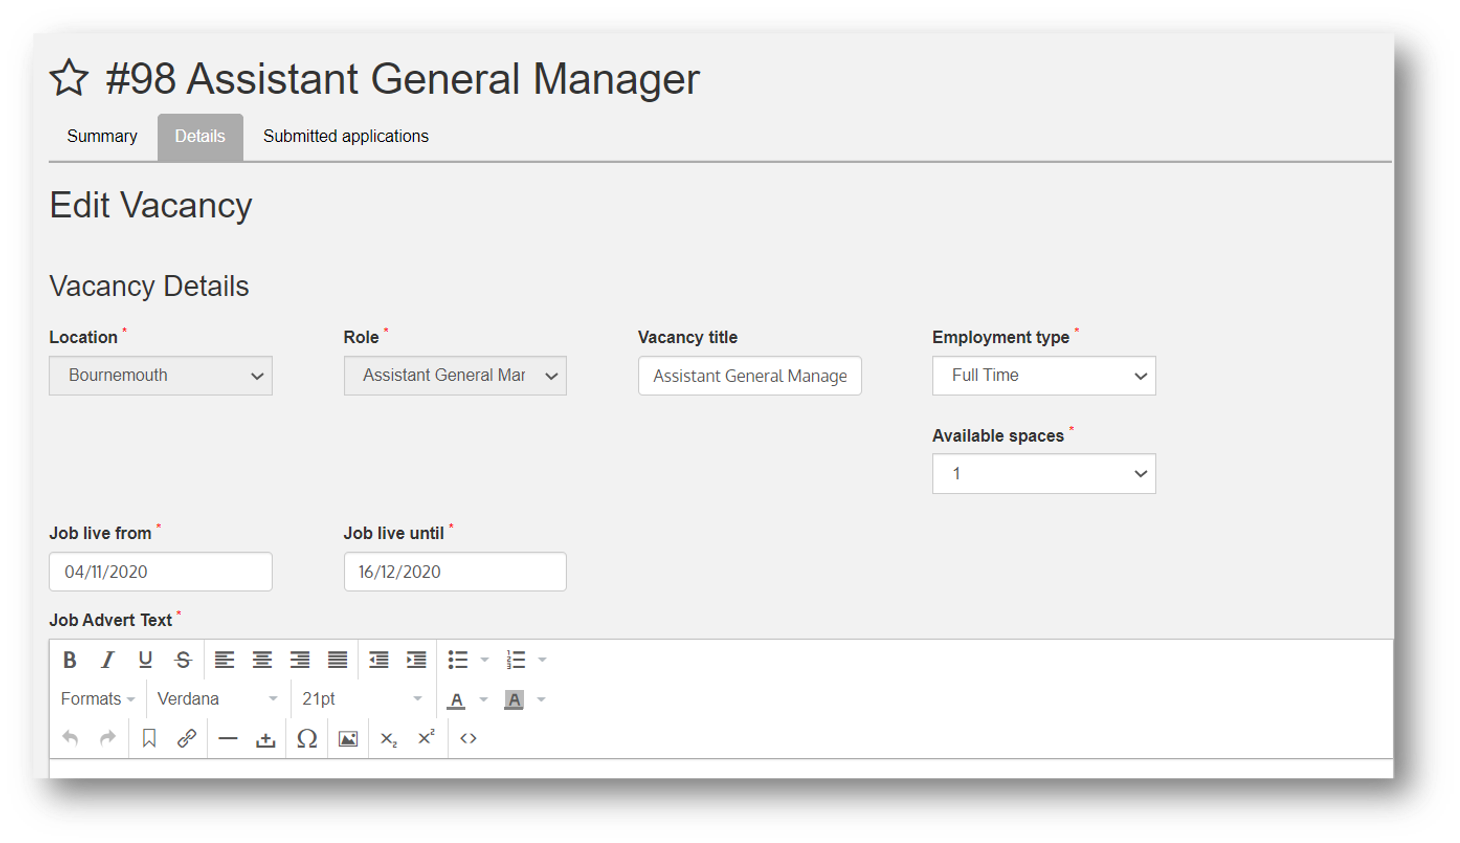
Fig.3 – Edit Vacancy Fields
Closing a Vacancy
- To close a vacancy with immediate effect, select Close Vacancy
Closing a vacancy does not regret current candidates associated with the particular vacancy, but it removes the vacancy from the candidate facing environment and therefore stops new candidates from applying.
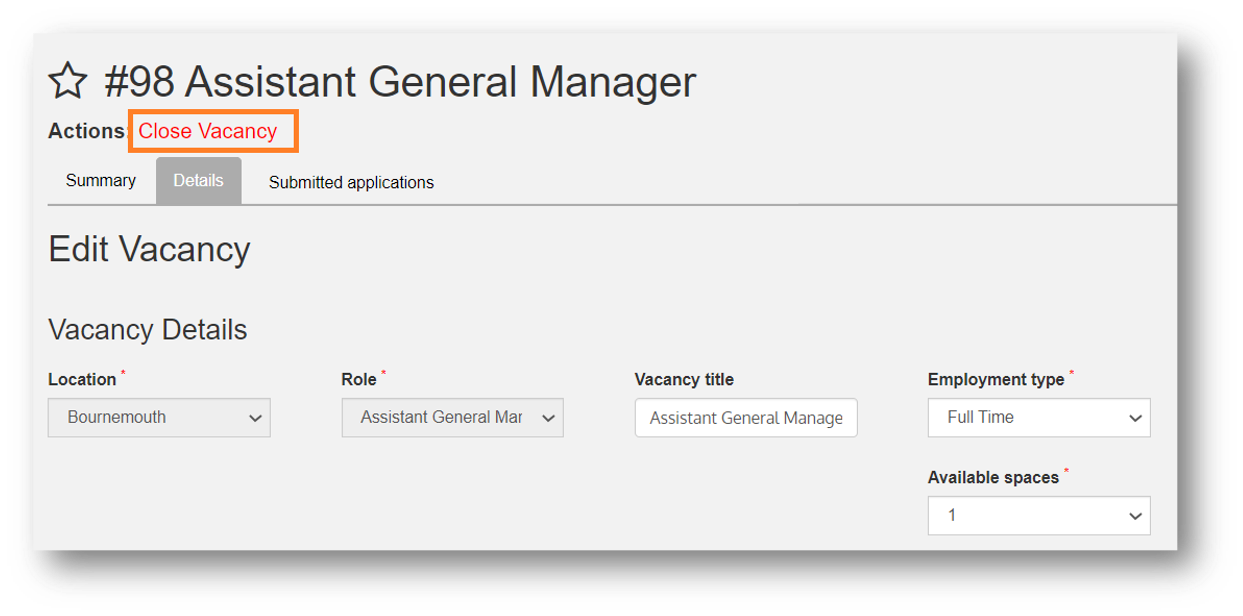 Fig.4 – Closing a Vacancy
Job Boards Section
Depending on permissions and the company's setup, vacancies are published automatically to job boards or can be published manually.
- To manually publish a vacancy to a job board, select the relevant Job Board after the vacancy has been created
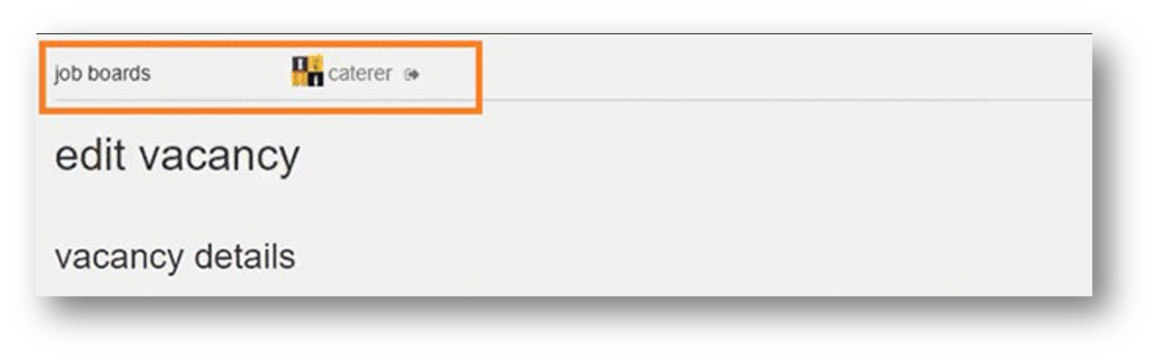 Fig.8 – Job Boards Option
Please note: certain job boards may require approval from the Recruitment Team / Head Office. The vacancy is only published on the job board once approved.
- Once all details are confirmed, select Save
The Vacancy Summary page displays once a vacancy has been created and saved in edit mode.
- Summary – Summaries the vacancy details
- Details – Displays the Vacancy Details screen and allows for editing
- Vacancy History - Displays the vacancy history (created, extended, closed, re-opened), a date/time stamp of the changes, and the user associated with the changes made.
- Submitted applications – All related applications are displayed here
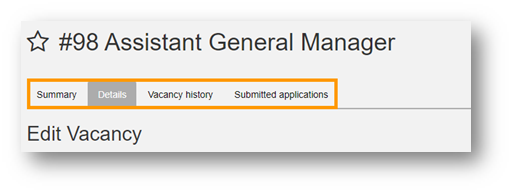
Fig.9 –Vacancy Summary Page
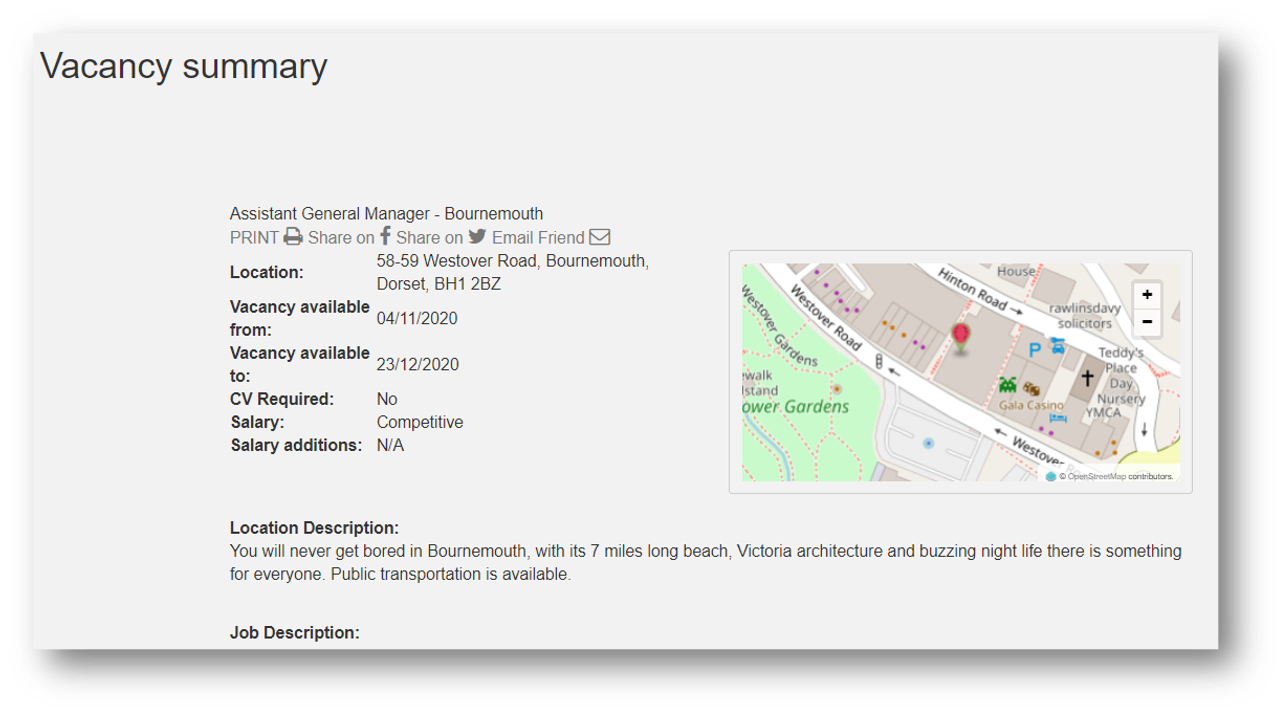
Fig.10 – Expanded Vacancy Summary Page
Re-opening a Vacancy
Hiring managers can re-open a vacancy that has expired (i.e. a closed vacancy) and subsequently publish new job adverts linked to the same vacancy on job boards to attract new candidates and boost the applications. This functionality provides a more efficient and easy way to re-advertise vacancies without the need to create the same vacancy for a role and location multiple times.
- Navigate to a closed vacancy via the vacancies page
- Select the cog icon to edit the vacancy
- Change the job live from date and job live until date (once both dates have been modified the Re-open vacancy checkbox field appears automatically)
- Select the Re-open vacancy checkbox field (as shown in Fig.11)
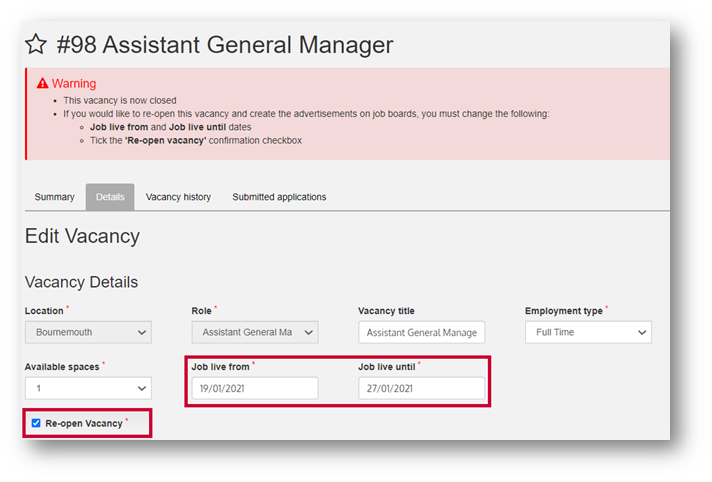
Fig.11 – Amending Job Live Dates & Re-opening tick box
- Select Save at the bottom of the vacancy page to re-open the vacancy.
Please note: Any users that are able to create a new vacancy can also re-open a vacancy. Publishing re-opened vacancies to job boards still requires approval from users on the Head Office/Administrator Permission level.
Re-opened vacancies are subsequently then published to the Candidate Portal and appear on top of the list of vacancies.
Job Boards and Re-opened Vacancies
Re-opening a closed vacancy will allow users to publish the vacancy to the job boards in the same way as new vacancies are posted to job boards. Therefore, re-opened vacancies are either directly published to job boards (that use XML Feeds) or require a manual push by selecting the relevant job board icons on the vacancy page.
Job Boards using XML Feed
The XML feeds for the job boards are updated by the ATS and a re-opened vacancy is added as a new vacancy with a revised start date & expiry dates. The previous vacancy is removed from the XML which will therefore remove the old job adverts from the various job boards.
As re-opened vacancies are picked up as new vacancies within the XML feeds, the corresponding job advertisements in the job boards are displayed at the top of the job listings to attract more candidates.
XML based Job Boards supported for this functionality:
- Indeed
- LeisureJobs
- Glassdoor
- E4S
- Placed
- Hit Training
- British Forces Resettlement Services
Job Boards requiring a manual push
Once a vacancy has been re-opened, the button for posting the job advertisement to the Job Boards becomes available to the user.
- Select the Job Board button which sends the job advertisement request to users on the Head office/ Administration permission level for approval (within the Job Board Ads section of the ATS)
- Users on the Head office/Administration permission level will approve or reject the vacancy. If approved, the vacancy is published as a new job advertisement within the job board.
Integrated ATS Job Boards that are supported for this functionality:
- Caterer
- Hospitality Jobs
Please note: Reed and Gumtree are currently not supported for this functionality.
Comments
Please sign in to leave a comment.