Overview
This article explains the process of using Scheduling to offer open shifts as well as using the My Schedule app to approve or deny team member requests.
The My Schedule app allows team members to easily access their published schedules. Within the app, the user can view their shifts and mark shifts as unavailable. The app also gives managers the ability to approve or deny any shift requests received from team members.
Creating Open Shifts
To create Open Shifts, the Scheduling Module must be opened either within the Fourth app or a web browser.
- Once the username and password have been correctly entered on the login screen, there will be an option to open Scheduling. It is displayed on the right-hand-side of the screen, above the sign out option

Once Scheduling has been opened, the dashboard will display.
- To go to the scheduling screen, select the Schedule tab on the dashboard, seen in Fig.2

The Open Shifts row is now visible, where a manager can enter in any available shifts to be offered to the appropriate staff.

- To create an open shift, select the day that the shift is needed on
- Choose a Start and Stop time for the shift and the desired Job Role for the open shift
Entering the Job Role is important as it will drive which team members receive an alert regarding the open shift. For example, if the user creates an open shift for the Chef job role, only Chef team members will receive the alert.
Alerts can be created for the open shift and a Message can be added to the team members if desired, seen in Fig.4.
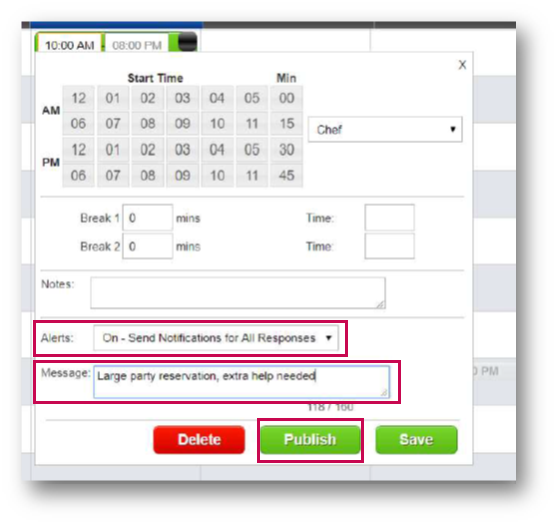
- Select the Publish button to create the Open Shift
If the option to keep Alerts On has been selected, a push notification will be sent to all team members who are available to work the shift, have the appropriate job role and have access to the Fourth app.
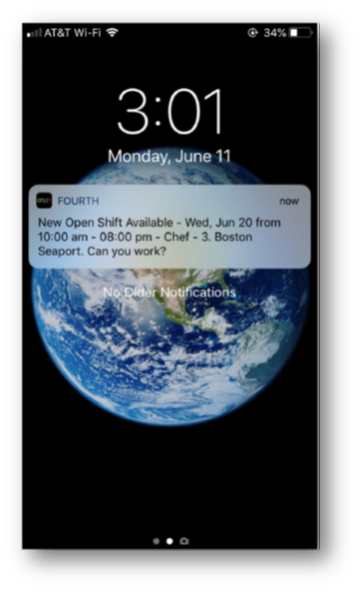
If the team member opts to work the open shift, their direct line manager will receive a push notification similar to the one shown in Fig.5.
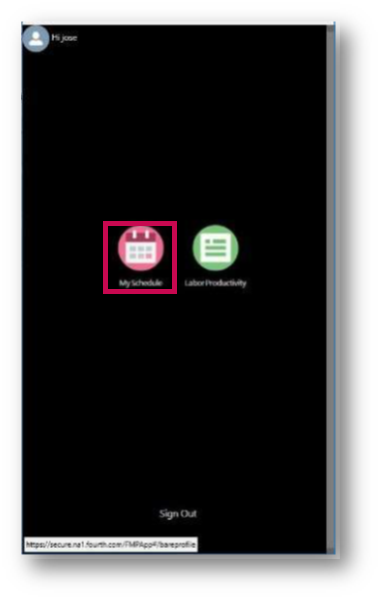
- To view all responses to the offered open shift, access the My Schedule app, either via the Fourth app or a web browser. It is displayed on the left hand-side of the screen, above the sign out option, seen in Fig.6
- To view the submitted responses to the offered open shift, select Team Requests
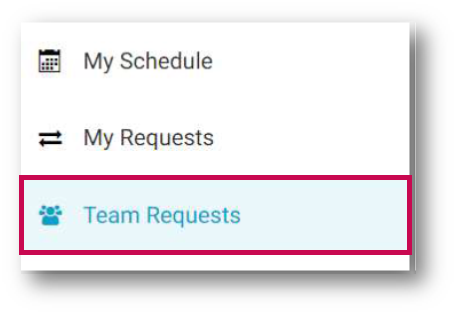
Fig.7 – Team Requests Option
Once selected, all responses to the offered open shift are visible (in addition to all other requests from team members i.e. shift swaps, drops, and gives).
- To view options regarding open shift responses, select the shift in question
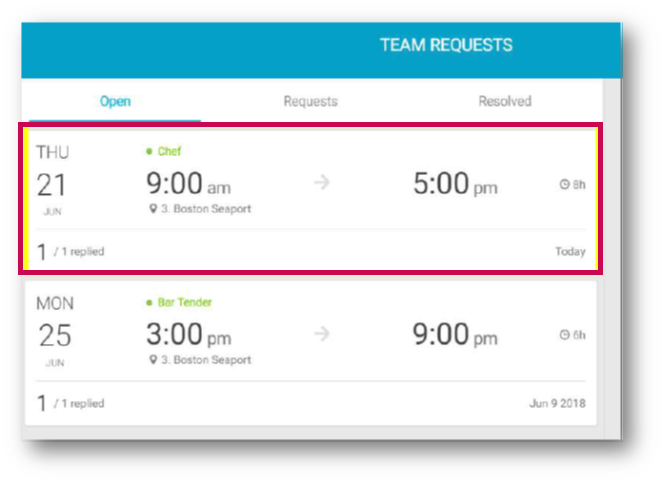
Once the shift has been selected (seen in Fig.8), all team members who offered to work will be shown.
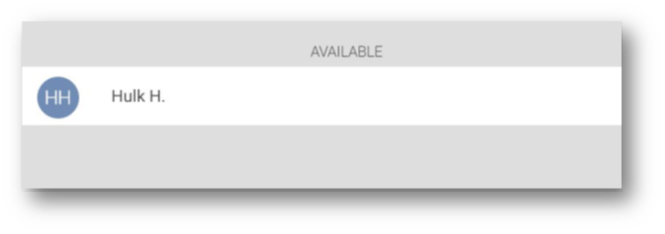
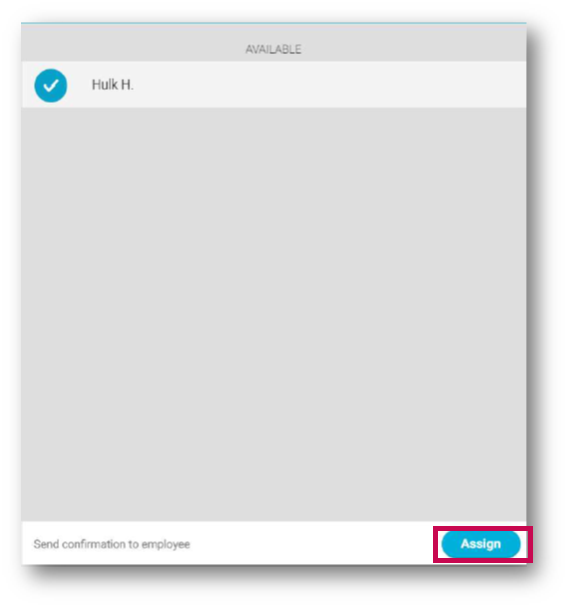
- To select a team member to work the open shift, select the Team Member’s Name, then Assign in order to notify the team member that their request has been accepted. See Fig.10
When the shift has been assigned, the selected team member will be receive a push notification similar to that of Fig.5. The schedule within Scheduling will also be updated to reflect the assignment.
Open shifts can be added to any future date/ time, even the current live date. Open shifts cannot be added retroactively.
Managing Team Member Shift Drops/ Swaps/ Gives
When a team member requests to drop, swap, or give one of their scheduled shifts, their line manager will be notified via a push notification which can be fully viewed in the Team Requests screen, shown in Fig.7.
- To review the request, select the requested shift
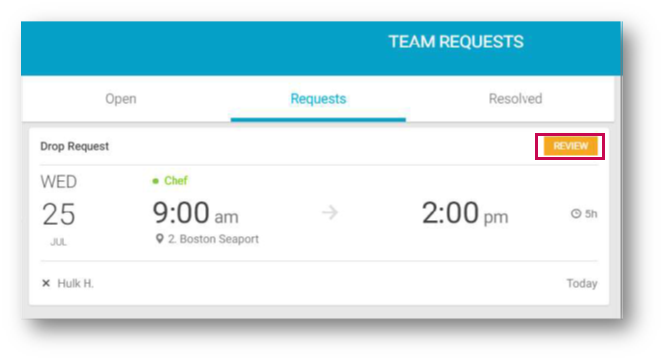
- Either Approve or Reject their team member’s request
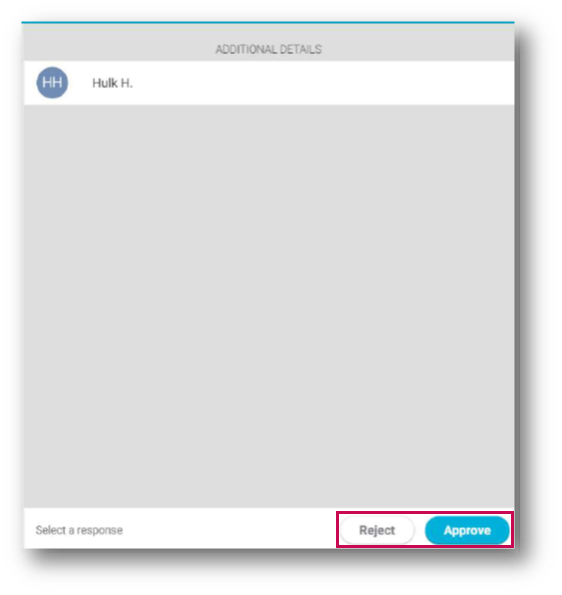
For ‘drop’ requests.
Once a choice has been selected, the team member will be informed via a push notification. If Reject was selected, the shift will remain on the team member’s schedule. If Approve was selected, the shift will be removed from the schedule.
For ‘swap’ requests.
Once a choice has been selected, both team members involved will be informed via a push notification. If Reject was selected, the two original shifts will remain on the originally scheduled team member’s schedule. If Approve was selected, the two shifts will be automatically swapped and updated within Scheduling.
For ‘give’ requests.
Once a choice has been selected, both team members involved will be informed via a push notification. If Reject was selected, no changes to either schedule will take place. If Approve was selected, the shift will be appropriately moved from one team member’s schedule to the other in addition to being updated in Scheduling.
Daily Auto-Publish to MySchedule app
This is a Global Setting and is enabled for all locations. Please liaise with your Fourth contact to have this done.
Appearance in Labour Productivity
There is no physical change to the Schedule page. The setting is a Global Setting - if turned on, it will apply for all locations using the My Schedule app. If the setting is enabled and a schedule has been published, then the schedule will be Auto-Published to the My Scheduled app daily, circa 13:00 GMT.
The tooltip next to the ‘Published’ button will also indicate when the next scheduled publish will be.

Fig.12 - Next Scheduled Publish shown on Tooltip
Employee Unavailability in My Schedule app when loading a Schedule
Please note: The functionality will be switched off by default but can be activated for all customers who use both Scheduling and the My Schedule app. Please liaise with your Fourth contact to have this functionality enabled.
When a template or last week’s schedule is loaded to the current week, a pop-up box appears, showing if any shifts are trying to be loaded for employees where they have unavailability.
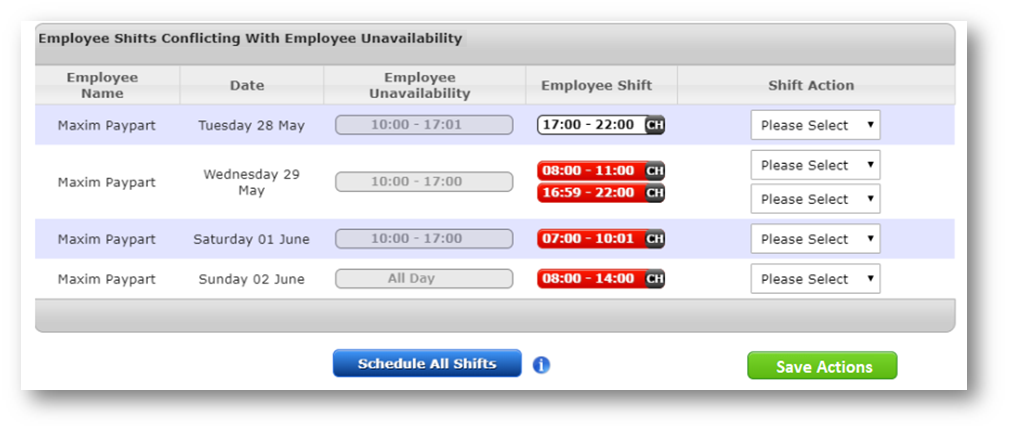
Fig.13 - Employee Shifts Conflicting with Unavailability
The pop-up box contains the following columns:
-
Employee Name – Employee Name
-
Date – Date of the unavailability clash
-
Employee Unavailability – Recorded unavailability for the employee. Created by the employee in the My Schedule app
-
Employee Shift – Shift(s) for the employee which are clashing unavailability for that day
-
Shift Action – The default will be Please Select. All Shift Action boxes will need to be completed
Completing Shift Actions
Specific “Shift Actions” from the Shift Action drop-downs must be selected for each shift that conflicts with employee unavailability.
The Shift Actions are:
-
Schedule Shift – shift is scheduled
-
Remove Shift – shift is not scheduled
All Shift Actions will need to be completed. Only then will the Save Actions button become available. If there are any outstanding shift actions an error message will be displayed.
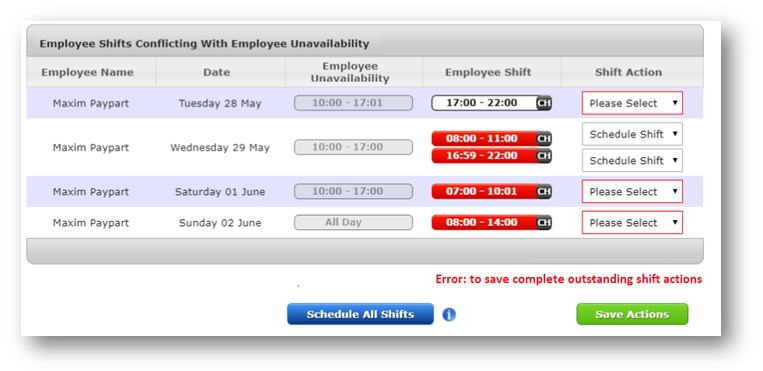
Fig.14 - Outstanding Shift Actions Error Message
The Schedule All Shifts button will schedule all shifts which are conflicting with employees’ unavailability. If any Shift Actions have been set, this button will override the Actions and schedule all shifts from the template.

Fig.15 - Schedule All Shifts Button & Tooltip

Comments
Please sign in to leave a comment.