
This article continues from Workforce Management Training Module - Appraisals
Succession Planning
Succession planning has been designed as a quick indicator of internal progression within an in-house career path. Area managers or internal HR departments/trainers can see instantly which locations are above or below their dedicated headcount for a particular job title. They can also see (if the employees' statuses are kept up to dated) which members of the team are thinking of leaving or would be potentially viable for internal promotions.
Setting up Succession Planning
For the information to feed through to this area of the training module certain elements have to be set up within the HR module under the administration sections.
Headcounts
Firstly, headcounts need to be set up for the job titles that should be regularly monitored by head office e.g. general managers, assistant managers, supervisors (due to screen size we suggest selecting no more than 5 or 6 job titles to monitor within a company).
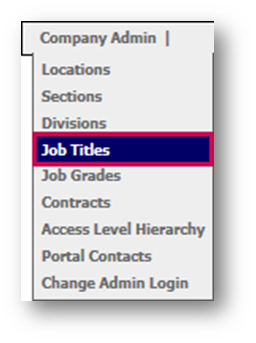
Fig.1 - Selecting Job Titles within the HR module
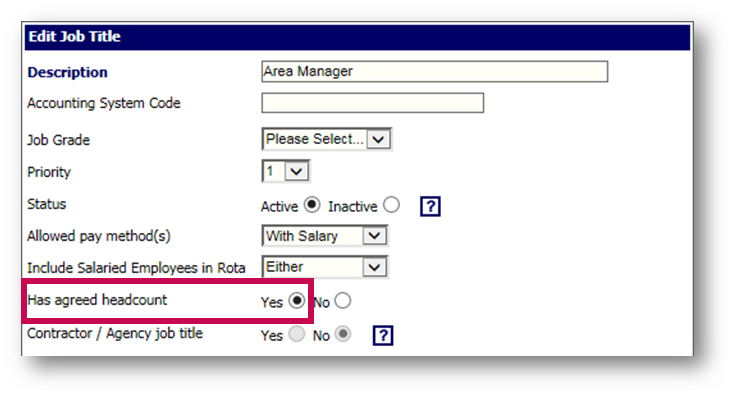
Fig.2 - Has agreed headcount setting
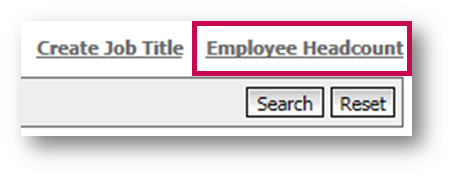
Fig.3 - The Employee Headcount button
This area will give a list of all the job titles have had the Has agreed headcount setting switched to Yes.
For example the General Manager’s headcount for the hotel shown in Fig.4 should come under Front Office division.

Fig.4 - Setting Location and Division for Employee Headcounts
User Defined Groups
Secondly, User Defined Groups need to be set up. This allows for quick selection of areas in succession planning to see straight away what is happening there. This is ideal for Area Managers to check on their specific locations. For example a company may have four hotels in the North that are managed by one area manager, then that area manager along with others may be managed by an operations manager.
As many as required can be set up. For example a company may have various brands within it, different areas that are looked after by specific managers and then a head office team that needs to see all locations.
Again, to set these up the user needs administration rights.
A list of existing User Defined Groups will display.
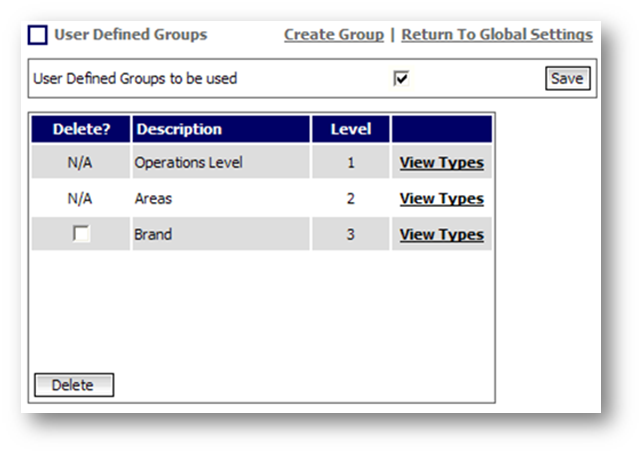
Fig.5 - List of User Defined Groups
Within each level, types need to be set up. For example, within the 'Area' group there may be numerous areas e.g. The North West, The South, London, etc.
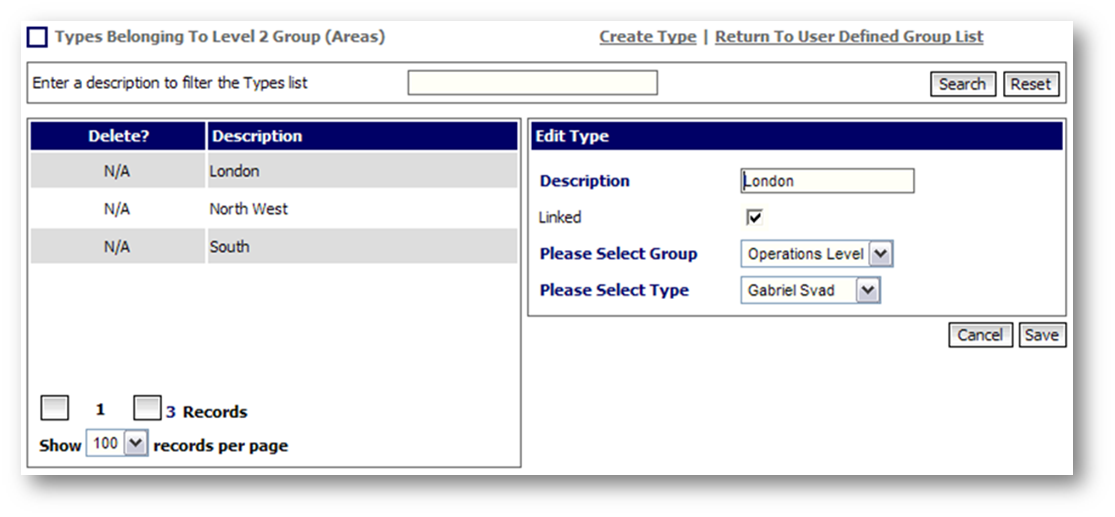
Fig.6 - Managing Types
Now each location on the portal that needs to be monitored has to be linked to a group.
Employee Status
This is an area where an employee’s status can be updated (typically after an appraisal or job chat) with where they are currently in their training level plus their aspiration status and any relevant comments.
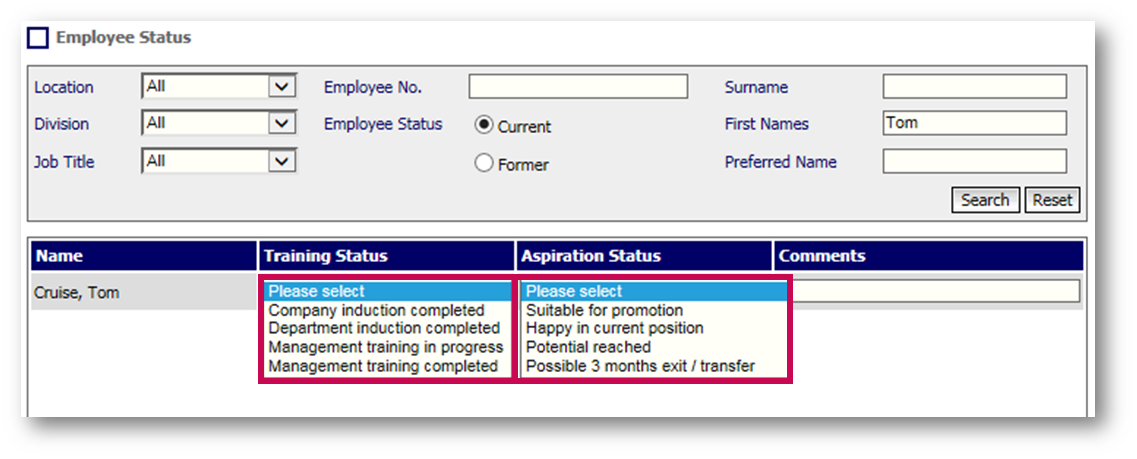
Fig.7 - Training and Aspiration statuses
This information will feed through to the Succession Plan itself if the employee’s job title is linked into a headcount.
Succession Planning
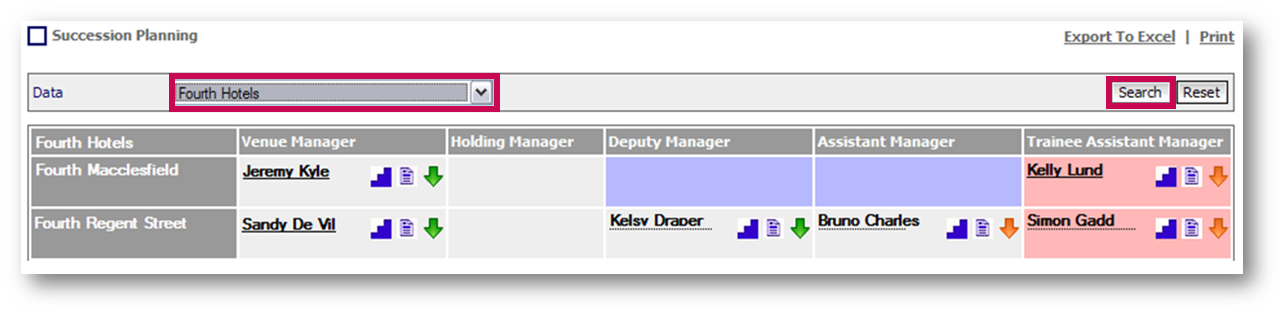
Fig.8 - Selecting data for Succession Planning
The succession plan has a key to the colours and icons that appear on the screen on the bottom left hand side. See Fig.9 below.
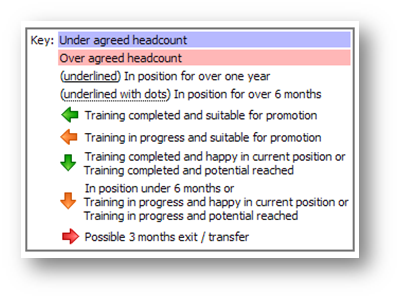
Fig.9 - Key for colours/icons in Succession Planning
The three icons which appear next to the employee’s name will open up additional windows for assistance in administration of the plan itself.
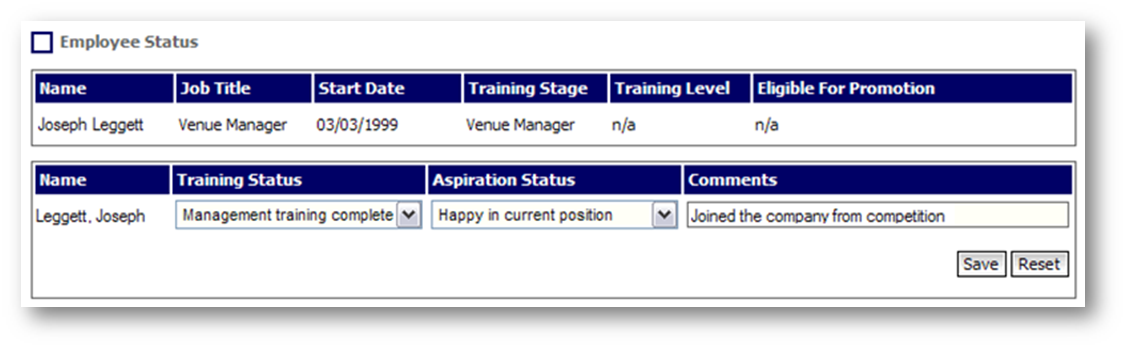
Fig.10 - Employee Status
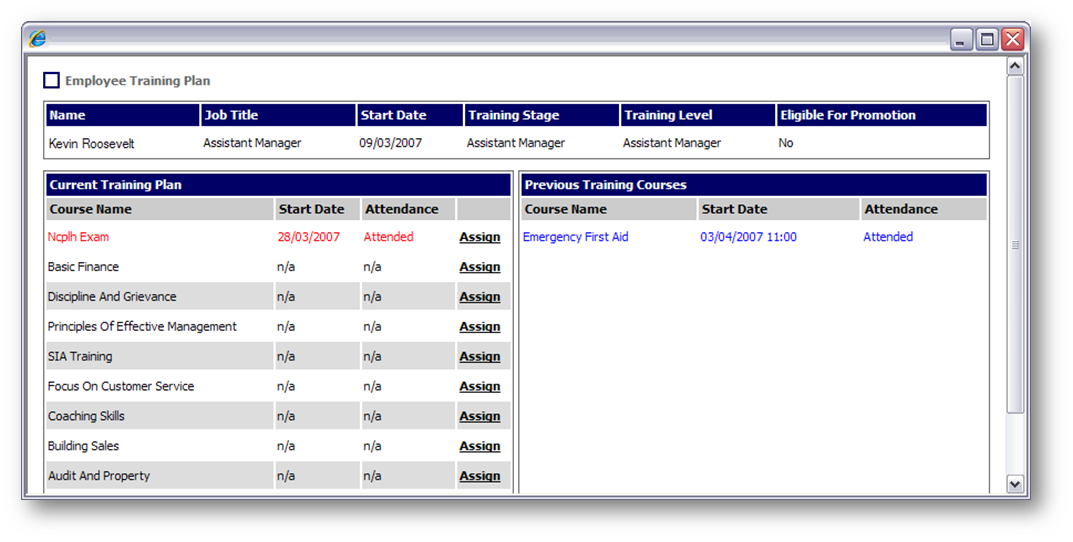
Fig.11 - An employee's training plan
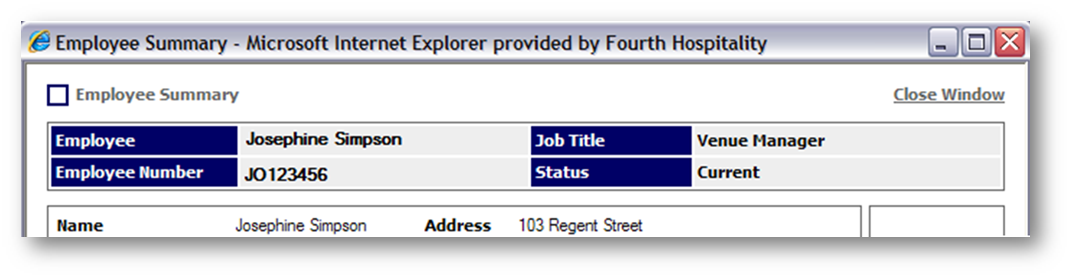
Fig.12 - An employee's summary
Succession Planning
Succession planning has been designed as a quick indicator of internal progression within an in-house career path. Area managers or internal HR departments/trainers can see instantly which locations are above or below their dedicated headcount for a particular job title. They can also see (if the employees' statuses are kept up to dated) which members of the team are thinking of leaving or would be potentially viable for internal promotions.
Setting up Succession Planning
For the information to feed through to this area of the training module certain elements have to be set up within the HR module under the administration sections.
Headcounts
Firstly, headcounts need to be set up for the job titles that should be regularly monitored by head office e.g. general managers, assistant managers, supervisors (due to screen size we suggest selecting no more than 5 or 6 job titles to monitor within a company).
- Go to HR Module > Company Administration Job titles
Fig.1 - Selecting Job Titles within the HR module
- From the list select the Job Title that needs to be monitored for headcount purposes
- Select Yes against the setting Has agreed headcount
- Save the Job Title
Fig.2 - Has agreed headcount setting
- Set this up for all the relevant job titles and then select Employee Headcount from the top-right corner
Fig.3 - The Employee Headcount button
This area will give a list of all the job titles have had the Has agreed headcount setting switched to Yes.
- Select the Location and Division to which that headcount applies
For example the General Manager’s headcount for the hotel shown in Fig.4 should come under Front Office division.
- Enter a number in the Headcount field(s) and Save changes
- All headcounts need to be entered in this way and saved to each location/division
Fig.4 - Setting Location and Division for Employee Headcounts
User Defined Groups
Secondly, User Defined Groups need to be set up. This allows for quick selection of areas in succession planning to see straight away what is happening there. This is ideal for Area Managers to check on their specific locations. For example a company may have four hotels in the North that are managed by one area manager, then that area manager along with others may be managed by an operations manager.
As many as required can be set up. For example a company may have various brands within it, different areas that are looked after by specific managers and then a head office team that needs to see all locations.
Again, to set these up the user needs administration rights.
- Go to HR Module > Administration > Global Settings
- Select Edit User Defined Groups
A list of existing User Defined Groups will display.
Fig.5 - List of User Defined Groups
- Select a Group to view its details and change the Description or Level if needed
- To add a new Group, use the Greate Group button in the top-right
Within each level, types need to be set up. For example, within the 'Area' group there may be numerous areas e.g. The North West, The South, London, etc.
- From the User Defined Group List, select View Types against one of the Groups
- Select a Type to edit its Description, and if Linked, the Group and Type it relates to
- Use the Create Type button to add a new one
Fig.6 - Managing Types
Now each location on the portal that needs to be monitored has to be linked to a group.
- Go to HR > Company Administration > Locations
- From the list select the first location to be linked into a group
- On the right hand side will now be the option to select which Group (in Fig.7 - Brand, Areas, Operations Level) this location falls under
Employee Status
- Go back to the Training module
- Select Succession Planning > Employee Status
This is an area where an employee’s status can be updated (typically after an appraisal or job chat) with where they are currently in their training level plus their aspiration status and any relevant comments.
- Select the Training Status & Aspiration Status from the drop-down menus
Fig.7 - Training and Aspiration statuses
- Add any additional Comments and select Save at the bottom of the screen
This information will feed through to the Succession Plan itself if the employee’s job title is linked into a headcount.
Succession Planning
- Go to Training > Succession Planning > Succession Planning
- Select the Group, Area or Brand (previously set up in HR) from the Data drop-down, and select Search
Fig.8 - Selecting data for Succession Planning
The succession plan has a key to the colours and icons that appear on the screen on the bottom left hand side. See Fig.9 below.
Fig.9 - Key for colours/icons in Succession Planning
The three icons which appear next to the employee’s name will open up additional windows for assistance in administration of the plan itself.
- The small steps icon -
 - once selected will bring up the employee’s status page where this can be updated and saved rather than having to switch between the employee status area and the succession plan
Fig.10 - Employee Status
- The paper icon -
 - will bring up the employee’s current training plan in an additional window
Fig.11 - An employee's training plan
- Lastly by selecting the arrow icon -
 - next to the employee's name it will bring up their summary in a pop-up window
Fig.12 - An employee's summary
Comments
Please sign in to leave a comment.