Reason for the Change
This change was developed has part of the product roadmap.
Customers Affected
All Inventory customers who have the Stock Management, Documents or Exports modules enabled.
Release Notes
Manually Creating a Credit Note

Fig 1 - Approved Supplier Return
- After a supplier return has been created and approved, users with access will see a new button ‘Enter Credit Note’ button as in Fig 1 above.
- Click the button to create a new Credit Note.
Note: If the status of the credit request is set to ‘Refused’ then this button will not be present.

Fig 2 - Credit Note Page
- The user is then taken to the Credit Note page to complete the creation process.
- The line items are taken from the approved supplier return and cannot be edited.
- Complete the ‘Credit Note Number’ and ‘Credit Note Date’ fields.
- To permanently delete the credit note, click the grey ‘Delete’ button.
- Click the green ‘Save’ button to save the credit note. Once saved it will not be possible to re-open or delete the credit note or supplier return.
- Saving the credit note will also automatically mark the credit note for export.

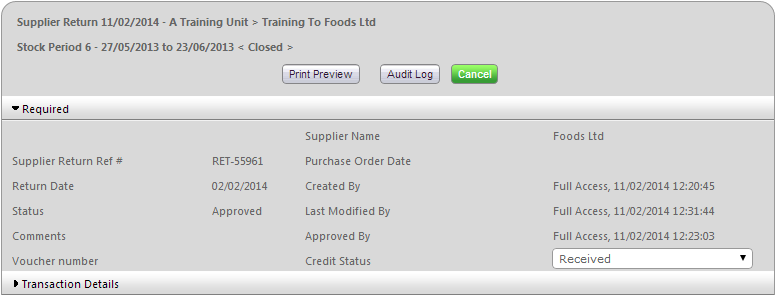
Fig 3 - Supplier Return Which Has An Associated Credit Note
- After saving the credit note the button layout on the approved supplier return will change since users are no longer able to edit it.
- The ‘Credit Status’ drop-down list will change to ‘Received’.
Exporting Credit Notes
For customers with invoice exports it is possible to export credit notes that were created manually.

Fig 4 - Invoice Export Link
- Follow the path: Exports Tab > Invoice Export Link > Select Export type (if more than one export type exists).

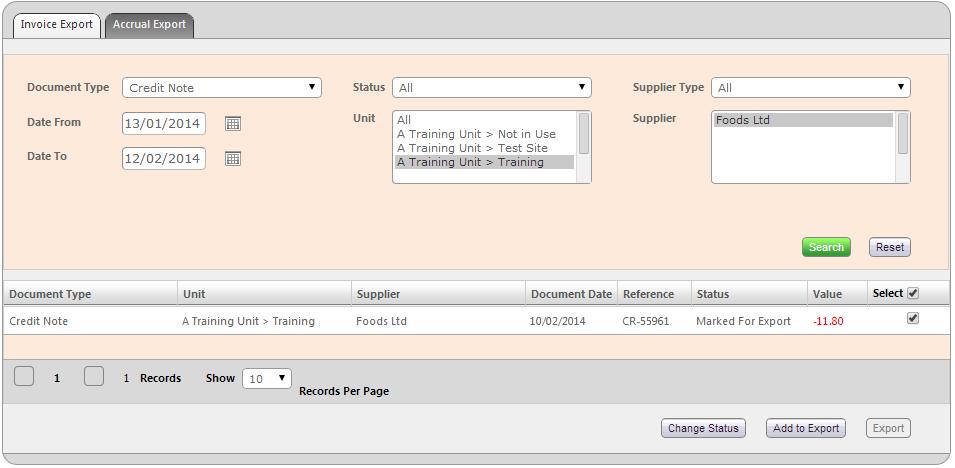
Fig 5 - Invoice Export Screen
- Search for the manually created credit note(s) and select them to add to the export by clicking the grey ‘Add to Export’ button as in Fig 5 above.
Note: Credit notes are displayed as negative values as in Fig 5 above.

Fig 6 - Enabled Export Button
- After the manually created credit note(s) have been added to the export they can be immediately exported by clicking the enabled ‘Export’ button.
Note: If the organisation uses an automatic invoice export then this step is not necessary.
Searching for Manually Created Credit Notes

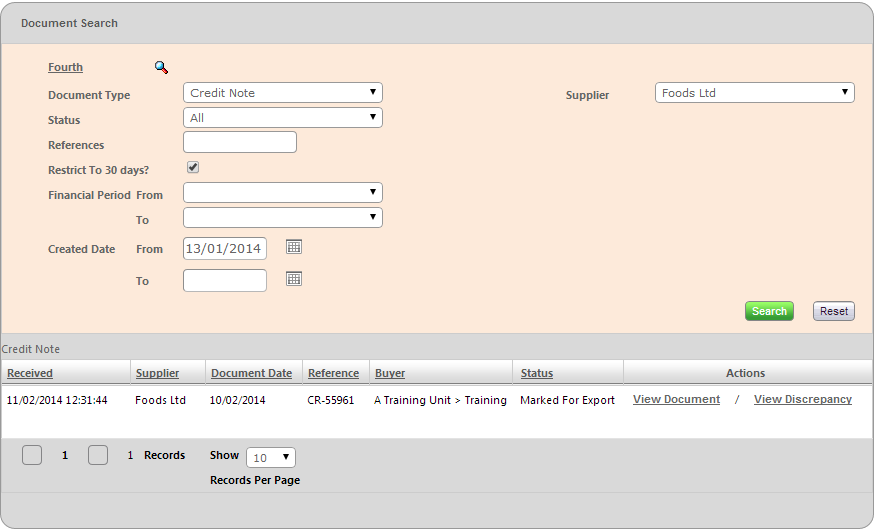
- To view credit notes users should follow the path: Documents Tab > Select ‘Credit Note’ from the ‘Document Type’ drop down list.
- Enter the relevant criteria and click the green ‘Search’ button to view the list of related credit notes.
- Click the ‘View Document’ link to view a printable version of the credit note.
- Clicking the ‘View Discrepancy’ will navigate to a read-only version of the Credit Note page as shown in Fig 7 above.

Comments
Please sign in to leave a comment.